Posted on 1 Comment

Ultimate Guide to Mock Scrapes: Attract Mature Bucks Effectively

making a mock scrape, how to create a mock scrape, making a licking branch

Understanding the Science Behind Mock Scrapes

Mock scrapes, a hunter’s subtle tool to lure mature bucks, work by tapping into the intricate deer communication system. Deer, particularly bucks, use scrapes as a method of communication to assert their presence and dominance, and to signify their readiness for breeding. They form these natural scrapes primarily during the pre-rut phase, when they are marking their territory and inviting does to visit. By understanding and replicating these signals, hunters can attract, influence, and anticipate the movements of mature bucks.

Deer employ a multi-sensory approach in their communication. A scrape typically comprises two main components: a ground disturbance where the deer paw the earth to expose the soil, and an overhanging ‘licking branch’ at about deer’s head height. The ground exposes fresh earth, while the licking branch is usually a twig or branch that deer manipulate with their mouths and rub with their foreheads to deposit scent from glands located there.

The Importance of Scent in Deer Communication

Scent plays an essential role in the deer’s communication system. Deer possess an incredibly acute sense of smell, allowing them to pick up the subtlest of scents. When a buck makes a scrape, he leaves behind a potent combination of smells from urine, gland secretions, and the disrupted earth. These smells can convey an array of information to other deer, such as the buck’s size, health, dominance status, and readiness to breed.

Hunters can exploit this reliance on scent by using vines in their mock scrapes. By using these vines with doe estrous or buck urine, hunters can create a potent array of scents to signal a deer to the scrape.

Visual Cues in Deer Communication

Alongside scent, visual cues also play a significant role in deer communication. When a buck creates a scrape, the disturbed ground and the positioned overhanging branch serve as visible markers to other deer in the area. These visual signs signify a buck’s territory and indicate his regular presence.

In creating mock scrapes, hunters should aim to mimic these visual signals as closely as possible. This includes carefully choosing a location with an overhanging branch and disturbing the ground in a manner similar to that of a natural scrape. This creates a believable visual cue that can attract deer to the location.

In essence, the science behind mock scrapes is deeply rooted in understanding deer behavior and communication. By accurately replicating these natural signals, hunters can create an effective hunting tool that lures in mature bucks, significantly increasing their hunting success.

Step-by-Step Guide to Making a Mock Scrape

The construction of a successful mock scrape requires detailed knowledge of deer habits and behaviors, and a thoughtful execution of the process. It’s not merely about mimicking the physical appearance of a scrape, but about creating an authentic-seeming signal to a deer that another buck is in the vicinity. Here’s how you can create an effective mock scrape:

Here is a quick demonstration from my YouTube channel showing how I make my mock scrapes. After years of using them I find this to be the most successful way in making a mock scrape.


1. Choosing the Right Location

The location of your mock scrape is critical to its success. Deer are creatures of habit, tending to follow established paths between bedding and feeding areas. Mock scrapes should ideally be located along these paths or near a food source, maximizing the chances of a deer discovering it.

Look for signs of deer activity such as tracks, droppings, or existing scrapes. A good mock scrape location should be in an area that is naturally appealing to a deer, with sufficient cover and access to food and water.

However, it’s crucial to maintain a balance. If the mock scrape is placed too close to high-traffic human areas, the deer may get spooked and avoid the area. Seclusion and tranquility are key attributes of an ideal mock scrape location.

2. Proper Timing for Mock Scrapes

Understanding the deer’s behavioral patterns is crucial for timing the creation of your mock scrape. The most effective time is right before the rut, usually in the late summer or early fall. During this period, bucks are marking territories and signaling their readiness to breed, hence they are more likely to engage with a mock scrape.


3. Reducing Human Scent

Deer have an exceptionally acute sense of smell, and any trace of human scent can be a red flag, causing them to steer clear of the area. When creating a mock scrape, it is vital to minimize any human scent transferred to the environment.

Wear gloves to prevent your scent from contaminating the mock scrape. Rubber boots are also recommended as they don’t absorb human scent as readily as other materials. Use a scent eliminator on your boots and tools to mask any human odors. Some hunters even go a step further and use deer scents or cover scents on their clothing to blend into the environment.

4. Using the Right Stimuli in Your Mock Scrape

A natural scrape typically consists of a ground disturbance and an overhanging ‘licking branch’. When creating a mock scrape, it’s essential to mimic these components closely.

Choose a location with an overhanging branch at about deer’s head height, usually 4-5 feet from the ground. This will serve as the ‘licking branch’. Bucks will often rub their antlers and forehead against the branch, depositing scent from their glands. Using your gloves, manually manipulate the branch to mimic this behavior.

For the ground disturbance, use a stick to paw the earth, mimicking the action of a buck. The ground disturbance should be roughly three feet in diameter, exposing fresh soil.

To further attract deer, consider adding scent to your mock scrape. Using a scent dripper filled with doe estrous or buck urine can stimulate the interest of bucks. This scent simulates the presence of a buck or a doe in estrus, and can be a potent attractant.

Remember, the goal is to create an environment that mimics the natural signals a buck would leave. Patience, precision, and attention to detail will serve you well in creating an effective mock scrape.

My Successful Journey with Mock Scrapes: A Testament to Adaptability and Strategy

Over the years, I’ve honed various hunting strategies and techniques, but one method that’s stood out for its effectiveness is the use of mock scrapes. It was several years ago when I first dabbled in this approach, and since then, it has remained an integral part of my deer hunting strategy, yielding great success.

When I first started, I understood the core premise – that mock scrapes tap into the communication system of deer, particularly bucks. By replicating their signaling method, I could subtly guide their movements to advantageous locations. This not only improved my chances of a successful hunt but also offered a fascinating insight into the behavior and habits of the bucks.

Year-Round Mock Scrape Management

Unlike some hunters who only utilize this strategy during the hunting season, I run my mock scrapes throughout the year. This year-round engagement has several benefits. Firstly, it maintains a consistent communication channel with the deer, mimicking their natural behavior. Deer interact with scrapes year-round, albeit more intensely during the rut, so my mock scrapes serve as a familiar and continuous signpost in their environment.

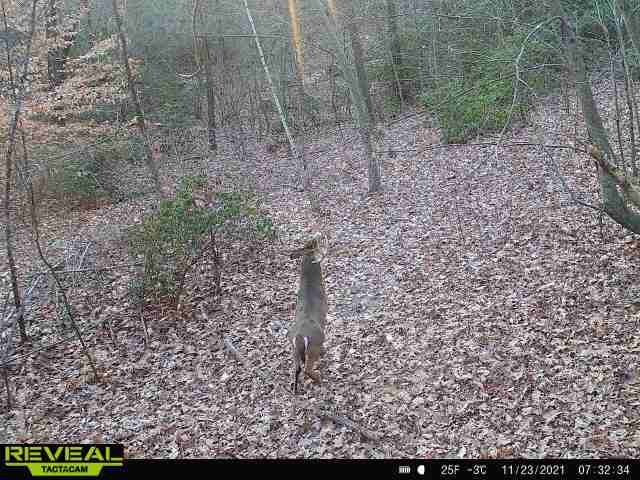
Running the mock scrapes all year also allows me to constantly gather information about deer movement and behavior in different seasons. This long-term monitoring provides invaluable insights that shape my hunting strategies. By using trail cameras alongside the mock scrapes, I can monitor which deer frequent the scrapes, their times of activity, and how they react to different stimuli.

Constantly Adapting Hunting Strategy

This year-round engagement with mock scrapes has demanded a fluid hunting strategy. I’ve learned that the approach is not a ‘set it and forget it’ tactic. It requires constant monitoring, adjusting, and refining to match the changing habits and behaviors of the deer.

One critical lesson has been the importance of location. Over time, I have had to adjust the positioning of my mock scrapes, often based on changes in deer movement patterns, food source locations, and general environmental changes. The aim is always to place the scrapes in areas that not only see regular deer traffic but also offer a strategic advantage for hunting.

I have also learned the value of subtlety. Early on, I found that any strong evidence of human intervention could be a deterrent to the deer. Over time, I refined my techniques to minimize human scent and any signs of disturbance. This meant using scent-free boots, gloves, and tools when creating and maintaining the scrapes. I also began using scent eliminators and deer attractants more strategically to further disguise any human presence and lure in the deer.

Final Thoughts

In conclusion, creating the perfect mock scrape is a blend of art and science that, when done right, can significantly elevate your hunting success. It requires careful planning, constant adjustment, and a keen understanding of the deer’s behavior. But, with patience and dedication, mastering the art of mock scrapes can provide a fascinating insight into the world of deer and offer a strategic advantage in your hunting pursuits. So, keep honing your craft, keep learning, and most importantly, keep enjoying the thrill of the hunt.

Frequently Asked Questions about Mock Scrapes

What is a mock scrape?

A mock scrape is a tool that hunters use to imitate the natural scraping behavior of bucks. It is designed to simulate deer communication, influencing their movement and attracting them to a specific location.

How does a mock scrape work?

Mock scrapes work by mimicking deer communication cues. Bucks use scrapes to announce their presence and status to other deer. By creating a mock scrape that closely resembles a real one, hunters can attract bucks to the location and potentially manipulate their movements.

When is the best time to make a mock scrape?

The best time to create a mock scrape is right before the deer rutting period, usually in the fall. This is when bucks are the most active and likely to encounter your mock scrape.

How can I reduce my scent when making a mock scrape?

Wear gloves and use scent eliminators on your boots and tools when creating the scrape. This helps to reduce human scent that could deter deer from approaching the mock scrape.

What should I use in my mock scrape to attract deer?

Use an overhanging branch, or a ‘licking branch’, at deer’s head height. Consider using a scent dripper filled with doe estrous or buck urine to make the scrape more attractive to the deer.

Can mock scrapes be used throughout the year?

While the most common time to use mock scrapes is right before the rut, maintaining and adjusting them throughout the year can provide continuous insights into deer behavior and movements.

How can I make my mock scrape more successful?

To increase the effectiveness of your mock scrape, ensure it is placed in an area frequently used by deer, use the right stimuli, time its creation appropriately, and minimize your scent.

 How has the use of mock scrapes evolved over time?

Over the years, the use of mock scrapes has evolved from a simple hunting tactic to a sophisticated strategy based on an in-depth understanding of deer behavior and communication. This shift has transformed the way hunters approach the deer environment, enabling more successful hunting experiences.

Posted on 1 Comment

The Fascinating World of Deer Hunting: Unveiling the Power of Mock Scrapes

Hello, and welcome back fellow hunting enthusiasts! One of my passions is understanding and leveraging the complex world of deer communication to improve my hunting strategy. It’s this interest that led me to dive deep into the realm of mock scrapes, an intriguing aspect of deer behavior that offers invaluable insights for hunters.

Mock scrapes, or as some call them, fake or hunter-made scrapes, have been a game-changer in my hunting strategy. They have helped me significantly increase my success rates during the hunting season. The ability to mimic natural whitetail scrapes and communicate with deer in their ‘language’ has undoubtedly revolutionized my hunting experiences.

But why are mock scrapes so important? What role do they play in deer communication, and how can we, as hunters, use them to our advantage? If you’ve found yourself asking these questions, then you’re in the right place. This guide will walk you through everything you need to know about mock scrapes and how to hunt them effectively. Let’s dive into the fascinating world of deer communication and unveil the power of mock scrapes!

What are Mock Scrapes?

As an avid hunter, one of my favorite hunting strategies involves the use of mock scrapes. In the world of whitetail hunting, mock scrapes, play a crucial role. But what are they exactly?

Mock scrapes are artificial deer scrapes that hunters create to attract bucks. Think of them as a communication board for deer – they’re an imitation of the natural scrapes made by bucks during the rutting season. Bucks use natural scrapes to mark their territory and signal their presence to does, often choosing high-traffic areas under a licking branch.

These mock scrapes aim to trigger the same buck behavior, drawing them into your hunting area and within range of your stand or tree saddle. Mock scrapes tap into the deer’s keen sense of smell – a significant aspect of deer communication.

What is a Community Scrape?

When deer hunting, you might stumble upon a goldmine, the community scrape. These are natural scrapes, usually larger and more frequented than regular scrapes. A community scrape serves as a ‘social hub’ for deer, with multiple bucks and does contributing to it over the entire season. They are typically found under a well-defined licking branch – a branch that deer will sniff or lick, adding their scent  from their preorbital glands to the communal mix.

This communication hub is a prime spot for game cameras and hunting strategies involving mock scrapes. Capturing the scent profile of a community scrape can be highly effective when creating your mock scrapes. In fact, harnessing the power of community scrapes in your hunting approach can significantly improve your chances of a successful hunt. You can do this by adding manufactured mock scrape scents to the community scrape and taking it over and challenging the mature buck that’s using the community scrape.

This provides an overview of what mock scrapes and community scrapes are and their role in deer hunting. We’ll further explore how and when to make mock scrapes, their effectiveness, and many more aspects in the following sections. Remember, hunting is not just about the thrill; it’s a part of our outdoor life, a bond with nature and a commitment to wildlife conservation.

making a mock scrape, how to create a mock scrape, making a licking branch

When Should You Make Mock Scrapes?

Timing is a critical factor when it comes to creating mock scrapes. The goal is to mimic natural deer behavior during the rutting season, when bucks are most active and marking their territory. Typically, the ideal time to make mock scrapes is during the pre-rut and rut periods when deer activity is at its peak. Although I do regularly run some mock scrapes all year round to try and keep an eye on deer in the area and see how they are using the scrapes throughout the season.

The exact timing may vary depending on your geographical location and the specific breeding season of the local deer population. It’s important to familiarize yourself with the hunting season and the rutting patterns in your area. Local hunting associations and wildlife management organizations like the Deer Association (NDA) can provide valuable insights into the peak rutting periods.

By aligning your mock scrape creation with the natural breeding behavior of deer, you increase the chances of attracting bucks to your hunting area. This strategic timing can significantly enhance your hunting experience and improve the effectiveness of your mock scrapes.

Do Mock Scrapes Really Work?

The effectiveness of mock scrapes is a topic of much debate among hunters. Some swear by their success, while others remain skeptical. From my personal experience and the experiences shared by other hunters, mock scrapes can indeed be effective in attracting deer and influencing their behavior.

The key to the effectiveness of mock scrapes lies in their presentation and the use of enticing scents. When creating a mock scrape, it’s essential to make it as realistic as possible. This includes selecting the right location, mimicking natural scraping patterns, and using appropriate scents that mimic deer urine or gland secretions.

Additionally, placing trail cameras near mock scrapes allows you to monitor deer activity and gain valuable insights into the local buck population. These cameras can capture valuable footage and help you refine your hunting strategies.

While mock scrapes may not guarantee a successful hunt every time, they can certainly improve your odds and contribute to a more productive hunting experience. It’s important to experiment, adapt, and fine-tune your approach based on your specific hunting area and the behavior of the deer population.

What is the Best Thing to Put in a Mock Scrape?

When it comes to creating a mock scrape, the choice of scent is a crucial factor. Deer rely heavily on their sense of smell for communication and detecting potential threats. Using the right scent can enhance the authenticity of your mock scrape and make it more appealing to deer.

Common options for scent include deer urine, both buck and doe urine, as well as synthetic scents that mimic natural deer gland secretions. These scents can be applied to the scrape itself, the surrounding area, and the licking branch.

It’s important to check the hunting regulations in your area regarding the use of scents. In some regions, there may be restrictions or specific guidelines for using scents in hunting. Always ensure you are in compliance with local laws and regulations.

By incorporating the right scents into your mock scrape, you create an enticing and realistic environment that appeals to deer. This increases the likelihood of attracting bucks and enhancing your hunting success.

How Many Mock Scrapes Should I Make?

The number of mock scrapes you should make depends on several factors, including the size of your hunting area, the deer population, and the specific hunting strategy you’re employing. While there is no definitive answer, creating multiple mock scrapes can increase your chances of attracting deer and maximizing your hunting opportunities.

Strategic placement is key when determining the number of mock scrapes to make. It’s recommended to start with a few well-placed mock scrapes and monitor their activity. If you observe increased deer traffic and interactions, it indicates that your mock scrapes are effective.

As you gain more insights into the behavior of deer in your hunting area, you can expand the number of mock scrapes accordingly. It’s important to create a balance between having enough mock scrapes to cover different areas and not overwhelming the deer with an excessive number of scrapes.

Monitoring the activity around each mock scrape is essential. Trail cameras, such as the ones discussed in the section on trail cameras, can provide valuable data on deer movement and help you assess the effectiveness of each mock scrape.

Remember, the goal is to create mock scrapes that effectively simulate natural deer behavior and attract bucks. By strategically placing and monitoring multiple mock scrapes, you increase your chances of luring in deer and optimizing your hunting experience.

Why Aren’t Deer Hitting My Mock Scrape?

If you find that deer are not interacting with your mock scrape as expected, there could be several reasons for this. It’s important to assess and troubleshoot the situation to improve the effectiveness of your mock scrape.

  1. Location: The location of your mock scrape plays a crucial role. Ensure that it is placed in an area frequented by deer, such as near food sources, bedding areas, or along travel routes.
  2. Timing: The timing of your mock scrape creation is important. If the scrape is made too early or too late in the season, deer may not be actively engaging with it. Align the creation of your mock scrape with the peak rutting periods in your area.
  3. Scent: The scent you use in your mock scrape is another critical factor. Ensure that you are using the right scents, such as deer urine or synthetic scents, to make the mock scrape appealing to deer. Avoid using excessive amounts of scent, as it may deter deer.
  4. Maintenance: Regular maintenance of your mock scrape is essential. Refresh the scrape with fresh scent and soil periodically to keep it appealing to deer. Remove any debris or excess vegetation that may hinder deer interaction.
  5. Competing Scrapes: If there are existing natural scrapes in the area, deer may prefer those over your mock scrape. Consider placing your mock scrape near heavily worked, natural scrapes to increase its effectiveness.

By evaluating these factors and making necessary adjustments, you can improve the attractiveness of your mock scrape and increase the chances of deer interacting with it during your hunts.

How Do You Attract Deer to Mock Scrapes?

Attracting deer to your mock scrapes requires careful consideration of various factors that can entice their curiosity and draw them in. Here are some tips and techniques to increase the effectiveness of your mock scrapes in attracting deer:

  1. Strategic Placement: Choose locations for your mock scrapes that are frequented by deer. Look for areas with high deer traffic, such as near food sources, bedding areas, or along known travel routes like pinch points or funnels. By placing your mock scrape in these strategic locations, you increase the likelihood of deer encountering and investigating it.
  2. Scent Attractants: Scent plays a crucial role in attracting deer to mock scrapes. Consider using deer urine or synthetic scents that mimic natural deer scents. Apply the scent attractant to the mock scrape itself and on the licking branch above the scrape. This creates a realistic scent profile that entices deer to investigate the area.
  3. Licking Branch: A key component of a mock scrape is the presence of a licking branch. Choose a sturdy branch that hangs approximately 4-5 feet above the ground and extends over the mock scrape. This branch serves as a visual cue for deer and encourages them to interact with the scrape.
  4. Visual Presentation: Make your mock scrape visually appealing to deer by roughing up the ground around the scrape. Use a stick or rake to create disturbance and mimic the activity of multiple bucks. This gives the impression that the scrape has been worked over time, making it more attractive to deer.
  5. Trail Cameras: Placing trail cameras near your mock scrapes allows you to monitor deer activity and assess the effectiveness of your setup. Trail cameras provide valuable insights into the types of deer visiting the scrape, their behavior, and the times they are most active. This information can help you make adjustments to your hunting strategy accordingly.
  6. Timing: Consider the timing of your hunts in relation to deer activity. Early morning and late afternoon are typically when deer are most active. Plan your hunting sessions accordingly, maximizing your chances of encountering deer near your mock scrape.

By employing these techniques and adapting to the specific conditions of your hunting area, you can enhance the attractiveness of your mock scrapes and increase the likelihood of deer interaction. Remember to be patient and allow time for deer to discover and establish a pattern of visiting your mock scrapes. Persistence and careful attention to detail will pay off in improving your hunting success.

Do Deer Check Scrapes in Morning or Evening?

The timing of when deer check scrapes can vary, but there are general patterns that can guide your hunting strategy. While deer are known to visit scrapes throughout the day, there are certain tendencies to keep in mind:

  1. Nighttime Activity: Most scraping activity occurs at night when deer feel more secure and less susceptible to predation. Bucks, in particular, are known to be active at night, visiting scrapes to leave their scent and gather information about other deer in the area.
  2. Evening Visits: Bucks may also visit scrapes in the evening hours, especially as they move from bedding areas to feeding areas. During this time, they may check scrapes for any recent activity or leave their own scent as a communication signal.
  3. Morning Movements: Deer, including bucks, often move toward their bedding areas in the morning after a night of foraging. While they may not actively check scrapes during this time, their movements can provide valuable insight into their patterns and potential bedding areas.
  4. Pre-Rut and Rut Phases: During the pre-rut and rut phases of the breeding season, bucks are more likely to check scrapes throughout the day, including morning and evening. These periods are characterized by increased deer activity and communication, making it an opportune time to hunt over mock scrapes.

To optimize your hunting strategy based on deer scrape checking behavior, consider the following suggestions:

  1. Morning Hunts: If you plan to hunt over a scrape line, it’s best to do so during the morning hours. Most bucks will work their scrapes during the night and move towards their bedding areas in the morning. Position yourself strategically along their likely travel routes, increasing your chances of encountering a buck near the scrape.
  2. Evening Hunts: Hunting over scrapes in the evening can also be productive, especially during the pre-rut and rut phases when bucks are actively checking scrapes. Set up in locations where deer move from feeding areas to bedding areas, intersecting their travel paths near scrapes.
  3. Trail Camera Insights: Utilize trail cameras to gather data on scrape activity during different times of the day. By analyzing the images and timestamps, you can identify patterns of deer visits and adjust your hunting schedule accordingly.
  4. Scouting and Observation: Spend time scouting and observing deer behavior in your hunting area. Look for signs of fresh scrape activity, such as pawed-up ground and fresh scent markings. This on-the-ground knowledge will help you determine the most suitable times to hunt near mock scrapes.

It’s important to note that while there are general trends in deer behavior around scrapes, individual deer may exhibit variations in their visiting patterns. Factors such as weather conditions, hunting pressure, and deer population density can influence their behavior. As an experienced hunter, it’s crucial to remain adaptable and responsive to the specific conditions in your hunting area.

By understanding the typical time frames when deer check scrapes and aligning your hunting efforts accordingly, you can increase your chances of encountering deer near your mock scrapes and maximizing your hunting success.

Conclusion

Mock scrapes are valuable tools in a hunter’s arsenal, offering opportunities to attract and monitor deer activity. By understanding what mock scrapes are, how to create them effectively, and how to optimize their use in your hunting strategy, you can enhance your chances of a successful hunt.

Throughout this article, we have explored the concept of mock scrapes, including their purpose and importance in deer communication. We have discussed various factors to consider, such as timing, scent attractants, visual presentation, and strategic placement, to increase the effectiveness of mock scrapes.

Additionally, we have addressed common questions and concerns related to mock scrapes, including their efficacy, the best materials to use, the number of mock scrapes to create, and ways to troubleshoot if deer aren’t interacting with them as expected.

By incorporating these insights and techniques into your hunting approach, you can improve your understanding of deer behavior, increase your chances of attracting deer to your hunting area, and ultimately enhance your overall hunting success.

Remember, hunting is a dynamic and ever-evolving pursuit. Continual observation, adaptation, and honing of your skills will further refine your ability to effectively utilize mock scrapes and engage in a fulfilling and rewarding hunting experience. So, embrace the art of mock scrapes, explore new strategies, and let your passion for deer hunting guide you in the pursuit of memorable hunting moments.

F.A.Q.

  1. What are mock scrapes?
    • Mock scrapes are artificial imitations of natural scrapes made by deer hunters to attract deer to a specific location.
  2. How do mock scrapes differ from natural scrapes?
    • Mock scrapes are created by hunters, while natural scrapes are made by deer. However, hunters try to mimic the behavior and appearance of natural scrapes to make their mock scrapes more enticing to deer.
  3. What role does scent play in deer communication through mock scrapes?
    • Scent is a crucial component in deer communication through mock scrapes. Deer use scent to communicate their presence, reproductive status, and territorial boundaries. Hunters can use deer urine or synthetic scents to enhance the authenticity of the mock scrape.
  4. How do mock scrapes contribute to a hunting strategy?
    • Mock scrapes serve as attractants and communication hubs for deer, making them valuable tools in a hunting strategy. By strategically placing mock scrapes in areas frequented by deer, hunters can increase their chances of attracting and encountering deer during the hunting season.
  5. What is a community scrape?
    • A community scrape is a type of scrape used by multiple deer in an area to communicate with each other. It serves as a signpost where deer share their scent and engage in social interaction.
  6. How important are community scrapes in deer communication and hunting?
    • Community scrapes play a significant role in deer communication and can be a major factor in successful deer breeding. They provide valuable information about the presence and activity of multiple deer in an area, making them attractive locations for hunters.
Posted on 3 Comments

One Stick Saddle Hunting: The Ultimate Mobile Hunter

Hi there, fellow saddle hunting enthusiast. As a huge advocate of one stick saddle hunting, I can’t wait to share with you my experiences of one sticking using minimal gear, and how it’s helped my public land deer hunting. It’s a wonderful blend of mobility, weight savings, and an almost intimate connection with the wilderness. This approach may initially seem daunting, but with some practice and the right hunting equipment, it opens up a whole new world of possibilities. There is a learning curve, but after some practice I know you can start one sticking safely.

Understanding One Stick Saddle Hunting

Firstly, let’s get into the nitty-gritty of what one stick saddle hunting is all about.

One stick saddle hunting is a method where hunters ascend a tree using just a single climbing stick, then proceed to rappel down after their hunt. While it may sound a bit out there at first, trust me, the speed and ease of this hunting approach will grow on you with time.

Emphasizing Safety in One Stick Saddle Hunting

It’s essential to note that one stick saddle hunting, when done correctly, can be as safe as any other elevated hunting method. Possibly even safer than other methods. Safety is paramount in any saddle hunting technique. As we ascend, we’re typically secured to the tree with a tether or a rappel rope, ensuring our safety at all times. The key distinction here is the post-hunt rappel down, which requires familiarity with your gear and practice at safe heights.

Essential Gear for One Stick Saddle Hunting

Before we dive deep into the mechanics of one stick saddle hunting, let’s discuss the specialty gear needed for this method. Most of this gear is common to traditional saddle hunting, with some additional, unique tools.

  • Long Rappel Rope (30+ feet): For the rappel rope, opt for a high-quality 3/8” static rope of an adequate length to wrap around the tree at eye level while at hunting height and still reach the ground. Although many hunters are using 8mm rope for packability and weight savings.
  • Long Paracord Pull Rope (30+ feet): The pull rope is used to retract your rappel rope post-hunt. Since it doesn’t bear any weight, a lighter pull rope can be used, even one that you use for raising and lowering your bow or crossbow.
  • Madrock Safeguard or Figure 8: These devices facilitate a controlled descent post-hunt. The Madrock Safeguard is a mechanical device that links your saddle’s bridge rope to the rappel rope via a carabiner. Conversely, the figure 8 device, while not mechanical, serves the same purpose by creating tension to slow the descent. I do not recommend a figure 8 device as your main means of repelling, but I do keep one on me in case of emergency.
  • Climbing Stick With Platform: As the name suggests, a single climbing stick suffices for this method. Most one-stick saddle hunters prefer one with a small, integrated platform, allowing you to avoid carrying a separate platform. I personally use a separate platform because I like the added room to stand.
  • Aider: To maximize each climbing stick move, consider adding an aider. This small nylon or rope ladder extends the reach of the climbing stick with minimal weight addition. For one-stick hunting, a two-step aider proves most beneficial.I find that the longer the aider the greater chance of your stick kicking out while climbing.

To gain a comprehensive understanding of these specialized climbing sticks, refer to this comprehensive guide on the best climbing sticks for saddle hunting. All you need is one climbing stick so find a brand you like and purchase one.

A quick demo of One Stick Saddle Hunting and how quickly and efficiently you can get up and down a tree.


The One Stick Saddle Hunting Technique: A Step-by-Step Guide

The technique of one stick saddle hunting may seem intricate at first, but as you practice, it becomes an intuitive process. I’ve broken it down into a simple, step-by-step guide for you. I can do this in the complete dark getting set up in the morning all while remaining quite due to the practice I put in. I also find this the absolute quickest way to get up and down a tree, faster than any other method.

  1. Initial Setup: Start by securing your tether around the tree at roughly chest height. Attach the other end to your hunting saddle. This serves as your primary safety line throughout the climb. To save time you can also start with your rappel rope instead and use it throughout the entire hunt. This eliminates have to switch from your tether to your rappel rope when the hunt is over.
  2. First Placement: Place your climbing stick on the tree below your tether or rappel rope. Ensure it’s tightly secured. Climb onto the stick, using the aider if needed. The secret key here is to use a one stick which has been outfitted with a cam cleat. This allows quick and easy placement and removal.
  3. Moving the Tether: Once secure on the climbing stick, slide your tether or rappel rope up the tree as high as you can. Now stand on the stick, leaning back into the saddle, with your weight supported by your rope.
  4. Climbing and Repositioning the Stick: Now put all your weight into the saddle and unhook the climbing stick from below you and reposition it to right below your tether or rappel rope. Repeat the process: climb onto the stick, move the tether or rappel rope, and then move the stick.
  5. Rappel Rope Setup: (Depending on if you used your tether to climb the tree or not.) When you’ve reached your desired hunting height, tie off your rappel rope around the tree. It should be long enough to reach the ground while still affording a sufficient wrap around the tree at eye level. Attach the other end to your belay device (Madrock Safeguard or figure 8).
  6. Hunting Setup: At this point, you can now set up your platform if you are using one. You are now ready to hunt.
  7. Descend: Post-hunt, switch over to the rappel rope, and now descend the tree using your madrock safeguard. You will be descending using the belay device attached to your rappel rope.

If you’re interested in more detailed explanations about saddle hunting techniques and how to use a hunting saddle, do check out this ultimate guide.

Weighing the Pros and Cons of One Stick Saddle Hunting

Finally, it’s important to weigh the pros and cons of one-stick saddle hunting. It’s a technique that offers many benefits, such as significant weight reduction and improved mobility, making it an attractive option for many saddle hunting enthusiasts. However, it does require a higher skill level and familiarity with your gear to execute effectively.

Advantages

Weight reduction: Carrying only one stick significantly lightens your load, which can be advantageous for long treks into public land.

Mobility: With less gear, moving between spots is quicker and less cumbersome.

Stealth: With fewer placements of the stick, there is less chance of making noise that could alert deer to your presence.

Speed: One sticking makes deploying, ascending, descending, and packing up and leaving unbelievably quicker than other methods.

Disadvantages

Learning curve: The one-stick method demands more skill and practice to master compared to traditional multiple stick methods.

Complexity: The process of managing ropes, particularly when preparing for descent, adds a level of complexity that some hunters may prefer to avoid.

Remember, practice is key in ensuring safety and efficiency when adopting any new hunting method. If you’re considering adopting this method or just looking to try out a new hunting saddle, here’s a comprehensive review of the best hunting saddles of 2023.

Now, gear up and get ready to explore the wilderness with one stick saddle hunting!

Posted on 3 Comments

Best Climbing Sticks for Saddle Hunting and Self-Filming in 2023: The Ultimate Guide

You know, there’s nothing quite like the thrill of saddle hunting. That rush of adrenaline, the sense of adventure, it’s unbeatable. Now, to truly enjoy this, you need the right gear. And when it comes to saddle hunting in 2023, climbing sticks are pretty high on that list. But with so many options out there, it can get a bit overwhelming, right? That’s why I rolled up my sleeves and I’ve sifted through the crowd, weighed the pros and cons, and finally, I’ve come up with this list of the absolute best climbing sticks for saddle hunting. So, let’s take this adventure up a notch, shall we?

Navigating the Choices Like a Pro

When it comes to climbing sticks, you’re usually looking at two main categories. On one side, you’ve got the mass-produced options that are pretty easy on the wallet. And on the other, there are the custom sticks, loaded with bells and whistles, but with a price tag to match. Now, I’m a firm believer in finding that sweet spot – that perfect balance of top-notch features without having to empty out your savings. So that’s exactly what I’m bringing to the table. Without further ado let’s dive in and check out these top picks for best climbing sticks that deliver without costing an arm and a leg!

The Tethrd Skeletors

The Tethrd Skeletors climbing sticks stand out as a top-tier choice in hunting gear due to their innovative design and practical features. With a unique folding dual step design, these sticks allow hunters more foot room during their ascent, facilitating a safer and more comfortable climb. The patented DynaLite rope and tab system enhances this product’s durability while maintaining a lightweight structure, which is ideal for long treks into the wilderness.

Critics praise the Tethrd Skeletors for their rugged durability and affordability, offering a set of four quality climbing sticks for under $250. Another beneficial feature is the StickLoc pin system that simplifies the task of stacking the sticks for transport, eliminating the need for extra cords or bungees. Plus, the fold-away step feature and ample standoff from the tree further enhance climbing comfort and ease of use. Overall, the Tethrd Skeletors are recognized as one of the best climbing sticks on the market due to their blend of innovation, durability, affordability, and user-friendliness.

Key Specifications:

  • Length: 20 inches
  • Weight: 2 pounds (includes the attachment rope)
  • Weight Limit: 300 lbs
  • Step Configuration: Dual steps

Top Features:

  1. Steps that extend from the tree, offering more foot room.
  2. Dynaloc Tab and Dynalight rope for quick, silent attachment.
  3. StickLoc pin system for secure transportation.

XOP Ultra Series Climbing Sticks

The XOP Ultra Series Climbing Sticks are highly regarded for their robust suite of features tailored towards enhancing hunting efficiency and safety. These climbing sticks offer an increased step stride, allowing climbers to comfortably ascend and descend with minimal effort. Stability is prioritized, ensuring a secure grip and foothold, reducing the risk of accidents. The lightweight and compact design of these climbing sticks makes transportation and setup a breeze. Equipped with slide-lock technology, these sticks allow for low-profile transport and hassle-free hanging. The unique arch step design further enhances foot support and stability, creating a secure and comfortable platform for each step. Hence, these characteristics make the XOP Ultra Series Climbing Sticks some of the best in the market, excelling in terms of comfort, stability, convenience, and support.

Crafted from powder-coated 6061 aluminum, the XOP climbing sticks offer outstanding traction, especially on crooked trees, ensuring a solid mount.

Key Specifications:

  • Length: 18 inches
  • Weight: 2.2 pounds per stick
  • Weight rating: 350 pounds
  • Step Configuration: Non-folding double steps

Top Features:

  1. Highly stackable, with two configurations – stacked or side-by-side.
  2. Value for money with feature-rich design.
  3. Four sticks included in the pack.

Muddy Pro Climbing Sticks

The Muddy Pro Climbing Sticks are praised for their robust quality and user-friendly design, making them one of the top choices for hunters. They are known for their sturdy construction, promising secure ascents while remaining exceptionally quiet for a discrete setup. Their rope and cleat design is lauded for being quick, simple, and reliable. The sticks exhibit a high degree of compatibility with several Muddy fixed-position treestand models, making them versatile for both straight and crooked trees. Additionally, the sticks’ independent installation and aluminum bark biters cater to a variety of tree types and conditions. The portability of these sticks is a standout feature, offering lightweight construction that is easy to transport, significantly reducing the time and effort required to hang stands. Overall, the Muddy Pro Climbing Sticks are recognized for their durability, versatility, and ease of use.

Key Specifications:

  • Length: 20 inches
  • Weight: 2.5 pounds per stick
  • Weight Rating: 300 pounds
  • Step Configuration: Folding double steps

Top Features:

  1. Unique rope cam system for quick, quiet installation.
  2. Budget-friendly.
  3. Four climbing sticks included in the pack.

Tethrd One Climbing Sticks

The Tethrd One Climbing Sticks have earned acclaim as some of the best climbing sticks available, owing to their range of notable features. Renowned for their lightweight design, each stick weighs only a pound, setting a benchmark for full-featured climbing sticks on the market. Despite their lightness, they offer a solid and stable climb, comparable to other popular options like the Beast Sticks. The Tethrd One Climbing Sticks also boast a quick and easy installation process, while remaining extremely quiet – a crucial feature for hunters. The StickLoc stacking system is another advantage, offering strength, silence, and an intuitive setup for efficient alignment and stacking during use. Built with Grade 9 aerospace titanium, these climbing sticks resist rust and corrosion, testifying to their durability. Lastly, their innovative design, incorporating a 6061 CNC precision machined step-standoff in a one-piece construction, optimizes strength. In conclusion, the Tethrd One Climbing Sticks are recognized for their lightweight, sturdy, and quiet design, along with innovative features that enhance ease of use and durability.

Key Specifications:

Length: 18.5 inches

Weight: 15.9 ounces (including the attachment rope)

Weight Rating: 300 pounds

Step Configuration: Dual steps

Top Features:

Extremely lightweight due to titanium tubes and 6061 aluminum machined steps.

Ideal for hunters who prefer quiet setup as it offers stealth strips on the hollow tubes.

Hawk Helium Climbing Sticks 

The Hawk Helium Climbing Sticks are highly regarded among climbing sticks, thanks to a range of distinctive attributes. With each 30-inch section weighing only 2.9 pounds, they’re crafted from aircraft-grade aluminum, which ensures they’re both lightweight and robust. The material, coupled with weight-saving cutouts, contributes to their easy portability and reliable durability. One of their standout features is the Silent Lock Technology, which uses a unique suction cup design for the steps to snap together quietly, providing a stealthy experience during use. Additionally, the dual-sided traction enhances safety by offering a secure grip on trees. In summary, the Hawk Helium Climbing Sticks are an excellent choice for hunters seeking a lightweight, easily portable, and durable climbing stick that delivers silent operation and secure traction.

Key Specifications:

Length: 20 inches

Weight: 2 pounds (with fastening strap)

Weight Rating: 300 pounds

Step Configuration: Solid double steps

Top Features:

Step off design conforms to any tree and leaves plenty of foot room on the step.

Angled Step for firm footing.

Relatively lightweight (not the lightest, but certainly not the heaviest).

Lone Wolf Custom Gear D’Acquisto Series Climbing Sticks

The Lone Wolf Custom Gear D’Acquisto Series Climbing Sticks are highly regarded in the hunting community for several key features. They offer a spacious step bed with extra separation from the tree for increased foot clearance, leading to enhanced comfort and stability during ascents. Their design prioritizes ultimate mobility, being lightweight and easily portable. Unique to this series is the Double Step™ Stick with exclusive offset step technology, which grants more standing room and a user-friendly alignment system for stacking. The Compact Climbing Stick impresses with its ability to compress to a slim 3/4” profile, enabling efficient stacking onto the stand. Constructed from 6061 American Made Metal, these sticks promise durability and longevity. Further versatility is provided by the Hang-On .75’s patented frame lock system, which accommodates optional gear and game haul. All these attributes make the Lone Wolf Custom Gear D’Acquisto Series Climbing Sticks a top-tier choice due to their comfort, stability, portability, compactness, high-quality build, and versatility.

Key Specifications:

Length: 17 inches

Weight: 1.75 pounds

Weight Rating: 300 pounds

Step Configuration: Single step

Top Features:

Built from lightweight, durable 6061 aluminum.

Features the lowest profile step on the market, a patent-pending design.

Out on a Limb Shikars Climbing Sticks

Out on a Limb Shikar Climbing Sticks earn their place among the top climbing sticks for a variety of reasons. They’re notably lightweight, simplifying transportation and enhancing portability. The design facilitates easy stacking, further aiding in packing and transport. Versatility is another key attribute as these sticks are well-suited for both saddle and traditional tree stand hunting. The sticks employ a secure and user-friendly Dynaloc Tab and Dynalight rope attachment method. Designed with steps that point away from the tree, they provide ample foot room and ease of climbing. The SHIKAR FXD takes it a step further by being ultralight, making it an excellent choice for mobile hunters. In summary, the Out on a Limb Shikar Climbing Sticks are highly regarded for their lightness, stackability, versatility, and secure attachment design.

Key Specifications:

Length: 20 inches

Weight: 2.4 pounds

Weight Rating: 300 pounds

Step Configuration: Solid double steps

Top Features:

Customizable to your preferred specifications.

Attracts attention for products geared towards mobile saddle hunters.

API Outdoors Hunt’n Sticks Climbing System

API Outdoors Hunt’n Sticks Climbing System ranks among the top climbing sticks due to a number of standout features. Firstly, they’re crafted from lightweight aluminum, enhancing portability and ease of transport. The sticks offer convenient portability and secure mounting to trees with the assistance of silent cam buckle straps, thereby providing a stealthy and secure climb. The same strap system facilitates easy installation, which can be an economic advantage. Constructed from high-grade aluminum, these sticks boast durability and strength. Furthermore, a pivoting V-bracket feature enhances ease of climbing. Overall, API Outdoors Hunt’n Sticks Climbing System is an excellent choice for hunters seeking a sturdy, lightweight, and user-friendly climbing stick.

I personally favor the API sticks due to the price. I acquired them on sale and made a couple of modifications to suit my needs. To enhance portability, I cut them down for a more compact size. Many hunters use these sticks and modify them into a Beast Stick. Presently, I employ a single API climbing stick, equipped with an aider, for my climbing needs.

Key Specifications:

Length: 32 inches

Weight: 9 lbs.

Weight Rating: 300 pounds

Step Configuration: Triple steps

Top Features:

Made of lightweight aluminum, these portable step sections mount securely to trees with silent cam buckle straps to give you a quiet and secure path up the tree.

Lightweight and easy to use step sections for treestand hunters.

As you can see each and every climbing stick has its own strengths and weaknesses, and the best one for you will depend on your specific needs. It’s essential to consider factors like weight, step configuration, spacing, and load capacity before making a decision. While price is a significant factor, the most expensive option isn’t necessarily the best.

Remember, safety should always be your priority. The weight ratings on these climbing sticks are generally conservative, but it’s better not to exceed them. Whether you’re a novice or a veteran saddle hunter, finding the right climbing stick is crucial to your hunting experience. The options we’ve listed are among the best on the market, and we’re confident you’ll find the one that suits your needs.

Happy hunting!

Posted on 3 Comments

What is a Tree Saddle and Why Should You Get One?

Welcome, fellow outdoor enthusiasts! It’s time to talk about a game-changing piece of hunting gear that I’m sure you’ve already heard of: the tree saddle. Having embraced this versatile equipment myself, I want to share my insights on why it should find a place in your hunting arsenal. So, let’s dive in and explore the fascinating world of saddle hunting and why you should try it.

The Genesis of the Tree Saddle

The tree saddle has been around for some time, often seen as a secret weapon among die-hard public land hunting purists. But what is a tree saddle, really? It’s a hunting device that functions as a fall restraint harness, securing you to a tree, protecting you from potential falls while hunting from an elevated position.

Over the years, the hunting industry has seen an explosion of innovative products, and among them, the tree saddle has experienced a resurgence.

But remember, it’s not merely a hunting style but a life-saving safety device as well. It stands unrivaled as one of the safest, most compact tools for hunting from an elevated position. So, let’s dig a little deeper and understand why a tree saddle is an excellent investment and why I would recommend trying one.


Here is a demonstration as to why saddle hunting is considered one of the safest methods to hunt. You are connected to the tree at all times using a  tree saddle.

Why the Tree Saddle Stands Unrivaled in Mobile Hunting Safety

Having experimented with numerous safety equipment for elevated hunting, I can confidently say that a tree saddle, when properly manufactured and tested, is among the safest and most compact tools for this pursuit.

A unique advantage of the tree saddle is the ability to use lineman’s positioning loops with a lineman’s rope while climbing. This ensures your safety during the climb or when setting up a stand or platform. In short, it drastically minimizes the risk of a fall. With a saddle you are connected to the tree at all times. From the moment you step up to the tree until it’s time to get down and leave.

But is it all about safety? Not really. The tree saddle is more than just a fall restraint device. It’s a versatile safety tool with wide-ranging applications that can enhance your hunting experience and make you more mobile on public land.


Advantages of a Tree Saddle


    • Safety: You are tethered to the tree from the moment you leave the ground until you return, ensuring maximum safety. Saddle hunting with a lineman’s rope and tether rope allow you to stay connected throughout the process, making it undoubtedly the safest way to hunt.

    • Comfort: Advancements in saddle design have made comfort a non-issue. Many saddle hunters, including myself, find hunting from a saddle more comfortable than any commercial treestand available. Also, yes, you can indeed sit down in a hunting saddle. You can either sit or lean.

    • Versatility: A tree saddle offers a flexible hunting experience. Whether you are climbing a small-diameter tree, a large-diameter one, a limbless oak, or a bushy pine, a saddle provides the mobility and flexibility you need.

    • Quietness: No more noise associated with pulling up stands or using a climber on a rough-barked tree. A tree saddle ensures a quieter hunting experience. I can set up in the complete darkness remaining quiet and undetected.

    • Portability: Compared to traditional tree stands, a saddle is lighter and less bulky, making it easy to carry into the woods. No more lugging around a climber making noise looking for the perfect tree.

    • Cost-effective: With a tree saddle, you can hunt anywhere, saving you hundreds of dollars on multiple stands.

    • Theft prevention: Treestand theft is a significant issue on public or heavily pressured land. But with a saddle, you don’t need to worry about someone else hunting from or stealing your stand.

    • Secrecy of hunting spots: Since you take your saddle with you, other hunters will not know your secret hunting spots.

    • More kill opportunities: Thanks to its versatility, a saddle offers more kill opportunities than any conventional stand.

Tree Saddle Vs. Stand

Now you might be wondering – Are tree saddles better than stands? Well, it’s not so much about one being superior to the other, as it is about understanding the different scenarios where each tool can shine. Here’s a comparison of the two.


    • Mobility: When it comes to mobility, tree saddles take the edge. They are lightweight, compact, and easy to set up, making them ideal for hunters who frequently change locations or hunt on public lands where permanent fixtures aren’t allowed.

    • Weight: Tree saddles are typically lighter than tree stands. A full saddle setup, including ropes, platform, and harness, usually weighs less than a lightweight climber stand, making it a better option for long treks into the wilderness.

    • Comfort: While comfort can be subjective, many hunters find that tree saddles, once properly adjusted, offer more comfort during long hours in the tree compared to traditional stands. This is especially true for those who enjoy the freedom of movement saddles provide.

    • Visibility: In a tree stand, you are typically limited to shooting in the direction the stand faces. With a tree saddle, you can position yourself to shoot 360 degrees around the tree, providing more opportunities for successful shots.

    • Safety: Both tree stands and saddles are safe when used correctly. However, because you are always tethered to the tree with a tree saddle, many argue that it provides an extra layer of safety compared to stands.

    • Cost: Depending on the specific models compared, tree saddles and stands can be similar in price. However, considering that with a tree saddle you can feasibly hunt anywhere without the need for multiple stands, it can be a more cost-effective choice in the long run.

The tree saddle is an exceptional tool that offers an array of advantages for the modern hunter over your traditional tree stand. Safety, mobility, versatility, and comfort are among its standout features, and these alone provide compelling reasons to consider adding one to your hunting equipment. It’s not a question of tree saddle vs. stand, but rather understanding how each tool can be used to enhance your hunting experience based on your specific needs and hunting conditions. 

Picking the Right Tree Saddle for Your Needs

To gain the most from a tree saddle, you must pick one that fits your needs and preferences. So what factors should you consider?


    • Size and Weight: Tree saddles come in different sizes and weights. Consider your body size and weight while purchasing one. A saddle that’s too big or too small can compromise your comfort and safety.

    • Comfort: Try out different saddle styles to determine what’s most comfortable for you. While one might prefer a minimalist design, another might opt for a more padded version.

    • Ease of Setup: A quick, simple setup is crucial. Look for saddles with intuitive designs and clear instructions. The faster you can set it up, the more time you have for hunting. And make sure you practice until you are proficient. 

    • Safety: Make sure the saddle has been tested and approved by safety standards. It should come with quality ropes and carabiners. Remember, your life could depend on this gear, so don’t compromise on safety.

    • Durability: Pick a saddle made with robust materials to withstand the outdoor elements. The saddle should be tear-resistant and able to support your weight comfortably.

How do you sit comfortably in a tree saddle?

Here are some tips on how to sit comfortably in a tree saddle:


    • Pick the right hunting saddle that fits your body type and hunting style.

    • Adjust your tether height to a comfortable level. A good starting point for tether height is between forehead and nose height, right around eye level. You can play with the tree tether height and use what is most comfortable for you.

    • Adjust your bridge length to ensure that you are sitting at a comfortable angle.

    • Adjust the saddle on your body to ensure that it is snug but not too tight1.

    • Don’t forget to wear comfortable clothing that allows for movement and flexibility.

    • Keep your upper body relaxed and avoid tensing up, which can cause discomfort over time.

    • Take breaks as needed to stretch and move around to prevent stiffness and discomfort

Tree saddles are versatile pieces of gear that allow you to adapt your hunting methods based on terrain, tree selection, and species hunted. This adaptability, combined with the safety and mobility they provide, make tree saddles a valuable addition to any hunter’s equipment collection.

If you’re considering making the switch to a tree saddle, or simply looking to add a new tool to your hunting toolbox, remember that like any hunting method, tree saddle hunting has a learning curve. Spend some time practicing with your saddle at ground level before taking it up into a tree. With time and practice, you’ll discover the freedom, comfort, and versatility that tree saddle hunting can provide. If you have any questions or are just unsure about something feel free to reach out and I will do my best to help.

As you can see, whether you are a seasoned hunter looking for an upgrade or a beginner starting from scratch, a tree saddle could be your next game-changer. It was for me! Why not give it a try on your next hunting adventure? It might just redefine your entire hunting experience.

Posted on 2 Comments

How to Use a Hunting Saddle: Your Ultimate Guide

Saddle hunting has become increasingly popular among bowhunters, particularly those who hunt deer. Saddle hunting offers numerous benefits, including enhanced safety, 360 degree shooting, and increased mobility. In this article, we’ll explore the top benefits of saddle hunting and provide some useful tips I’ve learned along the way to help you succeed this fall.

What is Saddle Hunting?

Saddle hunting is a technique where hunters use a tree saddle (a type of harness) to securely attach themselves to a tree while hunting. This method offers increased mobility, safety, and comfort compared to conventional tree stands. Saddle hunting has been used effectively over the years by many big name hunters.

Top Benefits of Saddle Hunting

  1. Enhanced Safety: Safety is the primary advantage of saddle hunting. Hunters are tethered to the tree at all times, from the moment they leave the ground. This greatly reduces the risk of falling and ensures a secure hunting experience.
  2. Noise Reduction: Saddle hunting eliminates the creaking noises associated with metal tree stands, as saddles are made of fabric and ropes. This quiet setup allows hunters to remain undetected by deer. Setting up quietly under the cover of darkness can be done quickly and silently.
  3. Lightweight and Portable: Tree saddles are lightweight (usually under two pounds) and compact, making them easy to carry and transport. This enables hunters to quickly move to their desired hunting location without being weighed down by cumbersome equipment. This also reduces sweating and leaving ground scent all over while walking to your hunting spot.
  4. 360-Degree Shooting Range: Saddle hunting allows for a full 360-degree shooting range, so hunters never miss an opportunity. This mobility is especially beneficial when hunting near food sources, where deer are likely to linger at close range. This has helped me over the years when a deer comes from an unexpected direction such as my back.
  5. Versatility in Tree Selection: With saddle hunting, tree size is not a limiting factor. Hunters can choose trees as small as 4 inches or as large as 30 inches in diameter, allowing for optimal positioning near key hunting spots like scrapes or water sources. You will never look at a tree the same again after trying saddle hunting.
  6. Improved Shooting Accuracy: Saddle hunting offers three points of contact for the hunter: two feet on a platform and their body weight supported by the saddle. This stable setup allows for more accurate shots, particularly when bowhunting. Shooting from a saddle does take plenty of practice though.
  7. Cost-Effective: Saddle hunting can save hunters money by eliminating the need for multiple tree stands or blinds. Using a single saddle for all hunting locations is both economical and efficient. It can be expensive to start, especially if you like all the latest and greatest gear, but in the long run ends up being cheaper than buying multiple pre-hung stands.
  8. Theft Prevention: As unfortunate as it is to say tree stand theft is a common issue on public and heavily pressured lands. Saddle hunters can take their gear with them, eliminating the risk of theft or unauthorized use of their equipment.
  9. All-Day Comfort: Saddle hunting provides a comfortable seat for all-day sits during the rut, when mature bucks are most active. Hunters can easily adjust their position to alleviate discomfort, increasing the likelihood of a successful hunt. Additional accessories can also be purchased to help with comfort such as knee pads or back rests.
  10. Secrecy: Taking your saddle with you helps keep your hunting spots a secret from other hunters. There’s no trace of tree steps or ladders left behind, and the ability to hunt any sized tree adds an element of unpredictability. This is by far one of the most overlooked advantages to using a saddle.

Tips for Saddle Hunting Success

Now that you’re familiar with the benefits of saddle hunting, here are some tips to help you achieve success in the field:

Practice shooting from your saddle

Before heading out to hunt, practice shooting from your saddle to familiarize yourself with the different shooting positions and angles. To practice shooting you don’t always need to climb up to height. Set up your platform and tether on a tree only a foot off the ground and shoot, shoot, shoot. This will save you time from having to climb up and down the tree and allow for practice just shooting out of the saddle.

Choose the right tree

Select a tree with good cover to help conceal your movements and position. A tree no longer needs to be straight up and down like it does with a conventional tree stand. Additionally, branches no longer pose a problem since one of the benefits to saddle hunting is the ability to get around branches while remaining tethered to the tree at all times. All that would be required is using both your tether and linesman belt in order to get around that branch and up to the perfect spot.

Use high-quality gear

Invest in a well-made tree saddle, platform, and climbing equipment to ensure your safety and comfort while hunting. Look for gear that is lightweight, durable, and easy to use. Also be sure to check out facebook market place or any online forum for any used saddle hunting equipment.Check out our recommendations for the best hunting saddles of 2023 and consider using the Lone Wolf Pocket Arm for saddle hunting and self-filming.

Optimize Your Setup

Take the time to adjust your saddle, tether, and platform to achieve the perfect fit for your body. This will ensure maximum comfort and stability while hunting, allowing you to focus on the task at hand. And if possible try to find a friend or go to a meet up with fellow hunters and try different saddles out to see which feels best on you.

Develop a System for Climbing and Descending

Develop a consistent method for climbing and descending trees that is both safe and efficient. Using climbing sticks, steps, or a combination of both can help you navigate trees with ease. You need to practice over and over and have a methodical method of how you approach and climb a tree. This gives you the best results as it makes you quicker but also safer. Climbing a tree in the pitch black on a cold morning during the middle of the rut in a bedding area is no problem if you practice. Check out our guide on saddle hunting for more information on climbing techniques and gear.

Master the Art of Concealment

Utilize natural cover, such as branches and foliage, to break up your silhouette and blend into your surroundings. This will make it more difficult for deer to detect your presence.You can also use the tree you are tethered to as concealment and use it to mask any movements.

Utilize Scent Control Techniques

Deer have an exceptional sense of smell, so it’s crucial to minimize your scent while hunting. Use scent control products on your clothing, gear, and body, and pay attention to wind direction to ensure you remain undetected. You can go as high or low as needed using a saddle and playing the thermals. 

Plan Your Shot Opportunities

Anticipate the paths and movements of deer in your hunting area and position yourself accordingly. This will allow you to make the most of your shot opportunities when they arise. I position my bow on my strong side. I practice all shots, but ideally I would like that deer coming from my strong side. If not you can always pivot in any direction unlike with a conventional stand where you are limited.

Be Patient and Persistent

Saddle hunting, like any hunting method, requires patience and persistence. Spend time observing deer behavior and patterns, and be prepared to put in the hours necessary to achieve success.

Practice Leave No Trace Ethics

When hunting from a tree saddle, it’s essential to practice Leave No Trace ethics. Remove all of your gear and any waste you generate to preserve the natural environment and minimize your impact on the area.

Continue Learning and Improving

As with any skill, saddle hunting requires continuous learning and improvement. Seek out advice from experienced saddle hunters, watch instructional videos, and stay up-to-date on the latest gear and techniques.

By following these tips and implementing the advantages of saddle hunting into your hunting strategy, you’ll be well on your way to enjoying a successful and rewarding experience in the field. Embrace the benefits of this versatile and effective hunting method, and watch as your success rate soars.

Join the Saddle Hunting Community

One of the best ways to continue learning and improving your saddle hunting skills is by connecting with like-minded hunters. Join online forums, social media groups, and attend saddle hunting events or workshops to expand your knowledge and share your experiences. The saddle hunting community is generally welcoming and eager to share tips and advice with fellow hunters.

Experiment with Modifications

As you become more experienced with saddle hunting, you may find that certain modifications or upgrades can enhance your overall experience. From customizing your tether system to adding accessories that improve your comfort or efficiency, don’t be afraid to experiment with your setup. On my own personal saddle I made my bridge adjustable which it wasn’t before. This added more comfort and gave my saddle a more personalized fit.  Be sure to visit our article on saddle hunting to explore more options for modifications and upgrades.

Consider Hunting on Public Land

Saddle hunting is particularly well-suited for hunting on public land, where you may need to frequently change locations to avoid competition from other hunters or adapt to changing deer patterns. Public land hunting can be more challenging, but it can also be an excellent way to hone your skills and learn to adapt to various hunting conditions. Read our guide on public land hunting for more information and tips.

Set Goals and Track Your Progress

As with any pursuit, setting goals and tracking your progress can help you stay motivated and focused on improvement. Consider setting specific goals related to your saddle hunting skills, such as mastering a new climbing technique, perfecting your shot accuracy from various positions, or harvesting a certain number of deer in a season. Document your experiences, successes, and challenges in a journal or digital log to help you identify areas for improvement and celebrate your accomplishments.

Stay Informed on Industry Advances

The world of saddle hunting is constantly evolving, with new gear and techniques being developed regularly. To stay on the cutting edge, subscribe to hunting magazines, newsletters, and podcasts, and follow industry leaders and innovators on social media. Staying informed on the latest advancements can help you make the most of your saddle hunting experience and ensure that you’re using the best tools and techniques available.

In conclusion, the key to saddle hunting success lies in your commitment to learning, improving, and adapting to new challenges. By following these tips and embracing the saddle hunting lifestyle, you’ll be well-equipped to enjoy a rewarding and successful hunting experience. Good luck, and happy hunting!

Posted on

Best Lures for Fishing the Cape Cod Canal: Top 4 Must Have Lures

As someone who’s spent countless hours casting lines into the Cape Cod Canal, I can attest to the pure joy this spot brings. The anticipation of what might be lurking beneath the water’s surface, the excitement of the perfect cast, and the thrill of the catch – it’s truly hard to beat. However, the canal can be quite the beast if you’re not equipped with the right lures. So today, we’re going to dive into the nitty-gritty of the best lures for fishing the Cape Cod Canal. But first we’re going to talk about the top, middle, and bottom water column, and how different lures yield different results.

Understanding the Water Columns of Cape Cod Canal

Before we get into the lures, let’s understand the different water columns in the canal. Essentially, the water column is divided into three sections: top, middle, and bottom. Each section requires a different fishing strategy and lure type, which can significantly impact your fishing results. Understanding this will allow you to target specific species that dwell in different parts of the canal. Use maps or local knowledge of the area to find out how the depth changes throughout the Canal.

When it comes to fishing in the Cape Cod Canal, the water column can be divided into three key sections:

  1. Topwater: This is the surface layer of the water. Stripers often hunt in this layer early in the morning or late in the evening when light levels are low. Using topwater lures like the Cotton Cordell Pencil Popper, which can imitate wounded baitfish or other prey items on the surface, can be particularly effective during these periods. The “walk-the-dog” retrieval method is frequently employed to make the lure move erratically, mimicking injured prey.
  2. Midwater: This is the middle layer of water between the surface and the bottom. This can be the trickiest layer to fish as the depth can vary greatly depending on the tide and time of day. Using lures like the Daiwa SP Minnow, which can be adjusted to swim at different depths, is a common approach for this layer.
  3. Bottom: This is the layer of water that interfaces with the Canal bed. Striped bass often feed in this layer during the brightest times of the day or when the water is particularly turbid. Lures like the FishLab Soft Mac Attack, which can be bounced along the bottom to stir up sediment and mimic a wounded baitfish or other bottom-dwelling prey, are often used for bottom fishing.

Remember that striped bass, like many other fish species, will move through these different layers of the water column throughout the day and according to environmental conditions. They might start the day feeding on the bottom, then move up to the midwater and even the surface as the day progresses. As such, having a range of lures that can effectively target all sections of the water column will give you the best chance of a successful day fishing for stripers in the Cape Cod Canal.

Top Lures for Each Water Column Section

Topwater: Left Hook Lure Pencil

The Left Hook Lure pencil is my go-to for topwater fishing at the Cape Cod Canal. This 7-inch, all-white pencil lure weighs 3.5 ounces, ideal for casting long distances and luring in the big ones.

How to Use: Cast the pencil lure out as far as you can, then retrieve it with a “walk-the-dog” motion. This erratic movement imitates an injured baitfish, and you wouldn’t believe how much predatory fish love a seemingly easy meal! Often times twitching the lure while allowing to take the current to sweep the lure away yields great results.

Middle: Magic Swimmers

When it comes to the middle column, the Magic Swimmers are a staple. These bad boys, the 190 Fast Sink and the 228 Slow Sink models, have a lifelike swimming action that drives fish wild.

How to Use: Cast the Magic Swimmer out and let it sink to your desired depth. Then, use a slow and steady retrieve, adding a twitch or pause occasionally. This mimics a casual swimmer and gets you some attention from curious fish. Changing speeds while reeling the lure in can give different results. If one way isn’t getting any bites trying changing your speed or twitches.

Bottom: FishLab Soft Mac Attack

For bottom feeders, the FishLab Soft Mac AttackJig is a must-have. Specifically designed for fishing in heavy current, this jig is rigged with a strong hook that holds up even against the most robust stripers and strongest of currents.

How to Use: Cast the jig out and let it sink to the bottom. Once there, use short, sharp upward jerks of your rod to “jig” the lure off the bottom, then let it fall back down. This mimics the behavior of a wounded baitfish and baits fish into striking. Knowing the bottom structure of the Canal comes in to play here. Jigging some spots on a East to West current may produce numerous fish. While the same spot on a West to East current may not produce anything,

Versatile Lure: Cotton Cordell Pencil Popper

The Cotton Cordell Pencil Popper is one of those versatile lures that can be modified by adding bb’s to the inside and increasing the weight for further casts.. Loaded with a strong hook, this lure can be used for casting out to the middle of the Canal to blitzing stripers..

How to Use:  Launch the pencil lure as far as you can to give yourself the best chance at a bass cruising down the middle of the canal then reel it back in using a “walk-the-dog” technique. This unpredictable motion mimics a wounded baitfish, which is irresistible to stripers looking for an effortless snack!

Notable Contender: Daiwa SP Minnow

The SP Minnow by Daiwa is a highly versatile fishing lure known for its unique darting action, particularly loved by inshore saltwater anglers. With its realistic shape, the SP Minnow mimics a baitfish in distress, making it highly effective for catching predatory fish. It comes in a variety of colors and sizes, each featuring a pair of sharp treble hooks, a durable body, and excellent weight distribution for long, accurate casts.

How to Use:  

  1. Select the right conditions: SP Minnows are most effective in slightly rough or choppy waters, where the lure’s action can effectively mimic a wounded baitfish. They work great during tide changes or around structures where predatory fish are likely to be hunting.
  2. Proper Casting: The SP Minnow is designed to be cast long distances. Aim for areas where fish are likely to be, such as near underwater structures or at the edge of weed lines.
  3. Retrieving: Start with a steady retrieve, allowing the lure to swim in a darting motion. This is the standard motion that often works well. However, you may also experiment with different retrieve styles.
  4. Vary your retrieval speed: The SP Minnow has a tantalizing action at both fast and slow retrieve speeds. Vary your speed and pause occasionally to mimic a wounded or distressed baitfish, which can often trigger bites.

Changing Up Lure Types and Colors

It’s essential to adapt to the ever-changing fishing conditions at the Cape Cod Canal. Don’t be afraid to switch up lure types and colors to find what works best on any given day. Sometimes the fish prefer shiny, vibrant colors, while other days they might gravitate towards more muted, natural hues. Experiment with different retrieves and presentations to unlock the secrets of this unique fishing location. For more guidance, check out these articles on Cape Cod Canal fishing etiquette and striped bass baits and techniques.

Equipping yourself with the right lures and knowing how to use them effectively is crucial for success when fishing the Cape Cod Canal. With the lures mentioned above and a little bit of patience, you’ll be well on your way to an unforgettable fishing experience at the Cape Cod Canal. Remember, the key to success is adapting to the conditions and being willing to change your approach. So get out there, cast your line, and enjoy the incredible fishing opportunities the Cape Cod Canal has to offer!

Posted on 1 Comment

The Ultimate Guide to Cape Cod Canal Fishing Etiquette

Master the art of courteous fishing at the Cape Cod Canal

When it comes to fishing at the Cape Cod Canal, it’s essential to maintain proper etiquette and respect fellow anglers. This comprehensive guide will provide you with valuable insights to ensure a pleasant experience while fishing the 7-mile waterway that connects Buzzards and Cape Cod bays. If you’ve never fished the canal it can be a daunting task. With many fishermen, who may have spent hundreds of dollars on gear, getting tangled up and crossing lines can be a sticky situation. Following this article can help you on the road to fishing success at the Cape Cod Canal

Maintain Respectful Distance

When setting up along the rocks, leave ample space between yourself and other fishermen. A “respectful distance” varies depending on the crowd’s size, but it’s always essential to ensure everyone has adequate room to cast and fish comfortably. If you’re unsure, ask other anglers for permission before joining them. Just asking can go a long way!

Follow the Casting Rotation

When joining a group of anglers, be mindful of the casting rotation established by those who arrived first. Observe their casting patterns and seamlessly integrate yourself into the rhythm to avoid disruptions and crossed lines. And be sure to fish using the same lure they are using. If everyone around you is jigging you need to be jigging as well. If they are on the surface with poppers you need to do the same as well.

Arrive on Time

The Cape Cod Canal is renowned for its exceptional fishing opportunities, attracting anglers from around the globe. Due to its popularity, it is crucial to arrive early and secure your preferred spot. Remember that those who wake up early and claim their spots have earned their positions, so don’t encroach on their territory if you arrive late.

Foster Positive Communication

A friendly greeting and open communication with nearby anglers will go a long way in fostering a pleasant atmosphere along the Cape Cod Canal. When you hook a fish that moves down-current, alert others with a call such as “Fish on!” or “Coming down!” This ensures they can pause their casts while you handle your catch, and they’ll expect the same courtesy from you.

Dress Appropriately and Use Suitable Gear

Wearing proper attire, particularly when it comes to footwear, is essential for safety and etiquette. The Canal is lined with slippery, weed-covered rocks, and studded soles are necessary for secure navigation. So be sure to have a set of corkers on your feet. Unfortunately many people have lost their lives over the years fishing from the rocks. Moreover, use heavy-duty tackle capable of handling the Canal’s strong currents and large fish to avoid prolonged battles that inconvenience other anglers.

Keep Your Secrets

Avoid sharing real-time information or images of your catches on social media. While it’s perfectly fine to inform your close friends about the action, inviting the entire online fishing community may increase the crowd and impact everyone’s experience negatively.

Clean Up After Yourself

Ensure you leave the Canal in pristine condition by disposing of your trash and litter appropriately. Go the extra mile by picking up any litter left behind by others and contribute to preserving the beautiful natural environment that makes Cape Cod Canal an exceptional fishing destination.

By following these guidelines, you’ll not only enhance your own experience but also contribute to a respectful and enjoyable atmosphere for all anglers at the Cape Cod Canal. Happy fishing!

Posted on

Surf Fishing For Beginners: Beginners Guide Surf Fishing Tips For Cape Cod Canal

Discover the secrets to successful surf fishing with our comprehensive guide, filled with expert tips and advice to help you become a master angler on the shore.

Welcome to the ultimate guide surf fishing for beginners! Our team of expert surf anglers have put together this comprehensive resource to help you become a pro at fishing from the shoreline. We’ll cover essential equipment, tackle choices, bait and lures, and offer valuable tips to ensure you have an unforgettable surf fishing experience. Follow our advice, and you’ll be landing impressive catches in no time!

Table of Contents

  1. Preparing for Your Surf Fishing Adventure
  2. Essential Surf Fishing Gear
  3. Choosing the Right Surf Fishing Rod
  4. Selecting the Perfect Surf Fishing Reel
  5. Finding the Ideal Surf Fishing Line
  6. Surf Fishing Rigs for Success
  7. Best Bait and Lures for Surf Fishing
  8. Tips for Choosing the Perfect Surf Fishing Spot
  9. Surf Fishing Techniques for Catching More Fish
  10. FAQs on Surf Fishing

Preparing for Your Surf Fishing Adventure

As a beginner surf angler, it’s crucial to be well-prepared before embarking on your first surf fishing trip. Saltwater fishing can be more challenging than freshwater fishing, and it requires more substantial gear and equipment to handle the demands of the ocean environment. To ensure a successful and enjoyable experience, follow these steps:

  1. Research: Learn about the specific fish species you’re targeting and their habits, preferred habitats, and feeding times.
  2. Gather your gear: Assemble your surf fishing gear, including a suitable rod, reel, line, and tackle.
  3. Obtain necessary permits: Ensure you have the appropriate fishing licenses and permits for the area you plan to fish.
  4. Plan your trip: Choose the best time to go surf fishing, taking into account factors like tide, weather, and fish activity.
  5. Practice your casting: Improve your casting distance and accuracy by practicing with your surf fishing setup.

Essential Surf Fishing Gear

To have a successful surf fishing experience, it’s crucial to use the right equipment. Here’s a list of essential gear you’ll need for surf fishing:

  1. Surf fishing rod: A long, powerful rod is necessary for casting beyond the breaking waves or getting it out in to the middle of the canal and for handling large, strong fish in the powerful current.
  2. Surf fishing reel: A high-capacity spinning reel is ideal for surf fishing due to its ability to cast long distances and hold ample line. I recommend something in the 6500 series range. That will give you ample line capacity and drag.
  3. Surf fishing line: Choose between braided or monofilament line, considering factors like sensitivity, abrasion resistance, and casting distance. Personally I use a 40lb braid attached to a 50lb leader.
  4. Surf fishing rigs: Employ a variety of surf fishing rigs to target different fish species and adapt to changing conditions.
  5. Bait and lures: Use a mix of natural and artificial baits to attract various fish species and maximize your chances of success.
  6. Surf fishing accessories: Equip yourself with additional gear, such as corkers for your boots, a surf fishing cart or bike, tackle box, and appropriate clothing.

Choosing the Right Surf Fishing Rod

When selecting a surf fishing rod, consider these three factors:

  1. Length: Rods between 8 and 12 feet are suitable for surf fishing. Longer rods allow for further casting distances, while shorter rods offer more control and are better for shorter casts.

Material: Graphite rods are lighter and more sensitive, making them great for detecting bites, but they can be fragile. Fiberglass rods are heavier but more durable, making them perfect for battling larger fish.

Action: The action of a rod is determined by where it bends. Fast action rods bend at the top third or less of the rod, offering more sensitivity but less casting distance. Medium and slow action rods bend further down, providing less sensitivity but greater casting distance.

Selecting the Perfect Surf Fishing Reel

When it comes to choosing a reel for surf fishing, you’ll want to consider the following:

Type: Spinning reels are often favored for surf fishing due to their ease of use and ability to cast long distances.

Size: A larger reel can hold more line, allowing you to cast further and handle bigger fish. The downside to this will be the added weight due to the size.

Material: Look for a reel that is made from corrosion-resistant materials to withstand the harsh saltwater environment. Different reels will have sealed bearings vs non sealed bearings which can play a factor in servicing the reel.

Drag: A strong and smooth drag system is vital for fighting larger fish species.

Finding the Ideal Surf Fishing Line

Choosing the right line for surf fishing can greatly influence your success. Here are some factors to consider:

Type: Braided line offers more sensitivity and a higher strength-to-diameter ratio than monofilament, but it is also more visible in the water. Monofilament is more abrasion-resistant and has some stretch, which can be beneficial when fighting a big fish.

Test: The line test you choose will depend on the species you are targeting. For smaller species, a 10-20 lb test line should suffice. For larger species, you may need to go up to a 30-50 lb test line.

Color: Consider the color of your line based on the water conditions. Clear lines are generally best for clear water, while colored lines can be used in murky water.

Surf Fishing Rigs for Success

There are many different types of surf fishing rigs you can use, each with its own set of advantages. Here are a few popular options:

Fish-Finder Rig: This rig allows the bait to move naturally with the current, making it a great option for many different species.

Pompano Rig: Named after the species it’s commonly used to target, this rig features multiple hooks and is great for catching fish near the bottom.

Double-Drop Leader Rig: This rig has two hooks suspended from the main line, allowing you to present two baits at once.

Best Bait and Lures for Surf Fishing

The best bait for surf fishing will depend on the species you are targeting. Natural baits such as shrimp, squid, and cut bait are often effective. Artificial lures can also be successful, especially when fish are actively feeding. Poppers, spoons, and soft plastic baits can all be great choices.

Tips for Choosing the Perfect Surf Fishing Spot

To maximize your chances of success when surf fishing, it’s essential to select a prime location. Here are some tips to help you find the ideal spot:

  1. Look for structure: Fish are often attracted to structures such as sandbars, jetties, and piers, as they provide cover and attract baitfish. Use these structures to your advantage when selecting your fishing spot.
  2. Study the beach: Pay attention to the contour of the beach, as deeper holes and troughs between sandbars can hold fish. Also, look for areas where waves are breaking, as this can indicate the presence of a sandbar or a drop-off.
  3. Observe bird activity: Birds feeding on the water’s surface can be a sign that fish are nearby. Keep an eye out for diving birds, as they can lead you to schools of baitfish, which in turn attract larger fish.
  4. Fish during the right tide: Fish are often more active and closer to the shore during periods of high tide. Fishing during the first two hours of an incoming tide and the last two hours of an outgoing tide can be particularly productive.
  5. Consult local knowledge: Speak with local anglers or bait shop owners to get insights on the best fishing spots and what species are currently biting.

Surf Fishing Techniques for Catching More Fish

To improve your surf fishing success, try employing these techniques:

  1. Vary your cast distance: Different species of fish can be found at different distances from the shore. Don’t be afraid to experiment with varying cast lengths to locate fish.
  2. Match the hatch: Use bait or lures that resemble the local prey species in both appearance and size to increase your chances of attracting fish.
  3. Keep a low profile: Fish can be easily spooked by movement and shadows on the beach. Try to maintain a low profile by staying low to the ground and avoiding sudden movements.
  4. Be patient: Surf fishing can require a lot of patience, as fish may not always be feeding or close to shore. Be prepared to spend several hours on the beach, waiting for the perfect opportunity to present itself.

FAQs on Surf Fishing

Q: Do I need a special license for surf fishing?

A: Licensing requirements vary depending on the location. Be sure to check with local authorities to determine what permits or licenses you may need before heading out to fish.

Q: What is the best time of day for surf fishing?

A: Early morning and late afternoon are often the best times for surf fishing, as fish tend to be more active during these periods. However, the ideal time can also vary depending on factors such as tide, weather, and fish species.

Q: Can I use my freshwater fishing gear for surf fishing?

A: While some freshwater gear may work for surf fishing, it’s generally recommended to use gear specifically designed for saltwater environments. Saltwater gear is typically more robust and corrosion-resistant, which is essential when dealing with the harsh conditions found at the beach.

We hope this ultimate guide to surf fishing for beginners has provided you with valuable information and insights to help you succeed on your surf fishing adventures. With the right gear, techniques, and patience, you’ll be well on your way to becoming a master angler on the shore. Happy fishing!

Posted on

The Best Turkey Hunting Tips And Tricks: Strategies for an Unforgettable Season

As I stepped out of my truck, the crisp morning air greeted me with a slight chill. I took a deep breath, absorbing the scent of dew-covered grass and damp earth. Today was the day I had been waiting for all year – the opening day of turkey season.

Turkey hunting can be a thrilling and rewarding pursuit, but it takes skill and strategy to consistently bag those elusive gobblers. In this article, we’ll share expert tips and tricks to help you elevate your turkey hunting game, from perfecting your calling techniques to employing advanced decoy strategies. Let’s dive in!

Exceptional Turkey Calling Techniques

  1. Perfect your hen imitation skills: To effectively entice gobblers, study the diverse vocalizations of hens in the wild and replicate their purrs, whines, moans, and clucks. These subtle nuances can make your calls alluring to gobblers. To learn more be sure to check out our guide on turkey mouth calls for beginners to get started.
  2. Begin softly and steadily increase volume: When calling a gobbler, start with gentle yelps and clucks, gradually intensifying your calls. This tactic will make your calling seem more authentic and persuade cautious gobblers to come closer.
  3. Master friction calls for optimum results: Proper technique is crucial when using friction calls. Hold the striker at a 45-degree angle, maintaining continuous contact with the surface. Vary pressure and striker movements to produce different sounds, such as yelps and purrs.
  4. Incorporate variation and movement in your calling: To make your calls more convincing, alter the direction, volume, and tone by turning your head or using different types of calls. This strategy will keep gobblers intrigued and lure them nearer.
Tagging Out While Self-Filming

Tried-and-True Turkey Hunting Tactics

  1. Hone your tree talk skills: When setting up near a roosting turkey, wait until first light before softly delivering a tree yelp. If the gobbler responds, stay silent and get ready for its approach, as it’s now aware of your location.
  2. Be patient after flydown: Avoid calling right after a gobbler descends from its roost. Allow it some time to settle, then charm it with a series of enticing calls.
  3. Strategically deploy decoys: Place a hen and jake decoy in the center of a known strutting zone, like a field, to attract gobblers. Approach the area under cover of darkness to prevent startling any nearby birds. For more tips, check out our guide on turkey decoys.
  4. Outwit pressured gobblers: To find unpressured gobblers on public land, observe both turkeys and fellow hunters. Focus on areas with minimal human activity to discover undisturbed birds.
  5. Switch tactics when needed: If a gobbler has resisted your calls for several days, try a new approach. Alter your calls, setup location, and approach direction to keep the bird on its toes. Late-season turkey hunting tactics can be especially useful in these situations.
  6. Leverage terrain for a better approach: Use terrain features to conceal your movement and approach gobbling turkeys more closely. This tactic can help you set up for a more successful shot opportunity.
  7. Take advantage of logging road bends: Gobblers often strut along logging roads, particularly near bends where they can easily see in both directions. Establish your position within shooting range of these bends to boost your chances of encountering a gobbler.

Key Gear for Turkey Hunting Success

  1. Camouflage blind: A strategically placed camo blind can greatly improve your ability to approach and call in cautious gobblers.
  2. Decoys: Employ a combination of hen and jake decoys to draw in gobblers. Set up with the sun at your back, so it shines directly into a gobbler’s eyes as it approaches. This will make it harder for the turkey to spot you while also enhancing the decoys’ lifelike appearance.

Advanced Decoy Strategies

  1. Pairing Decoys: Consider using a hen and jake decoy together to provoke a dominant tom’s jealousy, encouraging it to approach your setup more aggressively. Position the decoys about 20 yards away from your location and arrange the jake decoy slightly behind the hen decoy, simulating a mating or submissive posture.
  2. Motion Decoys: Motion decoys can add an extra level of realism to your setup. A decoy with a moving fan or a feeding hen that bobs up and down can help catch a gobbler’s attention from a distance. Be sure to check your local regulations regarding the use of motion decoys, as they may be restricted in some areas.

Essential Turkey Hunting Gear

  1. Camouflage: Proper camouflage is vital when turkey hunting, as these birds have exceptional eyesight. Choose a camo pattern that matches your hunting environment, and ensure your face, hands, and any other exposed skin are covered.
  2. Shotguns and Chokes: Select a shotgun that you are comfortable shooting, typically in 12-gauge or 20-gauge. For chokes, opt for one specifically designed for turkey hunting. These chokes offer tighter patterns at longer distances, increasing your chances of a clean, ethical shot.
  3. Turkey Loads: Turkey-specific loads, like those containing heavier pellets, are designed to provide the necessary energy to bring down a large tom. Be sure to pattern your shotgun with the specific load you plan to use, as different loads can produce varying results.
  4. Ground Blinds and Tree Seats: A ground blind or a comfortable tree seat can make extended sits more tolerable, allowing you to remain still and undetected by approaching turkeys. Ground blinds can also offer additional concealment, particularly when hunting with a bow.

As you can see, turkey hunting can be a challenging and rewarding experience. By utilizing expert tips and tactics, you can boost your odds of success in the field. Remember to scout thoroughly, employ effective calling strategies, and invest in quality gear to make your spring turkey season an unforgettable one. Above all, always practice safe and ethical hunting. And if you’re interested in capturing your hunts on film, check out our guide on how to self-film your turkey hunts.