Posted on

Hunting License Costs in the United States: How Much Is A License In Every State?

Resident Hunting License For Every State in the U.S.

Hunting is a popular outdoor activity enjoyed by millions of Americans each year. Whether you are looking to get a license for the first time or thinking of traveling to a new state to hunt, one thing is certain: obtaining a hunting license is an essential step in ensuring a safe and legal hunting experience.

In this article, we will look into the costs associated with hunting licenses across all 50 states in the United States. We will explore the variations in costs for residents, non-residents, short-term licenses, and even lifetime licenses. Additionally, we will provide visual representations of the data through bar charts, allowing for a quick and easy comparison of hunting license costs.

Understanding the costs of hunting licenses is crucial for both seasoned hunters and newcomers to the sport. It not only helps you plan your hunting trips effectively but also ensures that you are in compliance with the legal requirements of each state. So, let’s dive in and explore all the different costs of hunting license’s in the United States.

Table of Hunting License Costs by State

To provide you with a comprehensive overview of hunting license costs in the United States, we have compiled a table showcasing the costs for residents, non-residents, short-term licenses, and even lifetime licenses in each state. Please note that the costs mentioned are subject to change, and it is always advisable to check with the respective state’s wildlife agency for the most up-to-date information.

StateResident CostNon-Resident CostShort-Term Non-Resident CostLifetime License Cost
Alabama$31$351 (Annual)$217 (10-Day), $153 (3-Day)$380-$640
Alaska$45$160 (Annual)N/AN/A
Arizona$37N/AN/A$290-$630
Arkansas$25-$35$350 (Annual)$180 (5-Day), $125 (3-Day), $55 (1-Day)$1,000
California$54$188 (Annual)$54 (2-Day), $25 (1-Day)$640-$1,050
Colorado$42-$340$110 (Annual)N/AN/A
Connecticut$19-$41$91-$135 (Annual)N/AN/A
Delaware$39$188 (3-Day)N/AN/A
Florida$17$152 (Annual)$46 (10-Day)$200-$500
Georgia$15$100 (Annual)$20 (1-Day)$315-$750
Hawaii$20$105 (Annual)N/AN/A
Idaho$16$185 (Annual)N/A$221-$386
Illinois$13$57 (Annual)$35 (5-Day)$360
Indiana$32-$39$90 (Annual)$50 (5-Day)N/A
Iowa$22$144 (Annual)$77 (5-Day)$61
Kansas$28$98 (Annual)N/A$502
Kentucky$30-$100$185-$550 (Annual)N/AN/A
Louisiana$20$200 (Annual)$20 (10-Day), $65 (5-Day)$500-$4,000
Maine$26$115 (Annual)N/A$10-$900
Maryland$25$130 (Annual)N/AN/A
Massachusetts$30$67-$101 (Annual)N/AN/A
Michigan$11$151 (Annual)N/AN/A
MinnesotaVariesVariesVariesVaries
Mississippi$14-$25$300 (Annual)$150 (7-Day), $150 (3-Day)$500-$1,500
Missouri$10-$50$10-$50N/A$70-$800
Montana$10$15N/AN/A
Nebraska$18$97 (Annual)N/AN/A
Nevada$15-$75$15-$155 (Annual)$23 (1-Day)N/A
New Hampshire$32$113 (Annual)N/A$9-$900
New Jersey$27-$31$135 (Annual)N/AN/A
New Mexico$15$65 (Annual)N/AN/A
New York$22$100 (Annual)N/A$65-$765
North Carolina$25$100 (Annual)N/A$265
North Dakota$10-$30$250-$600 (Annual)N/AN/A
Ohio$19$180 (Annual)N/A$85-$450
Oklahoma$20-$100$20-$500N/A$625
Oregon$34$172 (Annual)N/AN/A
Pennsylvania$20$101 (Annual)N/AN/A
Rhode Island$21$55 (Annual)N/AN/A
South Carolina$12N/AN/A$300
South DakotaVariesVariesVariesVaries
Tennessee$33$305 (Annual)N/A$320-$1900
Texas$25$315 (Annual)N/A$1,000
Utah$13-$45$29-$400N/AN/A
Vermont$28$102 (Annual)N/AN/A
Virginia$23$111 (Annual)N/A$25-$260
WashingtonVariesVariesVariesVaries
West VirginiaVariesVariesVaries$312-$703
Wisconsin$18-$24$85-$250N/A$312-$703
WyomingVariesVariesVariesVaries
Table of State by State Hunting License Costs

Please note that the costs mentioned above are subject to change, and it is always advisable to check with the respective state’s wildlife agency for the most up-to-date information.

Visual Representation of Hunting License Costs

To provide a visual comparison of hunting license costs across all 50 states, we have created two bar charts. The first chart showcases the costs of resident hunting licenses, while the second chart displays the costs of non-resident hunting licenses.

Resident Hunting License Cost

Resident Hunting License Cost in The United States

You can view the interactive version of the chart here.

The bar chart above illustrates the varying costs of resident hunting licenses in each state. As you can see, the costs range from as low as $10 in some states to as high as $340 in others. This visual representation allows you to quickly identify the states with the highest and lowest resident hunting license costs.

Non-Resident Hunting License Cost

Non-Resident Hunting License Cost in The United States

You can view the interactive version of the chart here.

The bar chart above provides a comparison of non-resident hunting license costs across all 50 states. The costs for non-residents can be significantly higher than those for residents, with some states charging as much as $600 for an annual non-resident hunting license. This visual representation helps you understand the variations in costs for non-residents across different states.

These bar charts offer a clear and concise overview of the hunting license costs for both residents and non-residents. However, it is important to note that these charts represent the general costs and may not include specific variations or additional fees that may apply in certain states. For more detailed information, we recommend referring to the table provided earlier or contacting the wildlife agency of the respective state.

Detailed Breakdown of Hunting License Costs

In this section, we will provide a state-by-state breakdown of hunting license costs, highlighting any variations or unique aspects of each state’s licensing structure. Please note that the costs mentioned are subject to change, and it is always advisable to check with the respective state’s wildlife agency for the most up-to-date information.

  1. Alabama: Residents can obtain a hunting license for $31, while non-residents have the option of an annual license for $351. Short-term non-resident licenses are also available for $217 (10-day) or $153 (3-day). Alabama offers lifetime licenses ranging from $380 to $640.
  2. Alaska: Residents can purchase an annual hunting license for $45, while non-residents pay $160. Alaska does not offer short-term licenses or lifetime licenses.
  3. Arizona: Residents of Arizona can obtain a hunting license for $37. Non-residents, however, are not eligible for hunting licenses in this state. Arizona offers lifetime licenses ranging from $290 to $630.
  4. Arkansas: Hunting license costs in Arkansas vary depending on residency status. Residents can purchase licenses ranging from $25 to $35, while non-residents pay $350 for an annual license. Short-term non-resident licenses are available for $180 (5-day), $125 (3-day), or $55 (1-day). Arkansas also offers a lifetime license for $1,000.
  5. California: Residents of California can obtain a hunting license for $54, while non-residents pay $188 for an annual license. Short-term non-resident licenses are available for $54 (2-day) or $25 (1-day). Lifetime licenses in California range from $640 to $1,050.
  6. Colorado: Hunting license costs in Colorado vary widely depending on the type of license and residency status. Resident license costs range from $42 to $340, while non-residents pay $110 for an annual license. Colorado does not offer short-term licenses or lifetime licenses.
  7. Connecticut: In Connecticut, hunting license costs range from $19 to $41 for residents. Non-residents can purchase an annual license for $91 to $135. Short-term licenses and lifetime licenses are not available in Connecticut.
  8. Delaware: Residents of Delaware can obtain a hunting license for $39, while non-residents have the option of a 3-day license for $188. Short-term non-resident licenses are available, but lifetime licenses are not offered in Delaware.
  9. Florida: Hunting licenses in Florida are affordable, with residents paying $17 for a license. Non-residents, on the other hand, pay $152 for an annual license or $46 for a 10-day license. Florida does not offer lifetime licenses.
  10. Georgia: Residents of Georgia can purchase a hunting license for $15, while non-residents pay $100 for an annual license. Short-term licenses are also available for $20 (1-day). Georgia offers lifetime licenses ranging from $315 to $750.
  11. Hawaii: In Hawaii, residents can obtain a hunting license for $20, while non-residents pay $105 for an annual license. Short-term licenses and lifetime licenses are not available in Hawaii.
  12. Idaho: Residents of Idaho can purchase a hunting license for $16, while non-residents pay $185 for an annual license. Idaho also offers lifetime licenses ranging from $221 to $386.
  13. Illinois: Hunting license costs in Illinois are relatively low, with residents paying $13 for a license and non-residents paying $57 for an annual license. Short-term licenses are available for $35 (5-day). Illinois offers a lifetime license for $360.
  14. Indiana: Hunting license costs in Indiana vary depending on residency status. Residents can obtain licenses ranging from $32 to $39, while non-residents pay $90 for an annual license. Short-term licenses are available for $50 (5-day). Indiana does not offer lifetime licenses.
  15. Iowa: Residents of Iowa can purchase a hunting license for $22, while non-residents pay $144 for an annual license. Short-term licenses are available for $77 (5-day). Iowa also offers a unique lifetime license for $61.
  16. Kansas: Hunting license costs in Kansas are affordable, with residents paying $28 for a license and non-residents paying $98 for an annual license. Short-term licenses are not available, but Kansas offers a lifetime license for $502.
  17. Kentucky: Hunting license costs in Kentucky vary depending on residency status. Residents can obtain licenses ranging from $30 to $100, while non-residents pay $185 to $550 for an annual license. Short-term licenses and lifetime licenses are not available in Kentucky.
  18. Louisiana: Residents of Louisiana can purchase a hunting license for $20, while non-residents pay $200 for an annual license. Short-term non-resident licenses are available for $20 (10-day) or $65 (5-day). Louisiana also offers lifetime licenses ranging from $500 to $4,000.
  19. Maine: In Maine, residents can obtain a hunting license for $26, while non-residents pay $115 for an annual license. Short-term licenses and lifetime licenses are available, with lifetime licenses ranging from $10 to $900.
  20. Maryland: Residents of Maryland can purchase a hunting license for $25, while non-residents pay $130 for an annual license. Short-term licenses and lifetime licenses are not available in Maryland.
  21. Massachusetts: Hunting license costs in Massachusetts are affordable, with residents paying $30 for a license. Non-residents, on the other hand, pay $67 to $101 for an annual license. Short-term licenses and lifetime licenses are not offered in Massachusetts.
  22. Michigan: Residents of Michigan can obtain a hunting license for $11, while non-residents pay $151 for an annual license. Short-term licenses and lifetime licenses are not available in Michigan.
  23. Minnesota: Hunting license costs in Minnesota vary and are subject to different regulations based on the type of game and residency status. It is advisable to check with the Minnesota Department of Natural Resources for specific hunting license costs.
  24. Mississippi: Residents of Mississippi can purchase hunting licenses ranging from $14 to $25. Non-residents pay $300 for an annual license or $150 for a 7-day or 3-day license. Mississippi also offers lifetime licenses ranging from $500 to $1,500.
  25. Missouri: Hunting license costs in Missouri vary depending on residency status. Residents can obtain licenses ranging from $10 to $50, while non-residents pay the same amount. Short-term licenses are not available, but Missouri offers lifetime licenses ranging from $70 to $800.
  26. Montana: In Montana, residents and non-residents pay the same fee of $10 for a hunting license. Short-term licenses and lifetime licenses are not available in Montana.
  27. Nebraska: Residents of Nebraska can purchase a hunting license for $18, while non-residents pay $97 for an annual license. Short-term licenses and lifetime licenses are not offered in Nebraska.
  28. Nevada: Hunting license costs in Nevada vary depending on residency status. Residents pay $15 to $75 for a license, while non-residents pay $15 to $155 for an annual license. Short-term licenses are available for $23 (1-day). Nevada does not offer lifetime licenses.
  29. New Hampshire: Residents of New Hampshire can obtain a hunting license for $32, while non-residents pay $113 for an annual license. Short-term licenses are not available, but New Hampshire offers lifetime licenses ranging from $9 to $900.
  30. New Jersey: Hunting license costs in New Jersey range from $27 to $31 for residents. Non-residents pay $135 for an annual license. Short-term licenses and lifetime licenses are not available in New Jersey.
  31. New Mexico: Residents of New Mexico can purchase a hunting license for $15, while non-residents pay $65 for an annual license. Short-term licenses and lifetime licenses are not offered in New Mexico.
  32. New York: In New York, residents can obtain a hunting license for $22, while non-residents pay $100 for an annual license. Short-term licenses are not available, but New York offers lifetime licenses ranging from $65 to $765.
  33. North Carolina: Residents of North Carolina can purchase a hunting license for $25, while non-residents pay $100 for an annual license. Short-term licenses and lifetime licenses are not available in North Carolina.
  34. North Dakota: Hunting license costs in North Dakota vary depending on residency status. Residents pay $10 to $30 for a license, while non-residents pay $250 to $600 for an annual license. Short-term licenses and lifetime licenses are not offered in North Dakota.
  35. Ohio: Residents of Ohio can obtain a hunting license for $19, while non-residents pay $180 for an annual license. Short-term licenses and lifetime licenses are available, with lifetime licenses ranging from $85 to $450.
  36. Oklahoma: Hunting license costs in Oklahoma vary depending on residency status. Residents pay $20 to $100 for a license, while non-residents pay $20 to $500. Short-term licenses and lifetime licenses are available, with lifetime licenses costing $625.
  37. Oregon: Residents of Oregon can purchase a hunting license for $34, while non-residents pay $172 for an annual license. Short-term licenses and lifetime licenses are not offered in Oregon.
  38. Pennsylvania: Residents of Pennsylvania can obtain a hunting license for $20, while non-residents pay $101 for an annual license. Short-term licenses and lifetime licenses are not available in Pennsylvania.
  39. Rhode Island: Residents of Rhode Island can purchase a hunting license for $21, while non-residents pay $55 for an annual license. Short-term licenses and lifetime licenses are not available in Rhode Island.
  40. South Carolina: Hunting license costs in South Carolina are affordable, with residents paying $12 for a license. Non-residents, however, are not eligible for hunting licenses in this state. South Carolina offers a lifetime license for $300.
  41. South Dakota: Hunting license costs in South Dakota vary and are subject to different regulations based on the type of game and residency status. It is advisable to check with the South Dakota Game, Fish, and Parks Department for specific hunting license costs.
  42. Tennessee: Residents of Tennessee can obtain a hunting license for $33, while non-residents pay $305 for an annual license. Short-term licenses are not available, but Tennessee offers lifetime licenses ranging from $320 to $1,900.
  43. Texas: Residents of Texas can purchase a hunting license for $25, while non-residents pay $315 for an annual license. Short-term licenses and lifetime licenses are available, with lifetime licenses costing $1,000.
  44. Utah: Hunting license costs in Utah vary depending on residency status. Residents pay $13 to $45 for a license, while non-residents pay $29 to $400. Short-term licenses and lifetime licenses are not offered in Utah.
  45. Vermont: Residents of Vermont can obtain a hunting license for $28, while non-residents pay $102 for an annual license. Short-term licenses and lifetime licenses are not available in Vermont.
  46. Virginia: Residents of Virginia can purchase a hunting license for $23, while non-residents pay $111 for an annual license. Short-term licenses and lifetime licenses are available, with lifetime licenses ranging from $25 to $260.
  47. Washington: Hunting license costs in Washington vary and are subject to different regulations based on the type of game and residency status. It is advisable to check with the Washington Department of Fish and Wildlife for specific hunting license costs.
  48. West Virginia: Hunting license costs in West Virginia vary and are subject to different regulations based on the type of game and residency status. Lifetime licenses in West Virginia range from $312 to $703.
  49. Wisconsin: Hunting license costs in Wisconsin vary depending on residency status. Residents pay $18 to $24 for a license, while non-residents pay $85 to $250. Short-term licenses and lifetime licenses are available, with lifetime licenses ranging from $312 to $703.
  50. Wyoming: Hunting license costs in Wyoming vary and are subject to different regulations based on the type of game and residency status. It is advisable to check with the Wyoming Game and Fish Department for specific hunting license costs.

It is important to note that hunting license costs may vary based on factors such as age, type of game, and additional permits or stamps required. Additionally, some states may offer discounted rates for military personnel or senior citizens. For more detailed information on hunting license costs and regulations in each state, we recommend contacting the respective state’s wildlife agency or visiting their official websites.

How to Purchase a Hunting License

If you’re ready to embark on your hunting adventure, the first step is to obtain a hunting license. The process of purchasing a hunting license may vary slightly from state to state, but here is a general guide on how to purchase a hunting license, with a focus on online purchasing options.

  1. Research the Requirements: Before purchasing a hunting license, familiarize yourself with the specific requirements of the state where you plan to hunt. Each state has its own regulations regarding residency, age restrictions, hunter education requirements, and specific hunting seasons. Visit the website of the state’s wildlife agency or department of natural resources to gather the necessary information.
  2. Choose an Authorized Vendor: Many states offer the convenience of purchasing hunting licenses online. Visit the official website of the state’s wildlife agency to find a list of authorized vendors. These vendors may include the state’s wildlife agency website itself, as well as other authorized online platforms.
  3. Select the License Type: Determine the type of hunting license you need based on your residency status, desired duration, and the type of game you plan to hunt. Most states offer options for resident licenses, non-resident licenses, short-term licenses, and sometimes even lifetime licenses. Ensure that you choose the correct license type that aligns with your hunting plans.
  4. Provide the Required Information: When purchasing a hunting license online, you will typically be asked to provide certain personal information, such as your full name, date of birth, address, and contact details. Additionally, you may need to provide proof of hunter education certification or other required documentation.
  5. Pay the License Fee: Once you have provided the necessary information, you will be prompted to pay the license fee. The fee amount will vary depending on the type of license you are purchasing and the state’s specific pricing structure. Online payment options usually include credit or debit cards.
  6. Receive and Print the License: After successfully completing the payment, you will receive a confirmation of your hunting license purchase. In most cases, you will have the option to print a physical copy of your license. It is important to carry this printed license with you while hunting, as it serves as proof of your legal authorization.
  7. Check for Additional Permits or Stamps: Depending on the state and the type of game you plan to hunt, you may need to obtain additional permits or stamps. These may include tags for specific species, archery permits, muzzleloader permits, or waterfowl stamps. Ensure that you are aware of any additional requirements and obtain the necessary permits or stamps before heading out into the field.

Remember, it is crucial to abide by all hunting regulations and license requirements to ensure a safe and legal hunting experience. If you have any doubts or questions regarding the hunting license purchasing process, reach out to the state’s wildlife agency or department of natural resources for guidance and clarification.

Now that you have armed yourself with the knowledge of how to purchase a hunting license, you are one step closer to enjoying the thrill of the hunt in a responsible and legal manner.

Conclusion

In this article, we have explored the hunting license costs in all 50 states of the United States. We began by providing a detailed table showcasing the costs of hunting licenses for residents, non-residents, short-term licenses, and lifetime licenses in each state. We then presented visual representations of the data through bar charts, allowing for a quick and easy comparison of hunting license costs.

Throughout this guide, we have highlighted the variations in hunting license costs across different states and residency statuses. From the affordable fees in some states to the higher costs in others, it is evident that hunting license costs can vary significantly. It is crucial for hunters to understand these costs as they plan their hunting trips and ensure compliance with the legal requirements of each state.

We have also emphasized the importance of researching and understanding the specific hunting license requirements and regulations of the state where you plan to hunt. Each state has its own set of rules and regulations, including residency requirements, age restrictions, hunter education requirements, and specific hunting seasons. It is essential to familiarize yourself with these regulations to ensure a safe and legal hunting experience.

Purchasing a hunting license has become increasingly convenient with the availability of online options in many states. We provided a brief guide on how to purchase a hunting license, focusing on the online purchasing process. However, it is important to note that the process may vary slightly from state to state. Always refer to the official website of the state’s wildlife agency or department of natural resources for the most accurate and up-to-date information on purchasing a hunting license.

In conclusion, understanding hunting license costs and regulations is crucial for both seasoned hunters and newcomers to the sport. It not only helps you plan your hunting trips effectively but also ensures that you are in compliance with the legal requirements of each state. By obtaining the necessary hunting license and adhering to the regulations, you can enjoy the thrill of the hunt while contributing to wildlife conservation efforts.

Remember, responsible hunting practices, including obtaining the appropriate licenses, respecting hunting seasons and bag limits, and practicing ethical hunting techniques, are essential for the preservation of our natural resources and the sustainability of wildlife populations. So, as you embark on your hunting adventures, always prioritize safety, respect for nature, and compliance with hunting license requirements.

Happy hunting!
Posted on

Taking Hunting to New Heights: The XOP Edge Platform Review

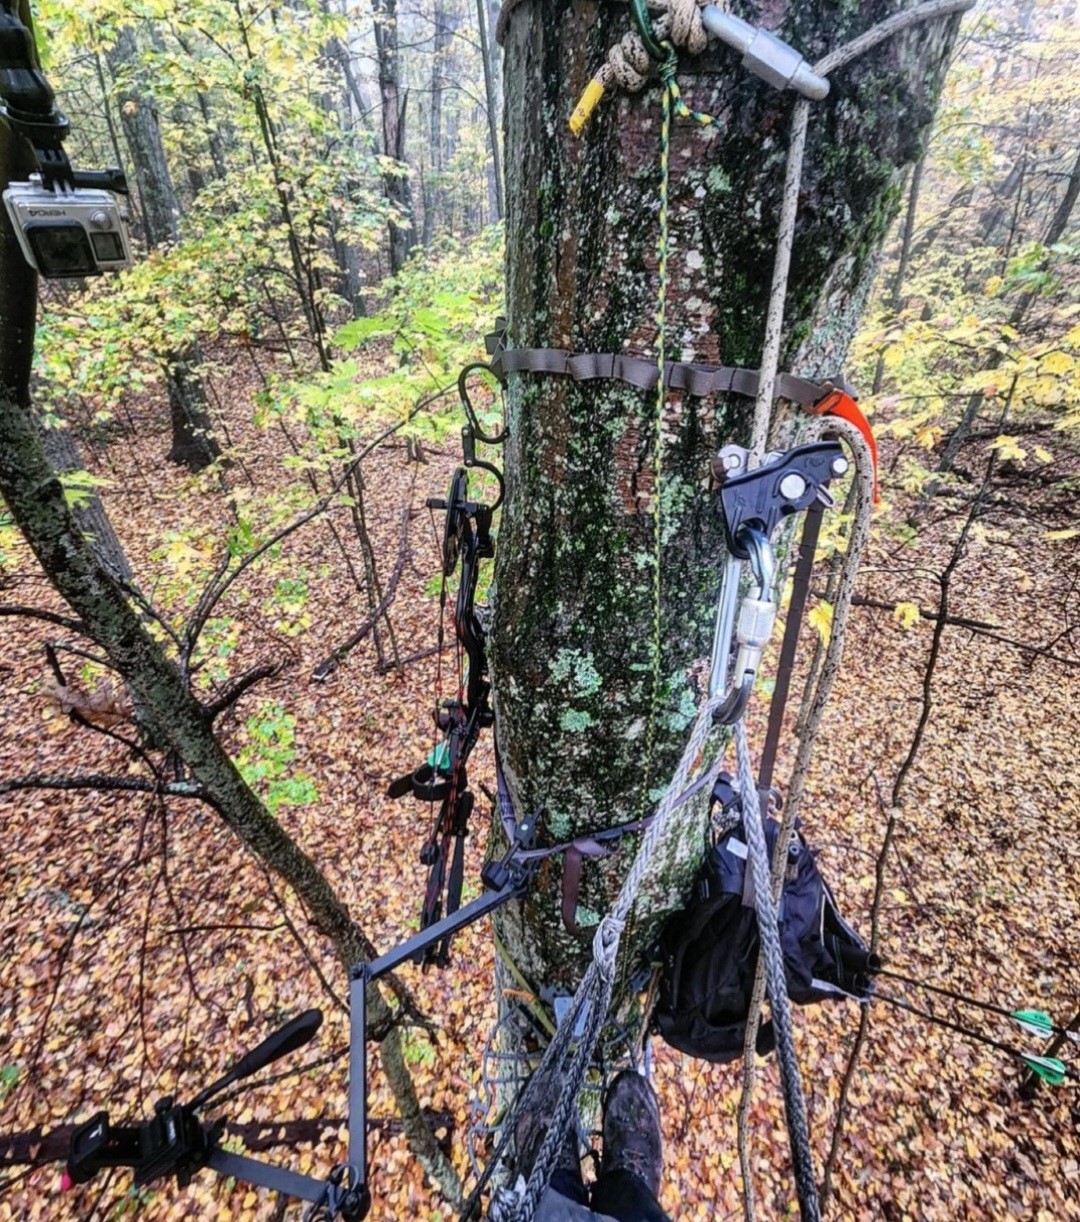
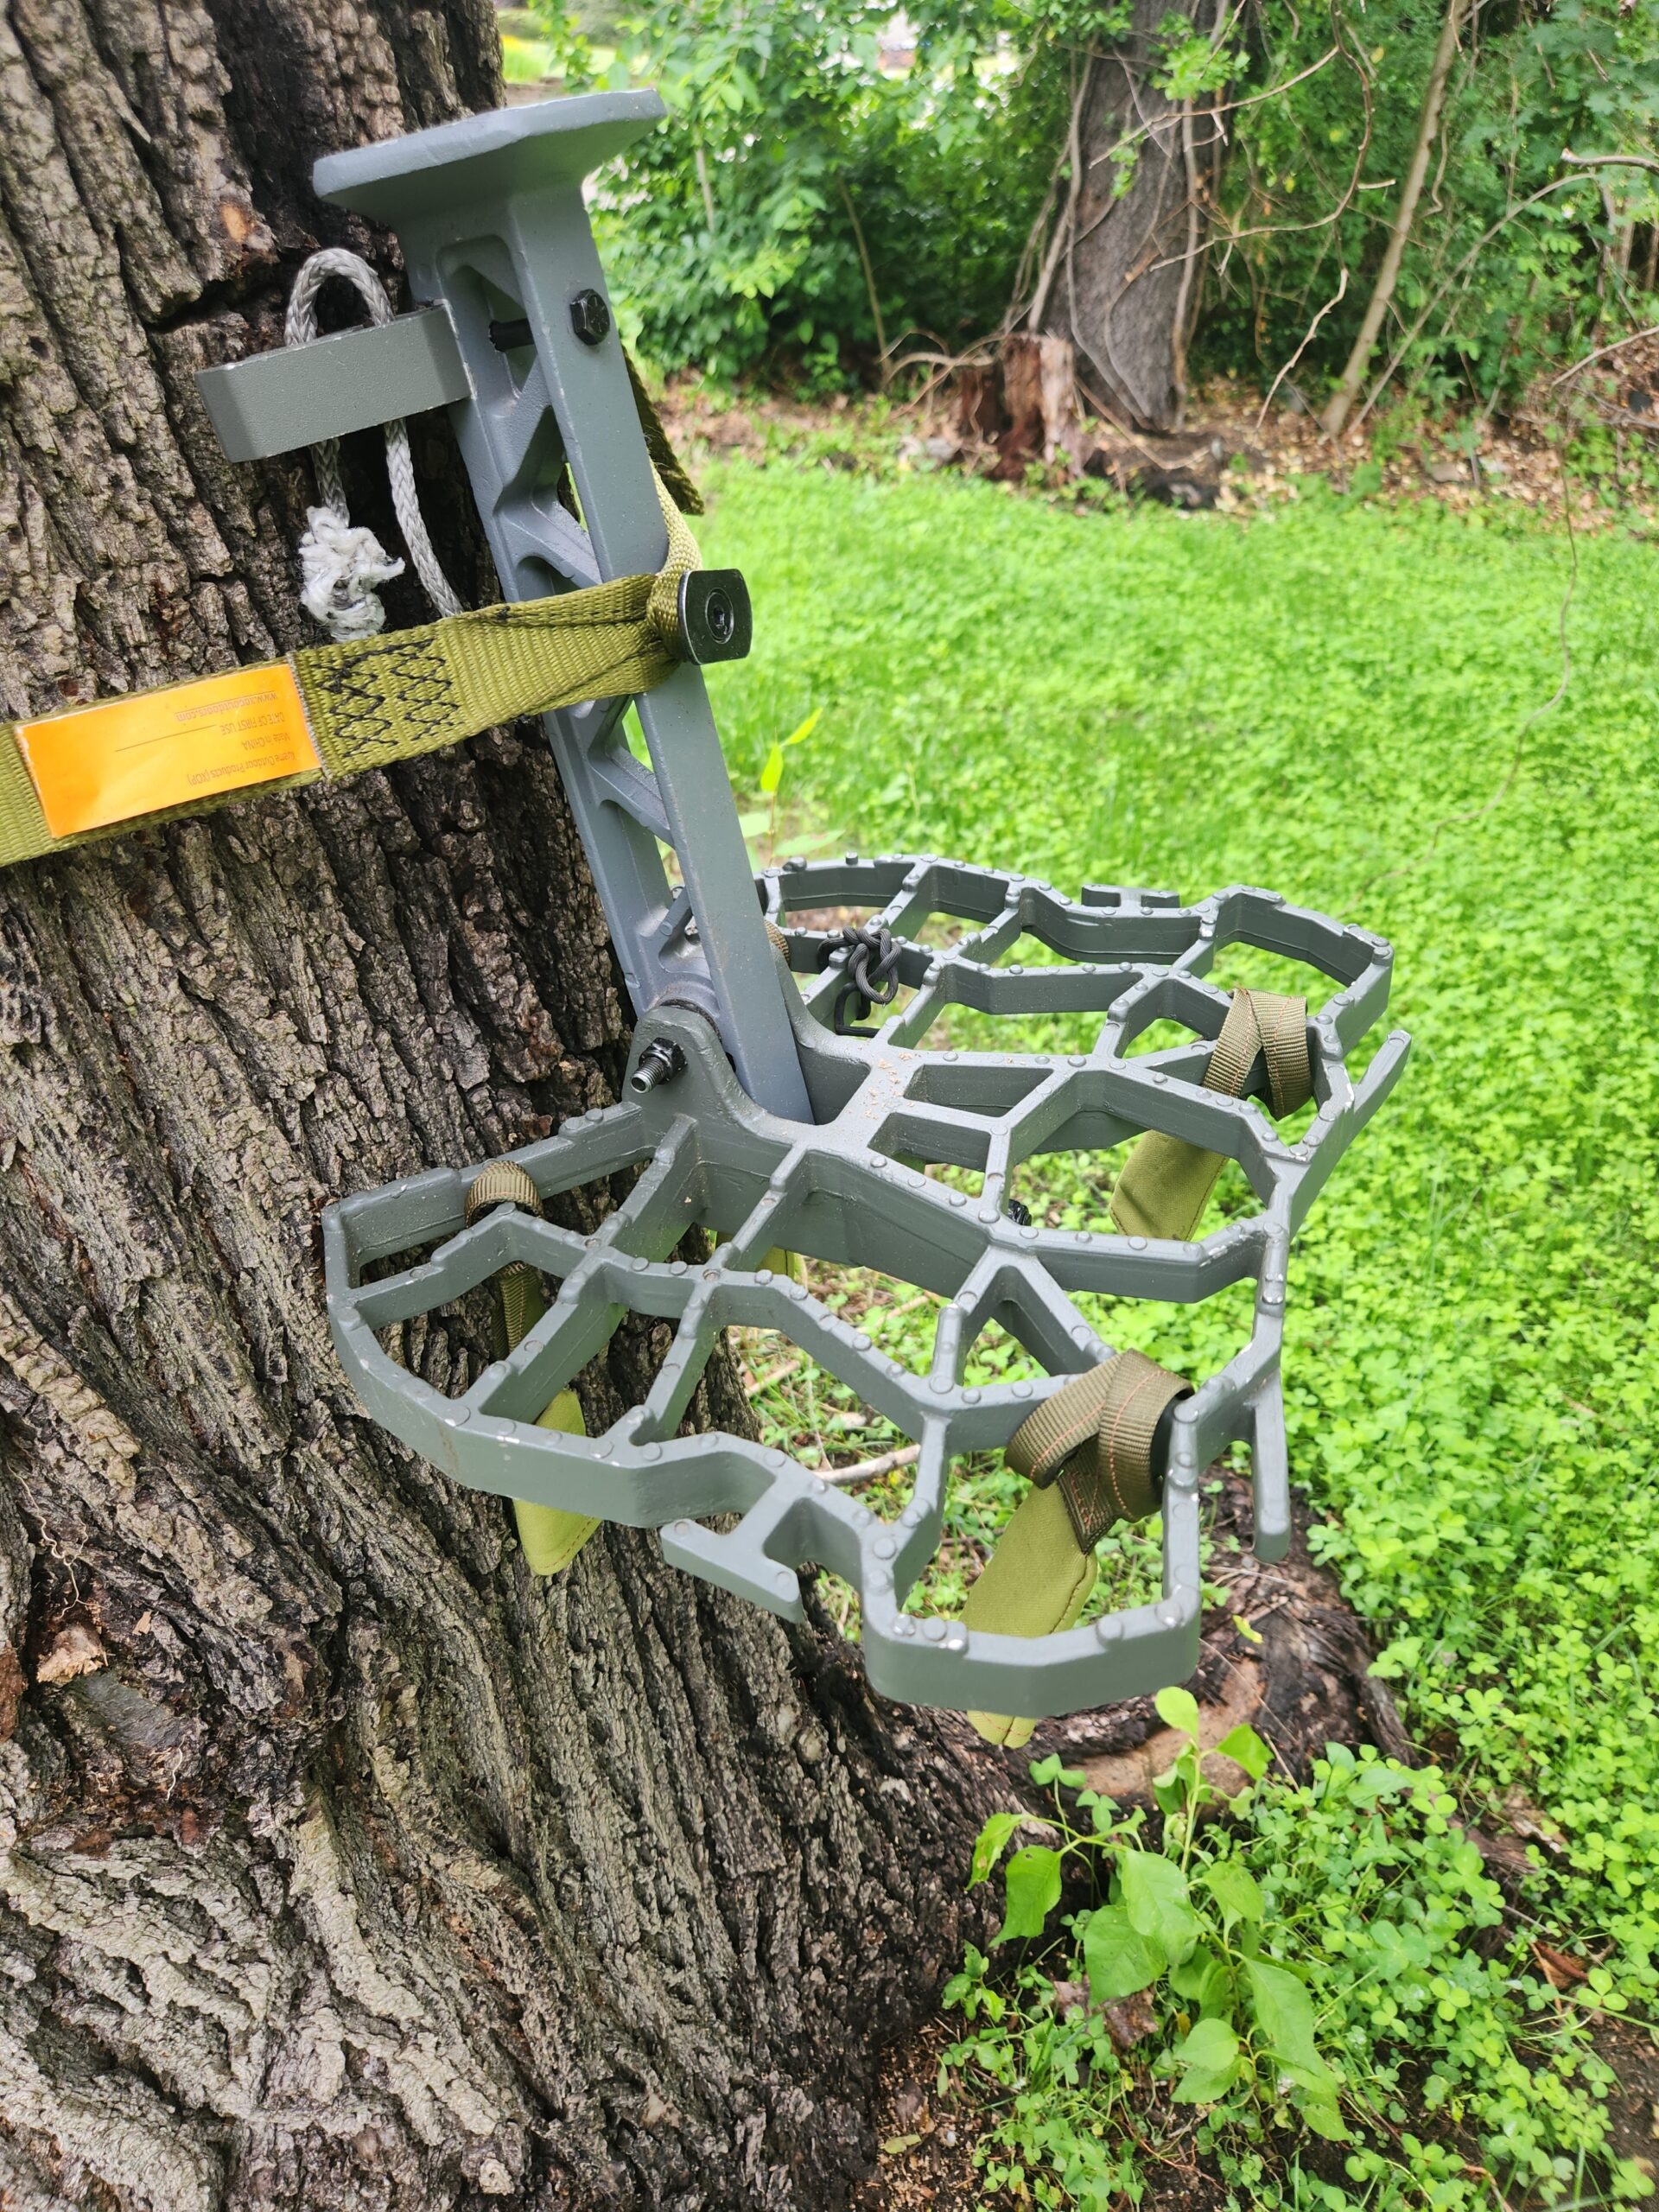
XOP Edge Review Setup on a tree for saddle hunting

My Saddle Hunting Journey and the XOP Edge

As a passionate hunter, I am always on the lookout for gear that can enhance my hunting experiences. One method that has truly revolutionized my approach is saddle hunting. The freedom and flexibility it offers are unparalleled, allowing me to choose any tree and adapt to changing conditions effortlessly.

In my quest to find the perfect saddle hunting platform, I stumbled upon the XOP Edge platform. Intrigued by its promises of stability, versatility, and value for money, I decided to give it a try. And let me tell you, it did not disappoint.

In this review, I will take you through my personal journey with the XOP Edge platform – from unboxing and examining its key specifications to discussing its unique features and performance in the field. By the end of this article, you’ll understand why the XOP Edge platform is an invaluable addition to any saddle hunter’s gear collection.

So grab your hunting gear and join me as we dive into the world of saddle hunting with the XOP Edge platform. Trust me, you won’t want to miss this exciting adventure.

Unboxing the XOP Edge: First Impressions

When my eagerly awaited package arrived, I couldn’t wait to tear it open and get my hands on the XOP Edge platform. The packaging was sturdy and well-designed, ensuring that the contents arrived in pristine condition.

Upon opening the box, I found the XOP Edge platform nestled securely within foam padding. Alongside it were a few additional items that caught my attention. These included an informational packet, an instruction manual, mounting instructions, stickers for some added flair, and a brochure showcasing other XOP products.

The first thing that struck me about the XOP Edge platform was its build quality. Made from 100% cast aluminum, it exuded durability and strength. The sleek design and attention to detail were immediately apparent, instilling confidence in its performance.

As I held the platform in my hands for the first time, I was impressed by its solid construction. It felt substantial without being overly heavy, striking a perfect balance between sturdiness and portability. This made it easy to carry on my pack without adding unnecessary weight to my hunting gear. For the first season using this I actually just attached backpack straps right to the platform and carried it that way.

Overall, the unboxing experience left me excited to put the XOP Edge platform to the test. Its impressive build quality and attention to detail hinted at a product that was designed with hunters’ needs in mind. Next up, let’s look into the key specifications of this remarkable saddle hunting platform.

The Nitty-Gritty: XOP Edge’s Key Specifications

To truly understand the capabilities of the XOP Edge platform, let’s take a closer look at its key specifications. This will give you a comprehensive understanding of what this platform brings to the table.

  • Dimensions: The XOP Edge platform measures approximately 13 and three quarters by 11 inches when open, providing ample space for comfortable hunting. When closed, it boasts a slim three-inch profile, making it easy to transport and store.
  • Weight: Weighing in at around four and a half pounds, the XOP Edge platform strikes a balance between strength and portability. It’s not the lightest in the market but its definitely way lighter than carrying a climber or hang on.
  • Material: Constructed from 100% cast aluminum, this platform is built to withstand the rigors of hunting season after season. Its robust construction ensures durability without sacrificing performance.
  • Weight Rating: The XOP Edge platform boasts an impressive weight rating of 350 pounds. This means it can accommodate hunters of various sizes and body types with ease, providing peace of mind while perched high above the forest floor.
  • Certifications: The XOP Edge platform meets ASTM F2128, F2126, F2125, and F2531 certifications. These industry standards ensure that the platform has undergone rigorous testing to guarantee its safety and reliability in the field.

With these specifications in mind, it’s clear that the XOP Edge platform is designed to meet the needs of serious saddle hunters. Its generous dimensions provide ample room for maneuvering while its sturdy build instills confidence in its ability to handle heavy loads.

In the next section, we’ll explore the design and construction of this remarkable saddle hunting platform. Get ready to be impressed by its attention to detail and innovative features!

Design and Functionality: The XOP Edge’s Winning Features

The design and construction of the XOP Edge platform play a crucial role in its overall performance and user experience. Let’s check out the details and see how this platform sets itself apart from the competition.

The first thing that caught my attention was the platform’s cast aluminum construction. This material choice not only ensures durability but also contributes to its overall stability. The platform feels rock-solid, with minimal flex even when subjected to side pressure. This instilled a sense of confidence in its ability to provide a stable base for hunting.

In terms of size, the XOP Edge platform strikes a balance between comfort and maneuverability. With dimensions of approximately 13 and three quarters by 11 inches, it offers enough space for hunters of various shoe sizes to find their footing comfortably. Even with larger shoe sizes, there is ample room to move, ensuring you can maintain your balance while taking aim at your target. This is the reason I use a platform and not a true one stick. I like being able to place my entire boot on the platform and stand if I want.

One standout feature of the XOP Edge platform is its ultra-grip traction surface. This innovative design element provides excellent grip, even in wet or slippery conditions. I found myself feeling secure and confident on the platform, knowing that I could focus on my hunt without worrying about slipping or losing my footing.

But what truly sets the XOP Edge platform apart are its unique features. The six-point offset bracket enhances tree grip, ensuring a firm attachment to the trunk for added stability. The center pivoting post allows for foot space and maneuvering around the tree, providing freedom of movement without compromising safety.


Additionally, the camming motion of the XOP Edge platform adds another layer of stability during use. This feature helps keep you steady while aiming or adjusting your position, allowing for precise shots without any wobbling or shaking. Be sure to watch my video if you ever need to re-cam a platform while up at hunting height.

Furthermore, I was impressed by the built-in strapping attachment points on the platform. These attachment points make securing backpack straps a breeze, keeping everything lightweight without needing to carry a backpack if you don’t want to. The tow rope hooks on the sides of the platform provide added convenience, allowing you to secure ropes or cords easily.

Lastly, the grooved cutouts on the XOP Edge platform are designed to accommodate up to four sticks, including XOP Minis, Lone Wolf Custom Gear minis, and most other climbing sticks. This versatility allows you to customize your setup according to your preferences and hunting needs.

XOP with an Api climbing stick neatly packed

In summary, the design and construction of the XOP Edge platform are top-notch. Its sturdy cast aluminum build, combined with innovative features like the six-point offset bracket and ultra-grip traction surface, make it a standout choice for saddle hunters seeking stability and comfort in their hunting adventures.

In the next section, I will share my personal experiences using the XOP Edge platform in various hunting scenarios. Stay tuned for an insightful evaluation of its performance in the field!

Performance in the Field: Putting the XOP Edge to the Test

Having put the XOP Edge platform to the test in various hunting scenarios, I can confidently say that its performance exceeded my expectations. Here, I will share my personal experiences and evaluate how this platform performs in real-life hunting situations.

One of the first things I noticed was the platform’s exceptional stability. Whether I was set up high in an awkward shaped tree or making slight adjustments to my position, the XOP Edge provided a rock-solid foundation. Its sturdy construction and ultra-grip traction surface instilled confidence, allowing me to focus on my hunt without any distractions.

The six-point offset bracket played a significant role in enhancing tree grip and overall stability. It securely anchored the platform to the tree, eliminating any wobbling or shifting during use. The last thing you want is a platform moving or un-camming on you. This feature proved particularly valuable when taking shots from various angles or dealing with uneven trees or side pressure.

I also appreciated the center pivoting post, which provided ample foot space and maneuverability around the tree. It allowed me to adjust my position effortlessly without compromising safety or comfort. Whether I needed to pivot for a better shot or reposition myself for improved visibility, the center pivoting post made it easy.

To sum it up, the XOP Edge platform delivers outstanding performance in the field. Its stability, tree grip, and overall functionality make it an invaluable tool for any saddle hunter. 

The XOP Edge: A Game-Changer for Saddle Hunting

When it comes to purchasing hunting gear, value for money is always a crucial factor to consider. In the case of the XOP Edge platform, it offers an excellent balance of features, performance, and affordability, making it a worthwhile investment for saddle hunters.

Priced at $150, the XOP Edge platform stands out as one of the most budget-friendly options in the saddle hunting market. I was even able to find it on sale for $40 off so keep and you out for coupons or sales. Considering its solid construction, innovative features, and impressive stability, this platform offers remarkable value for its price point.

Comparing the XOP Edge platform to other platforms in the market, such as the Tethrd Predator platform, highlights its competitive edge in terms of affordability. While there may be slight differences in design or specific features between platforms, the XOP Edge holds its ground admirably and often surpasses expectations.

The sturdy cast aluminum construction ensures durability and longevity, allowing you to enjoy countless hunting seasons with this platform. Its weight rating of 350 pounds accommodates hunters of various sizes and body types without compromising safety or stability.

Furthermore, the XOP Edge platform’s adjustable lean feature adds versatility and adaptability to different hunting situations. This allows you to find your preferred angle for maximum comfort all by adjusting a set screw giving you a customized fit for all day comfort.

Considering all these factors together, it’s evident that the XOP Edge platform provides exceptional value for money. It offers a reliable and feature-packed option at an affordable price point, making it accessible to a wide range of hunters.

In conclusion, if you’re looking for a saddle hunting platform that combines affordability with performance without compromising on quality or functionality, then the XOP Edge platform is an excellent choice. Its value for money proposition is hard to beat in today’s market.

In the final section of this review, I will recap the strengths of the XOP Edge platform while also highlighting areas where improvements could be made. Stay tuned for my final verdict on this remarkable saddle hunting platform!

Final Verdict: Why the XOP Edge is My Go-To Platform

After thoroughly evaluating the XOP Edge platform, I can confidently say that it is a must-have for any saddle hunter. This remarkable platform offers a combination of durability, stability, and affordability that is hard to find in the market.

With its sturdy cast aluminum construction and innovative features like the six-point offset bracket and ultra-grip traction surface, the XOP Edge platform delivers exceptional performance in the field. It provides a solid foundation for hunting, allowing you to focus on your target without worrying about stability or safety.

The XOP Edge platform’s versatility shines through its ability to accommodate modifications and personalization. Whether you’re looking to reduce weight, optimize gear storage, or customize attachments, this platform offers endless possibilities for tailoring it to your specific needs.

In terms of value for money, the XOP Edge platform truly stands out. Priced at $150, it offers an affordable option without compromising on quality or functionality. Its competitive edge in the market makes it an attractive choice for budget-conscious hunters who still demand top-notch performance.

While there may be minor observations regarding some chipping or potential areas for improvement, these do not detract from the overall excellence of the XOP Edge platform. With occasional touch-ups and careful consideration of modifications, you can easily address any minor concerns and maximize the platform’s potential.

In conclusion, I highly recommend the XOP Edge platform as an invaluable addition to any saddle hunter’s gear collection. Its exceptional stability, innovative features, and impressive value for money make it a standout choice in today’s market. Whether you’re a seasoned saddle hunter or just starting out on your journey, this platform will elevate your hunting experiences to new heights.

Don’t miss out on this opportunity to enhance your saddle hunting adventures with the XOP Edge platform. Trust me, once you experience its performance firsthand, you’ll wonder how you ever hunted without it.

FAQ

 Q: Is the XOP Edge platform suitable for hunters of all sizes? A: Yes, the XOP Edge platform has a weight rating of 350 pounds, making it suitable for hunters of various sizes and body types. It provides a stable and secure platform regardless of your weight.

Q: How does the XOP Edge platform compare to other platforms in terms of price? A: The XOP Edge platform is priced at $150, making it one of the most budget-friendly options in the saddle hunting market. It offers excellent value for money compared to other platforms with similar features.

Q: Does the XOP Edge platform come with a warranty? A: Yes, the XOP Edge platform comes with a manufacturer lifetime warranty on its metal components. This ensures that you’re covered in case of any manufacturing defects or issues.

Q: Can I use any climbing sticks with the XOP Edge platform? A: Yes, the XOP Edge platform features grooved cutouts that can accommodate up to four sticks, including XOP Minis, Lone Wolf Custom Gear minis, and many more. This provides flexibility in choosing your preferred climbing stick setup.

Q: Is there any assembly required for the XOP Edge platform? A: The XOP Edge platform comes pre-assembled and ready to use out of the box. Simply follow the included mounting instructions to attach it securely to your desired tree.

Q: Is the XOP Edge platform suitable for long hunting sessions? A: Yes, the XOP Edge platform provides a comfortable and stable base for extended hunting sessions. Its generous dimensions and ultra-grip traction surface ensure you can maintain your balance and focus on your hunt without discomfort.

Q: Can the XOP Edge platform be used in all weather conditions? A: Yes, the XOP Edge platform is designed to withstand different weather conditions. Its durable construction and ultra-grip traction surface provide excellent stability and grip, even in wet or slippery conditions.

Q: How easy is it to transport the XOP Edge platform? A: The XOP Edge platform’s compact design and lightweight construction make it easy to transport. Its slim three-inch profile when closed allows for convenient storage in your pack or gear bag.

Q: How secure is the attachment of the XOP Edge platform to the tree? A: The XOP Edge platform features a six-point offset bracket that provides excellent tree grip and stability. Combined with its aggressive teeth and slot lock technology, you can trust that this platform will remain securely attached to the tree throughout your hunting session.

Posted on

How to Launch Your Own Hunting Channel on YouTube

Self Filming Deer Hunt Starting a Youtube Channel

Isn’t it amazing how YouTube has become our go-to platform for sharing and experiencing all things outdoors? If you’re here, chances are you’ve felt the pull to start your own YouTube hunting channel. Maybe you’ve been inspired by a channel you follow, or perhaps you’ve got a unique perspective on hunting that you’re itching to share. Either way, you’re in the right place!

This blog post is your roadmap to launching a successful YouTube hunting channel. We’re not just talking about getting your channel off the ground – we’re talking about building a channel that resonates with your audience, stands out from the crowd, and grows into a thriving community of like-minded outdoor enthusiasts.

Understanding the YouTube Landscape

Before we dive into the nitty-gritty of starting a YouTube hunting channel, it’s crucial to understand the landscape of YouTube itself. YouTube is more than just a video-sharing platform; it’s a dynamic community where content creators and viewers interact, learn, and grow together.

Firstly, let’s talk about the YouTube algorithm. In simple terms, the algorithm is a set of rules that decides which videos get recommended to viewers. It’s influenced by factors like watch time, viewer engagement (likes, comments, shares), and the relevance of your videos to the viewer. Understanding this algorithm is key to increasing your channel’s visibility and attracting more viewers.

Now, let’s debunk a common misconception: YouTube success doesn’t happen overnight. It takes time, consistency, and a lot of hard work. You might not get thousands of subscribers or millions of views right away, and that’s okay. What matters is your passion for sharing your hunting experiences and your commitment to creating quality content.

Another important aspect to consider is monetization. Yes, it’s possible to make money on YouTube, but it’s not as easy as it seems. To qualify for YouTube’s Partner Program (which allows you to earn money from ads on your videos), you need at least 1,000 subscribers and 4,000 watch hours in the past 12 months. And even then, ad revenue can be unpredictable. That’s why many successful YouTubers diversify their income with sponsorships, merchandise, and other revenue streams.

Lastly, remember that YouTube is a community. Engaging with your viewers, responding to comments, and collaborating with other creators can help you build a loyal audience and grow your channel.

Understanding the YouTube landscape might seem daunting, but don’t let that discourage you. With the right knowledge and strategies, you can navigate this landscape and create a successful YouTube hunting channel. So, let’s get started!

Identifying Your Unique Selling Proposition

In the vast wilderness of YouTube, standing out can be as challenging as spotting a well-camouflaged deer in the brush. That’s where your Unique Selling Proposition (USP) comes into play.

Your USP is that special something that sets your channel apart from the rest. It’s the unique angle or niche that makes your hunting experiences different and interesting. Maybe it’s your expertise in a specific type of hunting, your unique approach to tracking game, or perhaps it’s your ability to explain complex hunting techniques in a way that’s easy for beginners to understand. Whatever it is, your USP is your ticket to capturing the attention of your target audience.

Identifying your USP requires some introspection. Start by asking yourself these questions:

  • What aspects of hunting are you most passionate about?
  • What hunting skills or knowledge do you have that others might find interesting or useful?
  • What unique perspectives or experiences can you bring to the table?
  • How do you want your audience to feel when they watch your videos?

Once you’ve identified your USP, the next step is to translate it into engaging content. This means showcasing your USP in your videos, whether it’s through the topics you choose, the way you present your content, or the unique insights you provide. Remember, your USP is what makes your channel uniquely you, so don’t be afraid to let your personality shine through.

In the end, your USP isn’t just about being different—it’s about adding value to your audience in a way that no one else can. And when you do that, you’ll not only attract viewers to your channel, but you’ll also turn them into loyal fans.

Creating Quality Content

Creating quality content is the cornerstone of any successful YouTube channel, and hunting channels are no exception. It’s not just about capturing your hunting experiences; it’s about presenting them in a way that’s engaging, informative, and visually appealing. Let’s break down what goes into creating quality content.

High-Quality Video Content

The first thing your viewers will notice about your videos is their quality. High-quality videos are more enjoyable to watch and can make your channel look more professional. Here’s what you need to consider:

Equipment: You don’t need a Hollywood budget to create high-quality videos. Start with what you have, even if it’s just your smartphone. As your channel grows, you might consider investing in a good-quality camera, a tripod for stable shots, a microphone for clear audio, and lighting equipment to ensure your videos are well-lit.

Filming Techniques: Mastering the art of filming is a journey, and like any journey, it starts with understanding the basics. Here are some fundamental filming techniques that can significantly enhance the quality of your videos:

Composition

Composition refers to how elements are arranged in your shot. It’s what makes a shot visually pleasing and engaging. Here are some basic principles of composition:

Rule of Thirds: Imagine your frame is divided into nine equal parts by two equally spaced horizontal lines and two equally spaced vertical lines. The rule of thirds suggests that you should place the most important elements in your scene along these lines, or at the points where they intersect. This technique can make your shots more balanced and interesting.

Leading Lines: Leading lines are lines that lead the viewer’s eye to the main subject of the shot. They can be anything from a trail in the woods to the line of sight of a person in your shot. Using leading lines can help guide the viewer’s attention and add depth to your shots.

Depth: Adding depth to your shots can make them more three-dimensional and engaging. You can create depth by including objects in the foreground, middle ground, and background of your shot.

Camera Angles

Using different camera angles can add variety and interest to your videos. Here are some common camera angles you might use:

Eye Level: This is the most natural camera angle, as it’s how we typically see the world. It’s great for capturing the hunter’s perspective.

Low Angle: A low angle shot is taken from below the subject, looking up. It can make the subject look powerful or imposing.

High Angle: A high angle shot is taken from above the subject, looking down. It can make the subject look vulnerable or small.

Point of View (POV): A POV shot shows the scene from the subject’s perspective. It’s a great way to immerse the viewer in the hunting experience.

Remember, variety is key. Using a mix of different camera angles can make your videos more dynamic and engaging.

Steady Footage

Steady footage is key, especially when you’re filming in the great outdoors. Shaky footage can be distracting and hard to watch. Here are some tips for capturing steady footage:

Use a Tripod or Monopod: A tripod or monopod can help stabilize your camera and capture steady shots. They’re especially useful for long shots or when you’re waiting for the perfect moment to capture a scene.

Use Image Stabilization: Many cameras and lenses come with built-in image stabilization, which can help reduce camera shake.

Practice Smooth Camera Movements: If you’re moving the camera, do it smoothly and slowly. Quick or jerky movements can make your footage look shaky.

Learning Resources

If you’re interested in learning more about filming techniques, there are plenty of resources available:

Online Courses: Websites like Coursera, Udemy, and MasterClass offer online courses on videography. These courses can teach you everything from the basics of filming to advanced techniques.

Books: There are many great books on videography, such as “How to Shoot Video That Doesn’t Suck” by Steve Stockman and “The Filmmaker’s Handbook” by Steven Ascher and Edward Pincus.

YouTube: YouTube itself is a great resource for learning about filming. Channels like Film Riot, DSLR Video Shooter, and D4Darious offer tutorials and tips on a wide range of filming techniques.

Remember, practice makes perfect. The more you film, the better you’ll get. So grab your camera and start shooting!

Editing: Editing is a crucial part of the video creation process. It’s where you take your raw footage and transform it into a story that captivates your audience. Here are some key aspects of video editing:

Cutting and Trimming

The first step in editing is usually to cut and trim your footage. This involves removing unnecessary parts of your clips and arranging the remaining parts in a way that tells your story effectively.

For example, if you have a long clip of you stalking a deer, you might want to cut it down to just the most exciting moments. Or if you have multiple clips of the same scene from different angles, you might want to cut between them to add variety and interest.

Transitions

Transitions are how you move from one clip to another. The simplest transition is a cut, where one clip immediately follows another. But there are many other types of transitions you can use, such as fades, wipes, and dissolves.

When used effectively, transitions can guide the viewer’s attention, indicate the passage of time, or create a certain mood or atmosphere. However, it’s important not to overuse transitions. Often, a simple cut is the best choice.

Color Correction and Grading

Color correction is the process of adjusting the colors in your footage to make them look more natural. This might involve adjusting the white balance, contrast, saturation, and other color settings.

Color grading, on the other hand, is more about creating a certain look or mood. For example, you might use color grading to give your footage a warm, golden look during a sunrise hunt, or a cool, blue look during a night hunt.

Sound Editing

Sound is a crucial part of any video. Good sound editing can enhance the viewer’s experience and make your video more immersive.

This might involve adding music or sound effects, adjusting the volume levels, or cleaning up background noise. Remember, the sound should support the visuals, not distract from them.

Learning Resources

If you’re new to video editing, there are plenty of resources available to help you learn:

Software Tutorials: Most editing software comes with tutorials or guides to help you get started. For example, Adobe Premiere Pro, one of the most popular editing software, has a range of tutorials available on the Adobe website.

Online Courses: Websites like Coursera, Udemy, and LinkedIn Learning offer online courses on video editing. These courses can teach you everything from the basics of editing to advanced techniques.

YouTube: YouTube is a great resource for learning about editing. Channels like Cinecom.net, Justin Odisho, and Peter McKinnon offer tutorials and tips on a wide range of editing techniques.

Books: There are many great books on video editing, such as “In the Blink of an Eye” by Walter Murch and “The Technique of Film and Video Editing” by Ken Dancyger.

Remember, editing is a skill that takes time and practice to master. Don’t be discouraged if your first few videos aren’t perfect. Keep learning, keep experimenting, and most importantly, keep having fun with it!

Balancing Entertainment and Education

One of the challenges of creating content for a YouTube hunting channel is striking the right balance between entertainment and education. Your viewers come to your channel to learn about hunting, but they also want to be entertained.

Try to make your educational content as engaging as possible. Use storytelling techniques, add humor where appropriate, and keep your explanations clear and concise. Show your viewers the action, not just the end result. Let them share in your triumphs and failures, your surprises and disappointments.

On the other hand, don’t forget to provide value in your entertaining content. Even when you’re sharing a thrilling hunting adventure, look for opportunities to educate your viewers. Share tips and insights, explain your decisions, and show your viewers what they can learn from your experiences.

The Power of Storytelling

Storytelling is a powerful tool in your content creation arsenal. A good story can captivate your viewers, draw them into your world, and make your videos more memorable.

Every hunt has a story. There’s the anticipation as you prepare for the hunt, the thrill of the chase, the challenges you overcome, and the satisfaction (or disappointment) of the outcome. Share these stories with your viewers. Let them experience the hunt with you, not just watch it.

Remember, stories are about more than just what happened. They’re about how you felt, what you learned, and how you grew. Don’t be afraid to show your viewers the real you—the excitement, the frustration, the joy, and the disappointment. It’s this authenticity that will make your stories resonate with your viewers and keep them coming back for more.

Creating quality content takes time, effort, and a lot of practice. But with each video you create, you’ll learn and improve. And remember, the most important thing is to enjoy the process. After all, you’re sharing your passion for hunting with the world. And there’s nothing more rewarding than that.

Building Your Brand

Creating a successful YouTube hunting channel isn’t just about producing great videos—it’s also about building a strong, recognizable brand. Your brand is what sets you apart from other channels, makes you memorable to your viewers, and creates a consistent experience across all your videos and social media platforms. Here’s how to build your brand:

Define Your Brand

Before you can build your brand, you need to define it. What is your channel all about? What makes it unique? What values and personality do you want to convey?

Think about your Unique Selling Proposition (USP) and how it translates into a brand. For example, if your USP is your humorous take on hunting, your brand might be fun, lighthearted, and a bit irreverent.

Create a Compelling Channel Name

Your channel name is often the first thing people see, so make it count. It should be memorable, easy to spell and pronounce, and give some indication of what your channel is about.

For example, if you specialize in bow hunting, you might include “bow hunting” in your channel name. Or if you’re known for your hunting adventures in a specific region, you might include the name of that region.

Design a Memorable Logo

Your logo is a visual representation of your brand. It should be simple, memorable, and work well at small sizes (since it will often be viewed as a small icon on YouTube).

Consider hiring a professional designer to create your logo, or use an online logo maker like Canva or Adobe Spark. Remember to keep your logo consistent across all your social media platforms.

Write a Compelling Channel Description

Your channel description is where you tell viewers what your channel is about and why they should subscribe. It should be concise, engaging, and include relevant keywords to help viewers find your channel.

Talk about the kind of content you create, who it’s for, and what makes it unique. And don’t forget to include a call to action, like “Subscribe for new hunting videos every week!”

Be Consistent

Consistency is key in branding. Your videos, thumbnails, logo, channel description, social media posts—all should reflect your brand.

This doesn’t mean everything has to look the same. Rather, they should feel like they’re part of the same family. For example, you might use the same color scheme or font across all your thumbnails, or start each video with the same intro.

Engage with Your Audience

Your brand isn’t just about how you present yourself—it’s also about how you interact with your viewers. Engage with your audience in a way that reflects your brand.

For example, if your brand is friendly and approachable, make sure to respond to comments, ask for feedback, and show appreciation for your viewers. If your brand is more professional, you might focus on providing expert advice and insights.

Building a brand takes time and effort, but it’s worth it. A strong brand can help you attract and retain viewers, stand out from the competition, and create a community around your channel. So start building your brand today, and watch your YouTube hunting channel grow!

Growing Your Audience

Growing your audience is one of the most challenging—and rewarding—aspects of running a YouTube hunting channel. It’s about more than just getting views. It’s about building a community of loyal viewers who look forward to your videos, engage with your content, and help spread the word about your channel. Here’s how to grow your audience:

Consistency is Key

One of the most effective ways to grow your audience is to post consistently. When you stick to a regular posting schedule, your viewers know when to expect new content and are more likely to keep coming back.

But consistency isn’t just about frequency—it’s also about quality. Strive to maintain a consistent level of quality in all your videos. This doesn’t mean every video has to be perfect, but your viewers should know they can always count on you for engaging, high-quality content.

Engage with Your Audience

Engaging with your audience is crucial for building a loyal community of viewers. Respond to comments on your videos, ask for feedback, and show appreciation for your viewers. This not only makes your viewers feel valued, but it also encourages them to engage more with your content.

You can also engage with your audience by incorporating their ideas and feedback into your videos. For example, you might do a Q&A video where you answer viewer questions, or a challenge video where you try a hunting technique suggested by a viewer.

Promote Your Channel

Promoting your channel can help you reach a wider audience. Share your videos on your social media platforms, collaborate with other YouTubers, or consider paid advertising if your budget allows.

Remember, promotion isn’t just about getting more views—it’s about getting more of the right views. Target your promotional efforts towards people who are likely to be interested in your content and become loyal viewers.

Master SEO

Search Engine Optimization (SEO) is a powerful tool for growing your audience. By using keywords effectively in your video titles, descriptions, and tags, you can help your videos appear in relevant search results and attract more viewers.

Start by researching keywords that are relevant to your content and popular among your target audience. Tools like Google Trends, Keyword Planner, and TubeBuddy can help with this.

Once you’ve identified your keywords, incorporate them into your video titles, descriptions, and tags. But remember, while keywords can help your videos get found, it’s engaging, high-quality content that will keep viewers watching.

Experiment and Adapt

Finally, don’t be afraid to experiment with different strategies and adapt based on what works. What works for one channel might not work for another, and what works today might not work tomorrow. Keep an eye on your analytics, listen to your audience, and be willing to change your approach if necessary.

Growing your audience takes time, effort, and a lot of patience. But with each new subscriber, like, and comment, you’ll know you’re on the right track. So keep creating, keep engaging, and keep growing. Your audience is out there, waiting to discover your channel.

Thinking Outside the Box

In the world of YouTube, standing out from the crowd can be a challenge. With so many hunting channels vying for viewers’ attention, thinking outside the box can be the key to capturing and holding that attention. Here are some innovative strategies to consider:

Collaborate with Other Channels

Collaborations can be a great way to reach a wider audience. Consider partnering with other YouTube channels—hunting-related or otherwise—for a joint video or series. This can introduce your channel to a whole new group of potential viewers who already enjoy similar content.

Leverage Trends

Stay up-to-date with the latest trends in the hunting community and on YouTube in general. This could be anything from a popular challenge or a new hunting technique, to a viral video format or meme. Incorporating trends into your videos can make them more relevant and appealing to viewers.

Create a Series

Consider creating a series or recurring segment on your channel. This could be anything from a weekly hunting tip to a multi-part guide to hunting a specific type of game. A series can give viewers something to look forward to and provide a sense of continuity across your videos.

Host Live Streams

Live streams can be a great way to connect with your audience in real-time. You could host a Q&A session, share a live hunting experience, or simply chat with your viewers. Live streams can create a sense of community and make viewers feel more connected to you.

Diversify Your Content

While your channel may be focused on hunting, don’t be afraid to diversify your content. You could share videos about related topics, like camping gear reviews, cooking recipes for game, or conservation issues. Diversifying your content can make your channel more interesting and attract a wider range of viewers.

Use Analytics

YouTube provides a wealth of analytics about your videos and viewers. Use this data to understand what’s working and what’s not. Which videos get the most views? When do people stop watching? What demographics are you reaching? Use this information to refine your content and targeting strategies.

Starting a YouTube hunting channel is a journey, and like any journey, it’s full of learning opportunities. So stay curious, stay creative, and most importantly, stay true to your passion for hunting. With dedication and a little outside-the-box thinking, you can create a channel that’s not only successful, but also a true reflection of you.

Monetizing Your Channel

Turning your passion for hunting and video creation into a source of income can be a rewarding aspect of running a YouTube channel. Here’s how you can monetize your channel:

YouTube Partner Program

The YouTube Partner Program allows creators to earn money from ads on their videos, channel memberships, and YouTube Premium revenue. To be eligible for the program, you need to:

  • Live in a country or region where the YouTube Partner Program is available.
  • Have more than 4,000 valid public watch hours in the last 12 months.
  • Have more than 1,000 subscribers.
  • Have a linked AdSense account.

Once you’re part of the program, you can earn money from ads on your videos. You can control the types of ads that appear on your videos, and you’ll receive a share of the revenue generated by these ads.

Sponsorships

Sponsorships can be a significant source of income for YouTube creators. Companies may pay you to feature their product in your video, mention them, or place their logo in your video.

When seeking sponsorships, focus on companies that are relevant to your content and audience. For example, hunting gear companies, outdoor brands, or local businesses related to hunting or the outdoors.

Remember, transparency is crucial with sponsorships. Make sure to disclose any sponsored content to your viewers and comply with YouTube’s guidelines on paid promotions.

Merchandise

Selling merchandise is another way to monetize your YouTube channel. This could be anything from t-shirts and hats with your channel logo, to hunting gear you recommend, to digital products like eBooks or guides.

You can sell merchandise directly through your YouTube channel with YouTube’s merchandise shelf feature, or through a third-party platform.

Affiliate Marketing

Affiliate marketing involves promoting a product and earning a commission for any sales made through your referral link. Many online retailers, including hunting and outdoor gear stores, have affiliate programs you can join.

Include your affiliate links in your video descriptions and let your viewers know that they can support your channel by shopping through these links.

Channel Memberships and Patreon

Channel memberships allow your viewers to pay a monthly fee for access to exclusive content, badges, new emojis, and other perks. This can be a great way to generate a steady income from your most loyal viewers.

Alternatively, you can set up a Patreon account where your fans can support you with a monthly donation in exchange for exclusive content and perks.

Remember, monetizing your channel should never come at the expense of creating content that you’re passionate about and that your viewers love. The most successful YouTube channels are those that have found a way to balance monetization with authentic, engaging content.

Navigating Challenges

Starting a YouTube hunting channel can be an exciting adventure, but like any journey, it comes with its share of challenges. Here are some potential hurdles you might face and tips on how to navigate them:

Dealing with Negative Comments

As your channel grows, you’re definitely going to encounter negative comments or criticism. While it can be disheartening, it’s important to remember that this is a part of putting yourself out there on the internet. Here’s how to handle it:

  • Stay Positive: Respond to negativity with positivity. Thank the person for their feedback and move on. Remember, you’re not going to please everyone, and that’s okay.
  • Learn from Constructive Criticism: Not all negative comments are bad. Some can provide valuable feedback that can help you improve your videos. Learn to differentiate between constructive criticism and plain negativity.
  • Ignore Trolls: Some people post negative comments just to provoke a reaction. Don’t feed the trolls—ignore them and focus on the positive comments instead.

Maintaining a Consistent Posting Schedule

Consistency is key to growing your audience, but maintaining a regular posting schedule can be challenging, especially when you’re balancing other commitments. Here’s how to manage it:

  • Plan Ahead: Plan your videos in advance and try to have a few videos ready to go in case something comes up and you can’t film.
  • Set Realistic Goals: Don’t overcommit yourself. It’s better to have a consistent schedule of one video per week than to burn out trying to post every day.
  • Batch Your Work: Try to film multiple videos at once, or do all your editing in one sitting. Batching your work can make the process more efficient.

Managing Public Perception

Hunting can be a controversial topic, and it’s important to be mindful of how your videos might impact public perception and local hunting areas. Here’s how to handle it:

  • Promote Ethical Hunting: Use your platform to promote ethical hunting practices. Show respect for the animals you hunt and the environment you hunt in.
  • Educate Your Viewers: Use your videos to educate your viewers about hunting. Explain why hunting is necessary for wildlife management and how it contributes to conservation.
  • Be Mindful of Local Impact: Be mindful of the potential impact of your videos on local hunting areas. Avoid revealing specific locations to prevent overhunting.

Starting a YouTube hunting channel can be challenging, but don’t let these hurdles deter you. With passion, perseverance, and a little bit of planning, you can navigate these challenges and create a successful channel that you’re proud of.

Conclusion

Embarking on the journey of starting a YouTube hunting channel is an adventure filled with creativity, community, and the shared passion for the great outdoors. From defining your unique selling proposition, creating quality content, building a recognizable brand, growing your audience, to navigating the challenges, each step is a testament to your dedication and love for hunting.

But remember, the journey doesn’t end with hitting the ‘Upload’ button. It’s a continuous process of learning, adapting, and growing. It’s about engaging with your audience, sharing your experiences, and contributing positively to the hunting community. It’s about turning your passion into a platform that educates, entertains, and inspires.

So, to all the aspiring hunting YouTubers out there, it’s time to take that first step. Your unique hunting experiences, your stories, your voice, have a place in the YouTube community. Equip yourself with the right gear, arm yourself with knowledge, and most importantly, fuel your journey with passion.

The woods are waiting, your audience is waiting. So, go ahead, start your YouTube hunting channel, and let the world join you in your hunting adventures. Because every hunt has a story, and the world is eager to hear yours.

Frequently Asked Questions

Q1: What equipment do I need to start a YouTube hunting channel?

A: Starting a YouTube hunting channel requires a basic set of filming equipment, including a good quality camera, a tripod or camera arm, a microphone for clear audio, and editing software for post-production. As you progress, you might also consider investing in additional equipment like a drone for aerial shots, action cameras for different perspectives, and lighting equipment for low-light conditions.

Q2: How often should I post videos on my channel?

A: Consistency is key when it comes to growing your audience. It’s less about the quantity and more about the regularity. Whether you choose to post daily, weekly, or bi-weekly, stick to a schedule that is manageable for you and aligns with the expectations of your audience.

Q3: How can I grow my audience?

A: Growing your audience involves a combination of producing high-quality, engaging content, optimizing your videos for search (SEO), promoting your channel on other platforms, and engaging with your audience through comments and social media.

Q4: How can I make money from my YouTube hunting channel?

A: There are several ways to monetize your YouTube channel. These include ad revenue from the YouTube Partner Program, sponsorships and brand partnerships, affiliate marketing, selling merchandise, and offering channel memberships or Patreon subscriptions.

Q5: How can I handle negative comments or criticism?

A: Negative comments or criticism can be tough, but it’s part of putting yourself out there on the internet. Stay positive, learn from constructive criticism, and ignore trolls or negativity that doesn’t serve you.

Q6: How can I promote ethical hunting practices on my channel?

A: Use your platform to educate viewers about ethical hunting practices. Show respect for the animals and the environment, explain the role of hunting in conservation and wildlife management, and always adhere to local hunting regulations in your videos.

Q7: What if I don’t have any experience with video editing?

A: Video editing is a skill that can be learned over time. There are numerous online resources, tutorials, and courses that can help you get started. Start with basic editing techniques and gradually progress to more advanced methods as you gain more experience and confidence.

Posted on

The Ultimate Angler’s Paradise: Unraveling the Magic of Fishing Piers in the Outer Banks

Fishing Piers in Obx

Today, we’re setting our compass towards the Outer Banks, a place that’s more than just a picturesque coastline. It’s a fisherman’s dream, a paradise where the Atlantic Ocean cradles a treasure trove of marine life, and the piers stand as gateways to an angler’s ultimate adventure.

Imagine this: As daybreak unfolds, the sky is brushed with strokes of vibrant orange and delicate pink. You’re standing on a sturdy pier that stretches out into the vast, sparkling Atlantic Ocean overlooking miles of the most beautiful beaches. The cool morning breeze carries the salty tang of the sea, and in your hands, you feel the familiar weight of your trusted fishing rod. As you cast your line into the depths, you can’t help but feel a rush of anticipation. The drum bite is red hot right now! This is fishing in the Outer Banks, an experience that’s as thrilling as it is serene.

But what makes fishing from a pier in the Outer Banks so special? Why do anglers from all corners of the globe flock here? Join us as we dive into the magic of these fishing piers, each with its unique allure and bountiful offerings. Whether you’re a seasoned angler who wants to take a break from driving on the beach in your 4×4 or a curious beginner, we promise this journey will leave you hooked. So, let’s reel in the adventure together!

Outer Banks Fishing Pier: A Historic Haven for Anglers

Let’s start our journey with the Outer Banks Fishing Pier. This historic pier, stretching out into the Atlantic, has been a favorite among anglers since its establishment in 1959. It’s more than just a structure; it’s a testament to the rich fishing culture of the Outer Banks.

The Outer Banks Fishing Pier offers a unique blend of convenience and charm. With its well-maintained structure and easy access, it’s a haven for both novice and experienced anglers. The pier is open 24 hours during the fishing season, allowing you to fish under the starlit sky or the warm glow of the rising sun.

But what truly sets this pier apart is the variety of fish that call these waters home. From the elusive Cobia to the mighty King Mackerel, the Outer Banks Fishing Pier offers a thrilling challenge for every angler. And let’s not forget the joy of reeling in a hefty Red Drum, a prized catch in these parts!

The pier also offers a range of amenities to enhance your fishing experience. Need to stock up on bait or rent some gear? The pier’s tackle shop has got you covered. And after a rewarding day of fishing, you can unwind at the on-site restaurant, Fish Heads Bar and Grill, where you can savor fresh seafood while enjoying panoramic ocean views.

Jennette’s Pier: Where Fishing Meets Conservation

Next on our journey is Jennette’s Pier, a state-of-the-art, 1,000-foot concrete marvel that’s not just a fishing pier, but a testament to the Outer Banks’ commitment to conservation and education.

Jennette’s Pier is a part of the North Carolina Aquarium Society, and it beautifully marries the thrill of fishing with the importance of marine conservation. As you cast your line into the deep blue waters, you’re not just fishing; you’re becoming a part of a larger mission to protect and understand our oceans.

The pier is home to a variety of fish species, making it a paradise for anglers. Whether it’s the thrill of battling a Bluefish or the joy of catching a Spanish Mackerel, fishing at Jennette’s Pier is an adventure that’s as diverse as the marine life beneath the waves.

But the allure of Jennette’s Pier extends beyond fishing. The pier houses interactive educational exhibits, aquariums, and even renewable energy demonstrations, offering a unique blend of fun and learning. It’s a place where you can reel in a big catch in the morning, learn about wind energy in the afternoon, and end the day watching a stunning Outer Banks sunset.

The pier also boasts a well-stocked tackle shop for all your fishing needs, and the pier staff are always ready to share tips and insights to help you make the most of your fishing experience.

Nags Head Fishing Pier: A Blend of Tradition and Fun

As we continue our journey, we arrive at Nags Head Fishing Pier, one of the oldest fishing piers in the Outer Banks. Established in 1947, this pier has been a beloved fishing spot for generations of anglers.

Nags Head Fishing Pier extends 750 feet into the Atlantic, offering ample space for you to cast your line into the Atlantic Ocean. The pier is home to a variety of fish species, including Flounder, Speckled Trout, and the much sought-after Sheepshead. Whether you’re a seasoned angler or a beginner, the thrill of reeling in a catch at Nags Head Fishing Pier is an experience to cherish and one you’ll always remember forever.

But the charm of Nags Head Fishing Pier extends beyond fishing. The pier is also home to a delightful restaurant and tiki bar. After a day of fishing, you can unwind with a refreshing drink, savor delicious seafood, and enjoy the stunning ocean views. The restaurant is famous for its breakfast, so make sure to start your fishing day with a hearty meal!

Moreover, the pier hosts various events throughout the year, adding a dash of fun to your fishing adventure. From fishing tournaments to live music, there’s always something exciting happening at Nags Head Fishing Pier.

Avalon Fishing Pier: A Hub for Anglers and Spectators Alike

Our journey now takes us to Avalon Fishing Pier, a popular spot in Kill Devil Hills that’s been attracting anglers and spectators since 1958. Stretching 696 feet into the Atlantic, this pier offers a unique fishing experience that’s steeped in the rich heritage of the Outer Banks.

Avalon Fishing Pier is known for its variety of fish species. From Spot and Croaker to the larger Cobia and King Mackerel, the pier offers a thrilling challenge for every angler. The excitement of casting your line into these waters and the anticipation of what you might reel in is an experience that keeps anglers coming back.

But Avalon Fishing Pier isn’t just for anglers. It’s also a great spot for those who simply want to enjoy the stunning ocean views or watch the anglers in action. The pier’s wooden planks have seen countless sunrise watchers, bird watchers, and families enjoying a leisurely stroll.

The pier also features a bait and tackle shop, where you can find all your fishing essentials. Whether you need to rent a rod, buy some bait, or pick up a souvenir, the friendly staff at the shop are always ready to assist.

Rodanthe Fishing Pier: A Serene Escape for Anglers

Our journey through the Outer Banks’ fishing piers now brings us to the charming village of Rodanthe. Here, the Rodanthe Fishing Pier stands as a beacon for anglers seeking a serene and rewarding fishing experience.

The Rodanthe Fishing Pier extends into the Atlantic, offering a tranquil spot for fishing. The pier is known for its variety of fish species, including Sea Mullet, Bluefish, and the occasional Cobia. Whether you’re casting your line in the early morning calm or under the starlit sky, fishing at Rodanthe Fishing Pier is a peaceful retreat from the hustle and bustle.

But the allure of Rodanthe Fishing Pier isn’t limited to fishing. The pier also offers stunning views of the Atlantic Ocean, making it a great spot for sunrise and sunset viewing. The sight of the sun rising or setting over the vast ocean, with the rhythmic sound of the waves in the background, is a truly mesmerizing experience.

The pier also features a well-stocked tackle shop, ensuring that you have all the essentials for a great fishing trip. And if you’re new to fishing, the friendly staff are always ready to share tips and help you get started.

Avon Fishing Pier: A Family-Friendly Fishing Adventure

Next on our journey is Avon Fishing Pier, located in the heart of Hatteras Island. This pier, extending 600 feet into the Atlantic, is a favorite among families and seasoned anglers alike.

Avon Fishing Pier offers a unique fishing experience with a variety of fish species. From the feisty Bluefish to the elusive King Mackerel, the pier promises a thrilling challenge for every angler. And with the pier’s open-air layout, you can enjoy the cool sea breeze and the stunning ocean views as you wait for the fish to bite.

But what truly sets Avon Fishing Pier apart is its family-friendly atmosphere. The pier is home to an arcade, where kids and adults can enjoy a variety of games. The pier also hosts fishing tournaments throughout the year, adding a dash of friendly competition to your fishing adventure.

The pier features a tackle shop, where you can find all your fishing essentials. Whether you need to rent a rod, buy some bait, or pick up a souvenir, the friendly staff at the shop are always ready to assist.

Conclusion: The End of Our Journey, The Start of Yours

As we reel in our lines and pack up our gear, we find ourselves at the end of our journey through the fishing piers of the Outer Banks. We’ve walked along the wooden planks of history at Nags Head Fishing Pier, marveled at the conservation efforts at Jennette’s Pier, and soaked in the serene atmosphere of Rodanthe Fishing Pier. We’ve experienced the family-friendly charm of Avon Fishing Pier and the bustling energy of Avalon Fishing Pier.

Each pier, with its unique allure and bountiful offerings, has painted a vivid picture of what fishing in the Outer Banks truly means. It’s not just about the thrill of the catch or the anticipation as you cast your line into the deep blue waters. It’s about the stories that unfold on these piers, the memories created, and the sense of community that binds every angler.

Fishing in the Outer Banks is an adventure that’s as diverse as the marine life beneath the waves. It’s a journey that takes you beyond the shore, into a world where the rhythm of the waves and the call of the sea create a symphony that’s as captivating as it is serene.

So, as we conclude our journey, we invite you to begin yours. Choose your pier, pack your gear, and set out on an adventure that promises to be as thrilling as it is rewarding. Whether you’re a seasoned angler or a curious beginner, the fishing piers of the Outer Banks are waiting to welcome you.

And remember, every cast is a story waiting to unfold. So, here’s to the stories you’ll tell, the memories you’ll create, and the adventure that awaits you in the Outer Banks. Tight lines, fellow anglers!

Cast Your Line with Us!

We hope our journey through the fishing piers of the Outer Banks has inspired you to embark on your own fishing adventure. Whether you’re a seasoned angler or a beginner, we’d love to hear about your experiences. Share your favorite fishing spots, your biggest catches, or your most memorable fishing stories with us. And if you have any questions or need some tips for your next fishing trip, don’t hesitate to ask. We’re here to help you reel in the big one!

FAQ

Q: What’s the best time to fish in the Outer Banks? A: While fishing in the Outer Banks is great year-round, the best time depends on the type of fish you’re after. Spring and fall are generally considered the best times for a variety of species.

Q: Do I need a fishing license to fish from a pier in the Outer Banks? A: No, you don’t need a fishing license to fish from a paid fishing pier in the Outer Banks. The piers have their own blanket licenses that cover all anglers.

Q: What should I bring for a fishing trip to the Outer Banks? A: Besides your fishing gear, it’s a good idea to bring sun protection, comfortable clothing, snacks, and plenty of water. Most piers have bait and tackle shops where you can rent gear or buy bait.

Q: Can I bring my kids to the fishing piers? A: Absolutely! Many of the piers in the Outer Banks are family-friendly and offer amenities like arcades and restaurants.

Q: What types of fish can I catch in the Outer Banks? A: The Outer Banks is home to a variety of fish species, including Flounder, Red Drum, Bluefish, Spanish Mackerel, King Mackerel, and Cobia, among others.

Remember, the Outer Banks is more than a fishing destination; it’s a community of anglers ready to share their love for the sea. So, cast your line, reel in the adventure, and become a part of our fishing family. We can’t wait to hear your fishing tales!

Posted on 1 Comment

Best Beaches of the Outer Banks: A Symphony of Sand and Surf

Best Beaches in the Outer Banks

Imagine a place where the sun paints the sky with hues of gold and crimson as it kisses the horizon, where the ocean whispers tales of the deep, and the sand beneath your feet is a canvas of countless stories. Welcome to the Outer Banks (OBX) – a 200-mile-long string of barrier islands off the coast of North Carolina, where every grain of sand has a tale to tell, and every wave brings a new adventure.

OBX is not just a destination; it’s a feeling, a state of mind. It’s the gentle lullaby of the ocean waves that puts the world to rest, the salty breeze that carries secrets of the deep, and the warm sand that invites you to leave your worries behind and embrace the joy of the present moment.

But here’s the thing about the Outer Banks – it’s not a one-size-fits-all kind of place. Each beach here has its own personality, its own rhythm. Some are lively, buzzing with energy and laughter. Others are serene, offering a tranquil haven for those seeking solitude and peace. Some are perfect for adventurous water sports, while others are best suited for leisurely strolls and quiet reflection.

Choosing the right beach in OBX is like choosing the right melody for your song – it sets the tone for your entire experience. That’s why we’re here, to guide you through the symphony of sand and surf that is the Outer Banks, helping you find the perfect beach that resonates with your rhythm, your preferences, and your idea of a perfect beach getaway.

So, let’s embark on this journey together, exploring the allure of the Outer Banks, one beach at a time.

Understanding the OBX Beaches: A Geographical and Diverse Perspective

The Outer Banks, often referred to as OBX, is a geographical marvel. This chain of barrier islands stretches over 200 miles along the North Carolina coast, forming a thin line between the Atlantic Ocean and the mainland. The OBX is a unique blend of serene villages, bustling towns, and untouched natural landscapes, all connected by the scenic NC Highway 12, also known as the “Beach Road”.

The OBX is divided into the Northern Beaches, Roanoke Island, Hatteras Island, and Ocracoke Island. The Northern Beaches include towns like Corolla, known for its wild horses, and Duck, famous for its quaint shopping and dining scene. Roanoke Island is steeped in history, housing the town of Manteo and the site of the first English colony in the New World. Hatteras Island is home to several charming villages and the iconic Cape Hatteras Lighthouse. Finally, Ocracoke Island, accessible only by ferry, is a world of its own with a unique island charm.

But the real stars of the OBX are its beaches. The Outer Banks beaches are as diverse as they are beautiful. From the bustling, activity-filled beaches of Nags Head and Kitty Hawk to the tranquil, untouched shores of Portsmouth Island, there’s a beach for every kind of vacationer in the OBX.

Some beaches, like those in Duck and Corolla, are primarily accessible to those staying in the adjacent communities, offering a more private beach experience. Others, like those in Kill Devil Hills and Nags Head, are dotted with public access points, lifeguard stands, and nearby amenities, making them popular choices for families and day visitors.

For the adventurous, the 4×4 beaches of Carova offer an off-the-beaten-path OBX experience. Accessible only by four-wheel-drive vehicles, these beaches are where you can spot the famous wild horses of the OBX, making for an unforgettable Outer Banks vacation.

In the Outer Banks, North Carolina beaches are more than just stretches of sand—they’re gateways to unique experiences. Each beach has its own charm, its own allure, and its own way of etching unforgettable memories in the hearts of those who visit.

Detailed Reviews of Top OBX Beaches

Nags Head: A Blend of History and Beach Bliss

Nags Head is one of the oldest and most well-known towns in the Outer Banks. It’s known for its beautiful beaches, rich history, and variety of attractions and activities.

The beaches in Nags Head are wide and sandy, with plenty of space for beachgoers to spread out and enjoy the sun and surf. The waters are generally calm, making it a great spot for swimming, sunbathing, and beachcombing. Lifeguards are on duty during the summer season, providing an extra layer of safety for families.

One of the unique features of Nags Head is its sand dunes. The town is home to Jockey’s Ridge State Park, which boasts the tallest natural sand dune system in the Eastern United States. Visitors can climb the dunes for a stunning view of the surrounding area, go hang gliding, or enjoy a picnic.

Beyond the beach, Nags Head offers a range of attractions and activities. The town is home to Jennette’s Pier, a popular spot for fishing and sightseeing. The pier also has a research center that offers educational programs and exhibits.

Nags Head also offers excellent opportunities for shopping and dining. The town has a variety of shops, ranging from beach gear and clothing to antiques and art. There are also numerous restaurants, offering everything from fresh seafood to international cuisine.

Kitty Hawk: The Quintessential Summer Beach

Kitty Hawk is located in the northern part of the Outer Banks and is known for its wide, sandy beaches. The town itself is a blend of residential areas and local businesses, giving it a friendly, community feel.

The beaches in Kitty Hawk are a major draw. They are well-maintained and offer plenty of space for beachgoers to spread out and enjoy the sun and surf. The waves here are typically gentle, making it a great spot for swimming, boogie boarding, and beginner surfers. Lifeguards are on duty during the summer season, adding an extra layer of safety for families and swimmers.

One of the unique features of Kitty Hawk is its beach access. There are numerous public beach accesses throughout the town, many of which offer free parking. Some accesses also have additional amenities like picnic areas, restrooms, and showers.

Beyond the beach, Kitty Hawk offers a range of outdoor activities. The Kitty Hawk Woods Coastal Reserve is a 1,800-acre maritime forest that offers hiking, birdwatching, and kayaking. There’s also a popular bike path that runs through the town, perfect for a leisurely ride or a morning jog.

For history buffs, Kitty Hawk is notable as the place where the Wright Brothers first achieved powered flight in 1903. The Wright Brothers National Memorial in nearby Kill Devil Hills commemorates this historic event.

With its beautiful beaches, outdoor activities, and friendly atmosphere, Kitty Hawk offers a classic Outer Banks vacation experience.

Avon Beach: A Low-Key Family Paradise

Avon Beach, located on Hatteras Island, is known for its laid-back atmosphere and beautiful, wide sandy beaches. It’s a favorite among families and those seeking a peaceful beach experience.

One of the main advantages of Avon Beach is its proximity to a range of rental homes. Many of these homes are located right on the beach, offering stunning views and easy access to the sand and surf. This makes it incredibly convenient for families or groups who want to enjoy a beachfront stay.

The beach itself is typically less crowded than some of the more northern Outer Banks beaches, providing plenty of space for beach games, sunbathing, and building sandcastles. The waters are generally calm, making it a good spot for swimming and boogie boarding.

Fishing is also popular in Avon, with the Avon Fishing Pier providing a great spot to cast a line. The pier also has a bait and tackle shop and offers fishing lessons for beginners.

Nearby, you’ll find a variety of local shops and restaurants, as well as a grocery store, making it easy to stock up on vacation essentials or grab a bite to eat.

With its relaxed vibe, beautiful beaches, and convenient amenities, Avon Beach offers a delightful Outer Banks beach experience.

Ocracoke Island: A Secluded Beach Haven

Ocracoke Island is located at the southernmost end of the Outer Banks and is accessible only by ferry, private boat, or plane, which adds to its secluded charm. The island is known for its 16 miles of pristine, undeveloped beaches, which are consistently ranked among the best in the nation.

The beaches on Ocracoke Island are wide and sandy, with rolling dunes and the occasional cluster of seashells. The surf is typically gentle, making it a great spot for swimming and sunbathing. The beaches are also less crowded than those in other parts of the Outer Banks, offering a peaceful and relaxing beach experience.

One of the unique features of Ocracoke’s beaches is the opportunity for shelling. The island’s location and the ocean currents often bring a variety of shells to its shores, making it a favorite spot for shell collectors.

Beyond the beach, Ocracoke Village offers a range of attractions. The Ocracoke Lighthouse, one of the oldest operating lighthouses in the United States, is a must-see. The village also has a variety of shops, restaurants, and galleries, offering a glimpse into the island’s vibrant local culture.

Ocracoke Island is also known for its history. It was a favorite haunt of the infamous pirate Blackbeard, and the island hosts an annual Pirate Jamboree in his honor.

With its beautiful, secluded beaches, rich history, and charming village, Ocracoke Island offers a unique and memorable Outer Banks experience.

Rodanthe: A Quiet, Family-Friendly Retreat

Rodanthe, located on Hatteras Island, is known for its serene, natural beauty and its wide, sandy beaches. It’s the northernmost village on the island and offers a peaceful retreat for those seeking a quiet beach vacation.

The beaches in Rodanthe are typically less crowded than those in other parts of the Outer Banks, providing plenty of space for beachgoers to relax and enjoy the sun and surf. The waters are generally calm, making it a great spot for swimming, sunbathing, and beachcombing.

Rodanthe is perhaps best known for its starring role in the movie “Nights in Rodanthe,” based on the novel by Nicholas Sparks. The house used in the film, known as the Serendipity House, is a popular attraction and can be seen perched on the beach.

Beyond the beach, Rodanthe offers a range of outdoor activities. The area is a popular spot for fishing, with both surf fishing and charter fishing opportunities available. The Pamlico Sound, located on the west side of the island, is a favorite spot for windsurfing and kiteboarding.

For nature lovers, the Pea Island National Wildlife Refuge is located just north of Rodanthe and offers excellent birdwatching opportunities. The refuge is home to a variety of bird species and also serves as a nesting site for sea turtles.

With its quiet beaches, outdoor activities, and Hollywood connection, Rodanthe offers a unique and tranquil Outer Banks experience.

Waves: A Beach with a Split Personality

Waves is located on Hatteras Island, nestled between the towns of Rodanthe and Salvo. It’s a small, quiet community that’s known for its beautiful beaches and excellent water sports opportunities.

The beach in Waves is wide and sandy, with plenty of space for beachgoers to spread out and enjoy the sun and surf. The waters are generally calm, making it a great spot for swimming and sunbathing. The beach is also less crowded than those in other parts of the Outer Banks, offering a peaceful and relaxing beach experience.

What sets Waves apart is its access to both the Atlantic Ocean and the Pamlico Sound. This unique location makes it a hotspot for water sports. The ocean side is popular for surfing and boogie boarding, while the sound side is renowned for its windsurfing and kiteboarding. In fact, Waves is considered one of the best kiteboarding spots on the East Coast.

There are several local businesses that offer water sports lessons and equipment rentals, making it easy for visitors of all skill levels to try out these activities. Whether you’re a seasoned pro or a complete beginner, you can enjoy the thrill of riding the waves or the wind in this Outer Banks town.

Beyond the beach, Waves offers a range of amenities including local restaurants, shops, and vacation rentals. It’s a great base for exploring the rest of Hatteras Island and the Outer Banks.

With its beautiful beaches, water sports opportunities, and laid-back vibe, Waves offers a unique and enjoyable Outer Banks experience.

Carova Beach: A Wild and Unique Experience

Carova Beach, often referred to as part of Corolla, is located in the northernmost part of the Outer Banks. It’s unique in that it’s only accessible by 4×4 vehicles or by boat, which adds to its secluded and untouched charm.

One of the main attractions of Carova Beach is its wild horses. These horses are believed to be descendants of Spanish mustangs that were shipwrecked in the 16th century. Today, they roam freely in the area, often seen grazing in the grass or walking along the beach. It’s a truly unique sight that adds a touch of magic to the Carova Beach experience.

The beach itself is wide and sandy, with rolling dunes and the occasional cluster of seashells. The surf is typically gentle, making it a great spot for swimming and sunbathing. The beaches are also less crowded than those in other parts of the Outer Banks, offering a peaceful and relaxing beach experience.

Fishing is popular in Carova, with the surf providing a great spot to cast a line. The area is also popular for off-road beach driving, with miles of beach to explore. However, visitors are reminded to respect the local wildlife and adhere to the rules regarding speed limits and designated driving areas.

Nearby, in the town of Corolla, you’ll find a range of amenities including shops, restaurants, and attractions like the historic Corolla Lighthouse and the Whalehead Club.

With its wild horses, beautiful, secluded beaches, and 4×4 adventure, Carova Beach offers a unique and memorable Outer Banks experience.

Cape Point Beach: A Historic Fishing Spot

Cape Point Beach is located in Buxton, near the iconic Cape Hatteras Lighthouse. It’s often referred to as the point where the two major Atlantic currents, the Labrador Current and the Gulf Stream, meet. This unique geographical position makes Cape Point one of the best fishing spots in the Outer Banks.

The beach itself is wide and sandy, with plenty of room for beachgoers to spread out and enjoy the sun and surf. The water at Cape Point is typically warmer than at other Outer Banks beaches, thanks to the influence of the Gulf Stream.

One of the main attractions near Cape Point Beach is the Cape Hatteras Lighthouse. This historic lighthouse is the tallest brick lighthouse in North America and a beloved symbol of the Outer Banks. Visitors can climb the lighthouse for a stunning view of the surrounding seascape.

Cape Point Beach is also a popular spot for off-road vehicle (ORV) use. There are designated ORV routes that allow visitors to drive on the beach, making it easier to transport fishing gear or beach supplies. However, certain areas may be closed during sea turtle and bird nesting seasons to protect these species.

It’s worth noting that the currents at Cape Point can be strong, and rip currents are common. Swimmers should be cautious and heed any warnings or advisories.

With its excellent fishing, warm waters, and proximity to the Cape Hatteras Lighthouse, Cape Point Beach offers a unique and enjoyable Outer Banks beach experience.

Portsmouth Island: An Isolated Adventure

Portsmouth Island is one of the barrier islands in the Outer Banks, located south of Ocracoke Island. It’s unique in that it’s entirely uninhabited by humans, offering a truly remote and natural beach experience. The island is only accessible by private boat or ferry, adding to its secluded charm.

One of the main attractions on Portsmouth Island is the ghost town of Portsmouth Village. Established in the late 18th century, Portsmouth was once a bustling port village. However, over time, the population dwindled, and today, the village stands as a well-preserved ghost town. Visitors can explore the historic buildings, including homes, a post office, and a church, all maintained by the National Park Service.

The beaches on Portsmouth Island are wide and uncrowded, perfect for those seeking solitude and unspoiled natural beauty. The island is also a popular spot for camping, with visitors allowed to camp anywhere on the beach.

For wildlife enthusiasts, Portsmouth Island is a haven. The island is part of the Cape Lookout National Seashore, which is home to a variety of bird species, making it a great spot for birdwatching. You might also spot sea turtles, as the island is a nesting site for several species.

Fishing is another popular activity on Portsmouth Island. The surf, sound, and inshore waters offer opportunities to catch a variety of fish, including red drum, flounder, and speckled trout.

Visiting Portsmouth Island is like stepping back in time. Its isolation, natural beauty, and historical significance make it a unique part of the Outer Banks experience.

Duck’s Private Beaches: An Exclusive Outer Banks Experience

Duck, located in the northern Outer Banks, is known for its beautiful beaches, upscale amenities, and vibrant local culture. It’s a favorite among families and those seeking a peaceful yet sophisticated beach vacation.

The beaches in Duck are wide and sandy, with gentle surf that’s perfect for swimming and sunbathing. One unique feature of Duck’s beaches is that they are private for residents and guests only, which helps maintain a quiet and uncrowded atmosphere. Lifeguards are on duty during the summer season, providing an extra layer of safety for families.

Beyond the beach, Duck offers a range of attractions and activities. The town boasts a vibrant arts scene, with several galleries and arts events throughout the year. The Duck Town Park and Boardwalk is a popular spot, offering beautiful views of the Currituck Sound, a playground, and a path that winds through maritime forest and willow swamps.

Duck is also known for its dining scene. The town offers a variety of restaurants, ranging from casual eateries to upscale dining options, many of which offer stunning waterfront views. Seafood is a specialty in Duck, with many restaurants serving fresh, locally caught fare.

For shoppers, Duck offers a range of options. The town’s shopping scene is characterized by its locally owned boutiques and specialty shops, where you can find everything from beach gear and clothing to gourmet food and wine.

With its beautiful private beaches, upscale amenities, and vibrant local culture, Duck offers a unique and sophisticated Outer Banks experience.

Planning Your Visit to the OBX

Best Time to Visit

The Outer Banks is a year-round destination, but the best time to visit depends on what you’re looking for. If you’re after warm weather and don’t mind the crowds, summer (June to August) is the peak season. The beaches are vibrant, and the water is warm, perfect for swimming and sunbathing.

For those who prefer a quieter, more relaxed atmosphere, spring (April to June) and fall (September to November) are excellent choices. The weather is mild, and the beaches are less crowded. Plus, you might get to witness the spectacular migration of birds in the spring or enjoy the stunning fall foliage.

Winter in the Outer Banks is a season of tranquility. While it’s too cold for swimming, it’s a great time for beach walks, fishing, and enjoying the serene beauty of the OBX without the crowds.

Accommodation Options

The Outer Banks offers a wide range of accommodation options to suit every budget and preference. From luxurious oceanfront homes and quaint bed and breakfasts to budget-friendly motels and campgrounds, you’ll find it all here.

For those planning a family vacation or traveling in a large group, rental homes are a popular choice. They come in all sizes and offer the comfort and convenience of a home away from home. Many of these homes are located right on the beach, offering stunning views and easy access to the sand and surf.

If you prefer the convenience of a hotel, there are plenty of options available, including well-known chains and unique, locally-owned establishments.

For the more adventurous, camping is a great way to connect with nature. The Outer Banks has several campgrounds, including those with beach access, offering a unique way to experience the OBX.

Tips for Booking in Advance

The Outer Banks is a popular destination, and accommodations can fill up quickly, especially during the peak summer season. It’s a good idea to book your stay well in advance to secure your preferred dates and accommodation type.

When booking, consider the location and proximity to the beaches and other attractions you want to visit. If you’re planning to visit during the off-peak season, check whether the amenities and attractions you’re interested in will be open.

Remember, the Outer Banks is a long string of islands, so getting from one end to the other can take some time. Plan your stay accordingly to make the most of your Outer Banks vacation.

Activities Beyond the Beach

The Outer Banks isn’t just about the beaches. While the sandy shores and sparkling waters are undoubtedly the main draw, there’s a wealth of other attractions and activities to explore. From historical sites and local cuisine to water sports and wildlife, the OBX has something for everyone.

Historical Sites

The Outer Banks is steeped in history. Visit the Wright Brothers National Memorial in Kill Devil Hills, where Orville and Wilbur Wright made their historic first flight. Explore the Fort Raleigh National Historic Site, the location of the first English settlement in the New World. Don’t miss the iconic Cape Hatteras Lighthouse, the tallest brick lighthouse in North America, offering panoramic views of the surrounding seascape.

Local Cuisine

Foodies will love the Outer Banks for its fresh seafood and local cuisine. Try the catch of the day at one of the many seafood restaurants, or sample the local specialty, Carolina-style barbecue. Don’t forget to try an Outer Banks original – the apple ugly, a deliciously sweet and sticky pastry.

Water Sports

If you’re a fan of water sports, the Outer Banks is your playground. The area is renowned for its surfing, with consistent waves suitable for all skill levels. The soundside waters are perfect for paddleboarding, kayaking, and kiteboarding. For a unique OBX experience, try your hand at crabbing or clamming.

Wildlife Encounters

The Outer Banks is a haven for wildlife. Take a 4×4 tour to see the wild horses of Corolla, direct descendants of Spanish mustangs that swam ashore from shipwrecks centuries ago. Visit the Pea Island National Wildlife Refuge, a vital stopover for migratory birds. Or take a dolphin-watching tour and see these playful creatures in their natural habitat.

Shopping and Art

The Outer Banks boasts a vibrant arts scene and unique shopping experiences. Browse the local art galleries and craft shops, where you can find everything from handcrafted jewelry to local artwork. Visit the quaint shops in Duck and Corolla, where you’ll find unique gifts, beachwear, and OBX souvenirs.

Fishing and Boating

With the Atlantic Ocean on one side and the Pamlico Sound on the other, the Outer Banks is a fisherman’s paradise. Charter a boat for a day of deep-sea fishing, or cast a line from one of the many fishing piers. For a relaxing day on the water, rent a pontoon boat and explore the sound at your own pace.

The Outer Banks is more than just a beach destination. It’s a place where history, nature, and adventure come together to create a vacation experience like no other. So come, explore, and discover the magic of the OBX beyond the beach.

Wrapping Up Your OBX Adventure

The Outer Banks of North Carolina is a treasure trove of sun, sand, and surf. Each beach, from Nags Head’s historic charm to the wild beauty of Carova Beach, offers a unique slice of beach bliss. Whether you’re a thrill-seeker, a nature lover, or someone seeking relaxation, there’s a beach here that’s just right for you.

But the allure of the OBX extends beyond its stunning beaches. The rich history, delectable local cuisine, abundant water sports, and diverse wildlife add layers of intrigue and excitement to your beach vacation. The vibrant arts scene and unique shopping experiences offer delightful diversions from the beach.

Planning your visit to the OBX is key to making the most of your vacation. Choose the right time to visit, find your perfect accommodation, and book in advance to ensure a smooth and enjoyable trip.

The Outer Banks beckons with its promise of unforgettable beach days and beyond-the-beach adventures. So pack your bags, set your out-of-office reply, and get ready to immerse yourself in the OBX experience. Your perfect beach awaits!

Join the OBX Adventure

Now that you’ve got a taste of what the Outer Banks has to offer, it’s time to start planning your own OBX adventure. Whether you’re a first-time visitor or a seasoned OBX vacationer, there’s always something new to discover in this beautiful beach destination.

We’d love to hear about your favorite OBX experiences, your top beach picks, and any tips you might have for fellow travelers. Share your stories with us and be sure to reach out to us on social media. And if you have any questions about planning your OBX vacation, don’t hesitate to ask. We’re here to help you make your Outer Banks vacation as memorable as possible.

Frequently Asked Questions

What is the best time to visit the Outer Banks?

The Outer Banks is a year-round destination, but the best time to visit depends on your preferences. Summer is the peak season with warm weather and bustling beaches. Spring and fall offer milder weather and fewer crowds, while winter is a time of tranquility and serene beauty.

What are the best beaches in the Outer Banks?

The Outer Banks boasts a variety of beaches, each with its own unique charm. Some of the top beaches include Nags Head, Kitty Hawk, Avon Beach, Ocracoke Island, and Carova Beach. The best beach for you depends on your preferences for activities, atmosphere, and amenities.

What activities are there in the Outer Banks besides beachgoing?

The Outer Banks offers a wealth of activities beyond the beach, including visiting historical sites, sampling local cuisine, engaging in water sports, encountering wildlife, shopping, and exploring the arts scene.

What types of accommodations are available in the Outer Banks?

The Outer Banks offers a wide range of accommodations, including rental homes, hotels, bed and breakfasts, and campgrounds. The best option depends on your budget, group size, and preferences.

How can I see the wild horses of the Outer Banks?

The wild horses of the Outer Banks can be seen in the northern beaches, particularly in Corolla and Carova Beach. The best way to see them is on a guided 4×4 tour, which ensures you can view the horses safely and responsibly.

Posted on

The Ultimate Guide to Early Season Deer Hunting: Strategies, Tactics, and Tips

Early Season Velvet Buck

As the summer heat begins to fade and the first signs of fall start to make their appearance, a unique opportunity arises for deer hunters. The early season, a period that is often overlooked, presents both a challenge and an opportunity for those willing to understand and adapt to the unique behaviors of deer during this transition. 

Early season deer hunting can indeed be a tough game. Mature whitetail bucks aren’t driven by the breeding instincts of the rut, nor are they forced to food sources by harsh winter conditions. Instead, they are in a state of flux, changing their main food sources and sometimes even their core areas as summer gives way to fall. 

However, it’s not all uphill. The early season also offers a distinct advantage: the deer haven’t been subjected to hunting pressure yet. This means that dedicated whitetail hunters who have spent their summer and early fall scouting meticulously stand a real chance at bagging a mature buck before the full intensity of the hunting season kicks in and turns the deer nocturnal. 

In this article, we will take a look into the best strategies, tactics, and tips for early season deer hunting. We’ll explore how to pattern bucks before the season starts, understand their dietary shifts, set up stands effectively, and adapt different strategies for private and public lands. Whether you’re a seasoned hunter or a beginner, this guide will equip you with the knowledge you need to make the most of the early deer hunting season. So, let’s embark on this journey and uncover the secrets of successful early season deer hunting.

Pre-Season Preparation: Patterning Bucks, Trail Cameras, and Food Plots

Preparation is the key to success in any endeavor, and early season deer hunting is no exception. The pre-season period is a crucial time to gather information, strategize, and set up for the hunting season. Let’s dive into the key aspects of pre-season preparation: patterning bucks, using trail cameras, and creating food plots.

Patterning Bucks

Patterning bucks before the season starts is an essential part of your hunting strategy. This involves understanding the behavior and movement patterns of mature bucks in your hunting area. Remember, mature bucks are experts at avoiding hunters, which is how they’ve managed to grow old. To outsmart them, you need to put in the work before the hunting season starts.

Start by identifying potential feeding and bedding areas. Look for signs of deer activity such as tracks, droppings, rubs, and scrapes. Pay attention to the times of day when you observe the most activity, as this can give you clues about the deer’s daily routines.

Using Trail Cameras Effectively

Trail cameras are a vital tool for patterning bucks. They provide a way to monitor deer activity without disturbing the area with your presence. However, simply setting up a trail camera isn’t enough; you need to use it effectively.

First, consider the placement of your trail cameras. They should be set up around major food sources and trails leading to these food sources. It’s also beneficial to place cameras near potential bedding areas to capture movement during the early morning and late evening.

Second, make sure your cameras are set to capture images at regular intervals, as well as when triggered by motion. This will provide a comprehensive picture of deer activity throughout the day. My camera of choice is the Tactacams and I like to place them 8-10ft up in a tree to keep them out of sight of anyone with sticky fingers.

Using a cell cam allows you to limit leaving scent in the area as the season gets closer. Pictures and even videos get sent straight to your phone eliminating the need to pull sd cards to check them.

Interpreting Trail Camera Pictures

Trail camera pictures can provide a wealth of information, but only if you know how to interpret them. They can tell you if nice bucks are around, but more importantly, they can help you figure out where those bucks are heading, where they’re coming from, and where they might be vulnerable.

Look for patterns in the pictures. Are there certain times when the bucks are more active? Are they frequently seen with other deer? Are there specific areas they seem to prefer? All these details can help you build a picture of the buck’s habits and preferences. Possibly even set up an excel spreadsheet to analyze the data and possibly identify any common patterns you may have missed otherwise.

Creating Food Plots

In addition to natural food sources, consider creating food plots to attract and nourish deer. Food plots are areas where you plant specific crops that are known to be attractive to deer. They not only provide a reliable food source for deer but also create an excellent opportunity for you to observe and pattern their behavior.

Choose plants that are known to be favored by deer and suitable for the soil and climate in your area. Some popular choices include clover, brassicas, and certain grains. Remember, the goal is to supplement the deer’s natural diet, not replace it.

Pre-season preparation is all about gathering information and using it to understand the behavior of the deer in your hunting area. By patterning bucks, using trail cameras effectively, interpreting the pictures they capture, and creating food plots, you can set yourself up for a successful early season deer hunt.

Understanding Deer Diet in the Early Season: From High-Protein Plants to High-Calorie Carbohydrates

Understanding the dietary habits of deer is crucial for successful hunting, especially during the early season when food sources and eating patterns undergo significant changes. Let’s look into the dietary transition of deer, the role of acorns, crops, soft mast, and the importance of water sources.

The Dietary Transition of Deer

As the seasons change from summer to fall, so does the diet of deer. During the summer months, deer primarily feed on high-protein plants, such as legumes, forbs, and leaves of woody plants. This protein-rich diet helps them grow and maintain their body mass and, for bucks, develop antlers.

However, as fall approaches, their dietary needs shift. They begin to transition from high-protein plants to high-calorie carbohydrates. This shift is driven by the need to build up fat reserves to survive the upcoming winter. Carbohydrates provide more energy than protein, making them ideal for this purpose.

The Significance of Acorns in the Deer Diet

Acorns play a significant role in the deer diet during the early season. They are a rich source of carbohydrates and fats, making them an excellent food for building up energy reserves. In fact, where they occur, acorns are often the most preferred natural food of whitetail deer.

There are two general groups of oak trees that produce acorns: white and red oaks. White oak acorns tend to drop earlier and contain fewer tannins, making them sweeter and more attractive to deer. Once the white oak acorns are depleted, deer will switch to red oak acorns. Be sure you can identify both types of oak trees and plan to hunt them accordingly. White oaks in the early season could be the ticket to harvesting an early season buck.

The Role of Crops and Soft Mast in the Deer Diet

In addition to acorns, crops and soft mast also play a crucial role in the deer diet during the early season. Crops such as corn and soybeans represent an almost limitless source of carbohydrates. Deer may overlook hard, dry soybeans in the early season, until a prolonged rain softens them up.

Soft mast, like apples, persimmons, and berries, may be far more important as an early-season food source than many hunters realize. These fruits are high in sugar and are very attractive to deer. When these fruits ripen and fall to the ground, deer will often prefer them over other food sources.

The Importance of Focusing on Water Sources

Water is a vital part of the deer diet, especially during the early season when temperatures can still be quite high. Deer need to drink water daily, and they will often visit water sources before they go out to feed. Focusing your scouting on water can be especially effective during drought years. A camera over a known water source can produce excellent results.

Understanding the dietary habits of deer during the early season can significantly improve your hunting success. By focusing on the right food and water sources, you can predict deer movements more accurately and increase your chances of a successful hunt.

Best Stand Setups for Early Season Deer: Adapting to Changing Conditions and Choosing the Right Sites

Choosing the right stand setup is a critical part of early season deer hunting. The early season is characterized by rapidly changing conditions, and your stand setup needs to adapt accordingly. Let’s explore the importance of adapting to changing conditions and the six best stand sites for early season deer hunting. This is a prime example why I saddle hunt. Being able to stay mobile and adapt to changing conditions will keep you one step ahead.

Adapting to Changing Conditions

In the early season, conditions can change quickly. Food sources shift as crops mature and are harvested, acorns start to drop and are depleted, and deer behavior changes as they adjust to these shifts. As a hunter, you need to be observant and reactive. 

For instance, if you notice that a certain food source is no longer attracting deer, it’s time to move your stand to a different location. Similarly, if you observe that deer are changing their travel routes, you need to adjust your stand setup accordingly. 

Six Best Stand Sites for Early Season Deer Hunting

1. Agricultural Fields: Deer are attracted to agricultural fields, especially in the early season when these fields are full of crops. However, it’s important to avoid spooking the deer when entering and exiting your stand. Consider setting up your stand at the edge of the field, where you can observe the deer without disturbing them. If you haven’t read my article on thermals be sure to give it a read. Deer will often come from the low side of a field where thermals tend to fall.

2. Food Plots: If you’ve created food plots, these can be excellent stand sites. Deer are likely to visit these plots regularly, providing you with plenty of opportunities for a shot. Try to position your stand near cover, so you can approach and leave without being detected.

3. Bedding-Area Funnels: These are areas where the landscape naturally funnels deer movement, often between bedding areas and food sources. Setting up a stand in these areas can be highly effective, but it’s a high-risk, high-reward strategy. You need to be very careful not to disturb the deer and ruin the spot.

4. Stands of Oaks:As we’ve discussed, acorns are a major food source for deer in the early season. Setting up a stand in an area with plenty of oak trees can be very productive. However, you need to be ready to move your stand as the availability of acorns changes.

5. Soft Mast: Areas with soft mast trees (like apple, pear, or persimmon trees) can also be excellent stand sites. Deer love these fruits and will often visit these areas regularly. However, keep in mind that soft mast generally doesn’t last long once it hits the forest floor. When the fruit is gone, it’s time to move your stand.

6. Scrape Lines: These are areas where bucks have scraped the ground and nearby trees with their antlers, often along their travel routes. Setting up a stand near a scrape line can be a good strategy, especially if the scrape line is fresh. However, keep in mind that deer generally visit early-season scrapes after dark.

The best stand setup for early season deer hunting depends on a variety of factors, including the available food sources, the deer’s travel routes, and the changing conditions. By being observant, adaptable, and strategic in your stand placement, you can increase your chances of a successful hunt.

Strategies for Hunting on Private Land: Keeping Bucks Calm and Avoiding Unnecessary Pressure

Hunting on private land offers a unique set of opportunities and challenges. The strategies you employ on private land can significantly differ from those used on public land, particularly in terms of managing pressure on the deer. Let’s look into the importance of keeping targeted bucks calm and relaxed and share some tips from experienced hunters on how to avoid unnecessary pressure.

Keeping Targeted Bucks Calm and Relaxed

One of the key strategies when hunting on private land is to keep targeted bucks as calm and relaxed as possible. Unlike public lands, where deer are often accustomed to human activity, deer on private lands can be more sensitive to disturbances. Any unusual activity, such as the scent or noise of a hunter, can put them on high alert and make them more elusive and turn nocturnal.

To keep bucks calm, it’s crucial to minimize your presence in their habitat. This means limiting the amount of time you spend in the hunting area before and during the hunting season. When you do need to enter the area, for instance, to set up stands or check trail cameras, try to do so quietly and quickly to minimize disturbance. Take your scent free routine seriously. I always leave all my camo in a bin covered with pine needles in my car. I never wear my hunting clothes until I get out of my truck and it’s time to hunt.

Avoiding Unnecessary Pressure

Experienced hunters understand that applying too much pressure can drastically reduce their chances of success. Here are some tips to avoid unnecessary pressure:

1. Smart Scouting: Use cellular trail cameras to monitor deer activity without physically being in the area. When you do need to scout in person, try to leave as little trace as possible. Avoid walking through bedding areas or prime feeding spots where you might leave your scent.

2. Careful Stand Placement: Place your stands in locations that allow you to enter and exit without disturbing the deer. This often means setting up along the edges of the deer’s core area, rather than in the middle of it.

3. Playing the Wind: Always consider the wind direction when hunting. You want to approach your stand from downwind to prevent your scent from reaching the deer. 

4. Limiting Hunting Pressure: Resist the urge to hunt every day. Overhunting an area can make deer wary and change their patterns. Instead, hunt strategically, focusing on the best weather conditions and times of day.

5. Silence is Golden: Be as quiet as possible when you’re in the hunting area. Noise can alert deer to your presence and make them more cautious. Use quiet gear, move slowly and deliberately, and avoid unnecessary talking or noise.

Hunting on private land requires a careful, strategic approach that prioritizes keeping deer calm and relaxed. By minimizing your presence, avoiding unnecessary pressure, and using smart hunting strategies, you have increased odds of killing that deer you’re after.

Strategies for Hunting on Public Land: A Different Approach for Rewarding Results

Hunting on public land is a different game altogether compared to private land hunting. It presents its own set of challenges, but also unique rewards. The thrill of harvesting a mature buck on public land, where the pressure is high and the odds are often stacked against you, is unmatched. Let’s discuss the different approach needed for hunting on public land and share some tips on how to hunt aggressively and effectively.

A Different Approach for Public Land Hunting

Public land hunting requires a different mindset and strategy. Unlike private lands, public lands are accessible to everyone, which means the deer there are usually more pressured and wary. They’re accustomed to human activity and have adapted to avoid it. This requires hunters to be more aggressive and proactive in their strategies.

On public land, deer are less likely to follow predictable patterns, especially mature bucks. They often take advantage of thick cover and rugged terrain to avoid hunters. Therefore, successful public land hunting often involves going deeper and hunting harder than others are willing to.

Hunting Aggressively and Effectively on Public Land

Here are some tips from experienced hunters on how to hunt aggressively and effectively on public land:

1. Scout Thoroughly: Spend as much time as you can scouting. Look for signs of deer activity, such as tracks, droppings, rubs, and scrapes. Use topographic maps and aerial imagery to identify potential bedding areas, feeding areas, and travel corridors. 

2. Go Deep: Don’t be afraid to venture into the more remote, hard-to-reach areas of public land. These areas often receive less hunting pressure and can be a refuge for mature bucks. 

3. Hunt the Thick Stuff: Mature bucks on public land often take refuge in thick cover. Don’t shy away from these areas. Instead, learn how to hunt them effectively. This might involve still-hunting or setting up a stand or ground blind near the edge of the thick cover.

4. Be Mobile: Being able to move quickly and adapt to changing conditions is crucial on public land. Using a tree saddle and staying mobile is the best advice I can give you. If a location isn’t producing results, don’t hesitate to move.

5. Play the Wind: As with any type of deer hunting, always consider the wind direction. Try to approach your hunting area and set up your stand or blind with the wind in your favor.

6. Hunt During Off-Peak Times: Hunting during the week or during inclement weather can increase your chances of success, as there will likely be fewer hunters on public land during these times. With my schedule hunting Mon-Fri isn’t an issue and that’s when I find less hunters to be in the woods.

Top Tips for Early Season Deer Hunting: Patience, Stalking, and Strategic Positioning

Here are some practical tips for successful early season deer hunting, emphasizing the importance of patience, stalking, and strategic positioning.

1. Patience is Key: Deer hunting, especially in the early season, is a game of patience. Deer are not as active during the early season as they are during the rut, so it may take longer for them to appear. Don’t get discouraged if you don’t see deer right away. Stay patient and keep your eyes peeled for any signs of movement. They are not being highly pressured yet so their guard still may be down.

2. Master the Art of Stalking: Stalking involves slowly and quietly moving through the hunting area in search of deer. This can be an effective strategy in the early season when deer are often feeding in open areas. Practice moving quietly and staying low to avoid detection.

3. Strategic Positioning: Where you position yourself can have a significant impact on your hunting success. Try to set up near food sources, water sources, and travel corridors that deer are likely to use. Use the wind to your advantage by positioning yourself downwind of the deer’s expected location.

4. Scout Ahead of Time: Scouting before the season starts can give you valuable information about deer movement patterns, preferred food sources, and potential stand locations. Use trail cameras, look for signs of deer activity, and observe from a distance to avoid disturbing the area.

5. Be Ready to Adapt: Conditions can change quickly in the early season, and successful hunters are those who can adapt. Be ready to change your strategy based on the weather, deer activity, and hunting pressure.

6. Practice Good Scent Control: Deer have an excellent sense of smell, and if they catch your scent, they’re likely to avoid the area. Use scent control products and play the wind to prevent deer from detecting your presence.

7. Use the Right Equipment: Having the right equipment can make a big difference in your hunting success. This includes a reliable weapon, appropriate clothing for the weather, and comfortable and quiet footwear for stalking.

8. Take Advantage of the Weather: Deer activity can increase dramatically after a cold front or a rainstorm. If the weather changes, consider heading out to your stand, as the deer are likely to be on the move.

Embrace the Challenge and Thrive in the Early Season

As we bring this article to a close, it’s important to reflect on the key points we’ve discussed and how they can shape your early season deer hunting experience. The early season is a unique period that presents both challenges and opportunities. It’s a time of transition for deer, marked by shifts in their behavior, diet, and movement patterns.

We’ve explored the importance of pre-season preparation, including patterning bucks, effectively using trail cameras, interpreting their pictures, and creating food plots. We’ve talked about the dietary transition of deer from high-protein plants to high-calorie carbohydrates, highlighting the significance of acorns, crops, soft mast, and water sources in their diet.

We’ve discussed the best stand setups for early season deer hunting, emphasizing the need to adapt to changing conditions and identifying the six best stand sites. We’ve also shared strategies for hunting on both private and public lands, underscoring the importance of keeping targeted bucks calm and relaxed on private lands and the need for a more aggressive approach on public lands.

Finally, we’ve shared practical tips for successful early season deer hunting, focusing on the importance of patience, stalking, and strategic positioning. Each of these elements plays a crucial role in your hunting success, and mastering them can significantly enhance your early season deer hunting experience.

However, the most important takeaway from this guide is the need for adaptability. The early season is a dynamic period, and the most successful hunters are those who can adapt to the changing conditions and deer behavior.

As you prepare for the early season, we encourage you to apply these strategies and tips. Remember, every hunting experience is a learning opportunity. So, embrace the challenge, learn from each hunt, and continually refine your strategies. The thrill of harvesting a mature buck in the early season is well worth the effort, and with these tips in your arsenal, you’re well on your way to a successful hunt.

Thank you for joining us on this journey through early season deer hunting. We hope this guide has been informative and inspiring. Now, it’s time to put these strategies into action. Happy hunting!

Join the Conversation and Stay Connected

Now that we’ve shared our insights and strategies for early season deer hunting, we’d love to hear from you. Do you have your own tips or experiences you’d like to share? What strategies have worked for you in the early season? Your insights could be invaluable to other hunters in our community. Let’s learn from each other and continue to grow as a community of passionate and dedicated hunters. Join us on Facebook or at Youtube.com/@DickOutdoors

If you found this guide helpful and want to stay updated with the latest hunting tips and guides, we invite you to subscribe to our newsletter. By subscribing, you’ll receive regular updates and insights directly to your inbox, helping you stay informed and prepared for every hunting season.

Remember, hunting is not just about the harvest. It’s about the thrill of the chase, the connection with nature, and the continual learning and growth. So, let’s embark on this journey together. Subscribe today, join the conversation, and let’s make every hunting season a memorable one. Happy hunting!

Posted on

Climbing to New Heights: A Review of the Tethrd Roll UP

Tethrd RollUp, One Stick Hunting, Tethrd Roll Up Pouch, Saddle Hunting

Imagine a world where your hunting gear is not just functional, but also versatile, lightweight, and incredibly efficient. Welcome to the world of the Tethrd Roll UP. This ingenious piece of equipment is a game-changer for one stick climbers and saddle hunters alike, designed with a keen eye for detail and a deep understanding of your needs in the great outdoors.

Priced at a reasonable $44.99, the Tethrd Roll UP is not just an accessory, but an investment in your hunting experience. It’s readily available, waiting to revolutionize your outdoor adventures and take your hunting experience to new heights.

Demonstration of how to set up the Tethrd RollUp Pouch for one sticking. The video showcases how perfectly a 30ft rope and a MadRock Safeguard fits into the pouch, emphasizing the product’s efficiency and convenience for climbers.

Design and Functionality: A Masterpiece of Efficiency and Versatility

From the moment I laid my hands on the Tethrd Roll UP, I knew I had found something special. Its design speaks volumes about its purpose—every inch, every feature, meticulously crafted for the one stick hunters. Yet, its versatility is what truly sets it apart. 

One of the standout features of the Roll UP is its thoughtful design for one stick hunting. It’s purpose-built to hold 40′ of 8-10mm rope, a testament to its commitment to serving the needs of hunters. But the magic of the Roll UP doesn’t stop there. Its universal design allows for fast and efficient packing and organizing, no matter your climbing method. This isn’t just a product—it’s a tool that understands and enhances your climbing experience.

In my time with the Tethrd Roll UP, I’ve come to appreciate its design and functionality. It’s not just a product I use—it’s a product I love, and one that has transformed my climbing experience.

The video showcases the use of a Tethrd Saddle in conjunction with a Madrock Safeguard for one sticking, in preparation for the 2022 deer season.


Unique Features: The Magic is in the Details

The Tethrd Roll UP isn’t just about functionality—it’s about innovation. One of the features that I’ve grown to love is its smart, easy access storage. It’s a simple yet powerful design element that makes a world of difference when you’re out in the field. The storage is designed to not only complement one stick hunter requirements but also accommodate any other saddle hunting gear. It’s this kind of thoughtful design that sets the Roll UP apart from the crowd.

But the Roll UP doesn’t stop at storage. It goes a step further to enhance your packing and organizing systems, regardless of your climbing method. Whether you’re a one stick hunter or prefer another method, the Roll UP is designed to make your packing and organizing fast and efficient. It’s a product that works with you, adapting to your needs and making your climbing experience smoother and more enjoyable.

One of the standout features of the Roll UP is its universal MOLLE attachment points. This feature ensures compatibility with all standard MOLLE/PALS systems, allowing you to attach the Roll UP to a pack, a saddle, or wherever you prefer to store your gear. It’s this level of versatility and adaptability that makes the Roll UP a truly unique product in the hunting gear market.

In my experience, the Tethrd Roll UP is more than just a product—it’s a testament to innovation and thoughtful design. Its unique features have not only enhanced my hunting experience but also made me a more efficient and organized climber allowing me to spend more time hunting instead of setting up and disassembling.

Additional Benefits: Security and Lightness in One Package

Beyond its unique features and functionality, the Tethrd Roll UP brings additional benefits to the table that further enhance its value. One such benefit is the added security provided by the zippered pockets. These pockets offer a secure place to store your gear, giving you peace of mind as you navigate your climbing adventures. It’s a small detail, but one that makes a significant difference in the overall user experience.

But perhaps one of the most impressive aspects of the Roll UP is its lightweight nature. Weighing in at a mere 4.8 ounces, the Roll UP is a testament to Tethrd’s commitment to creating products that are not only functional and versatile but also incredibly lightweight. This lightweight design makes the Roll UP easy to carry and truly makes you a lightweight mobile hunter, making your climbing experience more enjoyable and less strenuous.

Safety Precautions: Climbing with Confidence

When it comes to climbing, safety is paramount. Tethrd understands this, and their advice and recommendations for using the Roll UP reflect their commitment to user safety. They strongly advise against using any gear outside of the manufacturer’s specifications. This includes ropes, hardware, and other gear that may have been heavily modified or used outside of their intended purposes.

Tethrd also emphasizes the importance of professional supervision when trying new climbing methods. They recommend always remaining connected to the tree with a lineman rope and/or tether as you ascend and descend. It’s also crucial to reduce slack in your ropes as much as possible to maintain control and stability.

These safety precautions are not just guidelines—they’re essential practices for safe and responsible climbing. 

Remember, the Tethrd Roll UP is an incredible tool, but like any climbing equipment, it must be used responsibly. Always prioritize safety, follow Tethrd’s recommendations, and enjoy your climbing adventures with the assurance that you’re using your gear correctly.

Wrapping Up: The Tethrd Roll UP Experience

As we journey through the world of one sticking, the Tethrd Roll UP stands out as a beacon of innovation, functionality, and versatility. Its design caters to the needs of single stick climbers while also offering a universal appeal to all saddle hunters. The smart, easy access storage, the universal MOLLE attachment points, and the lightweight design all come together to create a product that truly enhances the climbing experience.

But the Roll UP is more than just its features—it’s the added security of the zippered pockets, the emphasis on safety, and the overall commitment to improving your hunting experience that truly sets it apart. It’s a product that understands and adapts to your needs, making your climbing adventures more efficient, organized, and enjoyable.

With the Tethrd Roll UP, I’ve come to appreciate not just its features, but the thought and care that went into its design. It’s a product I love, and one that has truly transformed my one sticking experience. Whether you’re a one stick climber or a saddle hunter, the Tethrd Roll UP is a game-changer that promises to elevate your climbing adventures to new heights.

Design and Functionality: A Masterpiece of Efficiency and Versatility

From the moment I laid my hands on the Tethrd Roll UP, I knew I had found something special. Its design speaks volumes about its purpose—every inch, every feature, meticulously crafted for the one stick hunters. Yet, its versatility is what truly sets it apart. 

One of the standout features of the Roll UP is its thoughtful design for one stick hunting. It’s purpose-built to hold 40′ of 8-10mm rope, a testament to its commitment to serving the needs of hunters. But the magic of the Roll UP doesn’t stop there. Its universal design allows for fast and efficient packing and organizing, no matter your climbing method. This isn’t just a product—it’s a tool that understands and enhances your climbing experience.

In my time with the Tethrd Roll UP, I’ve come to appreciate its design and functionality. It’s not just a product I use—it’s a product I love, and one that has transformed my climbing experience.

Unique Features: The Magic is in the Details

The Tethrd Roll UP isn’t just about functionality—it’s about innovation. One of the features that I’ve grown to love is its smart, easy access storage. It’s a simple yet powerful design element that makes a world of difference when you’re out in the field. The storage is designed to not only complement one stick hunter requirements but also accommodate any other saddle hunting gear. It’s this kind of thoughtful design that sets the Roll UP apart from the crowd.

But the Roll UP doesn’t stop at storage. It goes a step further to enhance your packing and organizing systems, regardless of your climbing method. Whether you’re a one stick hunter or prefer another method, the Roll UP is designed to make your packing and organizing fast and efficient. It’s a product that works with you, adapting to your needs and making your climbing experience smoother and more enjoyable.

One of the standout features of the Roll UP is its universal MOLLE attachment points. This feature ensures compatibility with all standard MOLLE/PALS systems, allowing you to attach the Roll UP to a pack, a saddle, or wherever you prefer to store your gear. It’s this level of versatility and adaptability that makes the Roll UP a truly unique product in the hunting gear market.

In my experience, the Tethrd Roll UP is more than just a product—it’s a testament to innovation and thoughtful design. Its unique features have not only enhanced my hunting experience but also made me a more efficient and organized climber allowing me to spend more time hunting instead of setting up and disassembling.

Additional Benefits: Security and Lightness in One Package

Beyond its unique features and functionality, the Tethrd Roll UP brings additional benefits to the table that further enhance its value. One such benefit is the added security provided by the zippered pockets. These pockets offer a secure place to store your gear, giving you peace of mind as you navigate your climbing adventures. It’s a small detail, but one that makes a significant difference in the overall user experience.

But perhaps one of the most impressive aspects of the Roll UP is its lightweight nature. Weighing in at a mere 4.8 ounces, the Roll UP is a testament to Tethrd’s commitment to creating products that are not only functional and versatile but also incredibly lightweight. This lightweight design makes the Roll UP easy to carry and truly makes you a lightweight mobile hunter, making your climbing experience more enjoyable and less strenuous.

Safety Precautions: Climbing with Confidence

When it comes to climbing, safety is paramount. Tethrd understands this, and their advice and recommendations for using the Roll UP reflect their commitment to user safety. They strongly advise against using any gear outside of the manufacturer’s specifications. This includes ropes, hardware, and other gear that may have been heavily modified or used outside of their intended purposes.

Tethrd also emphasizes the importance of professional supervision when trying new climbing methods. They recommend always remaining connected to the tree with a lineman rope and/or tether as you ascend and descend. It’s also crucial to reduce slack in your ropes as much as possible to maintain control and stability.

These safety precautions are not just guidelines—they’re essential practices for safe and responsible climbing. 

Remember, the Tethrd Roll UP is an incredible tool, but like any climbing equipment, it must be used responsibly. Always prioritize safety, follow Tethrd’s recommendations, and enjoy your climbing adventures with the assurance that you’re using your gear correctly.

Wrapping Up: The Tethrd Roll UP Experience

As we journey through the world of one sticking, the Tethrd Roll UP stands out as a beacon of innovation, functionality, and versatility. Its design caters to the needs of single stick climbers while also offering a universal appeal to all saddle hunters. The smart, easy access storage, the universal MOLLE attachment points, and the lightweight design all come together to create a product that truly enhances the climbing experience.

But the Roll UP is more than just its features—it’s the added security of the zippered pockets, the emphasis on safety, and the overall commitment to improving your hunting experience that truly sets it apart. It’s a product that understands and adapts to your needs, making your climbing adventures more efficient, organized, and enjoyable.

With the Tethrd Roll UP, I’ve come to appreciate not just its features, but the thought and care that went into its design. It’s a product I love, and one that has truly transformed my one sticking experience. Whether you’re a one stick climber or a saddle hunter, the Tethrd Roll UP is a game-changer that promises to elevate your climbing adventures to new heights.

Posted on

The Deer Buffet: Crafting a Food Plot for Every Season

clover plot,food plot, deer clover plot, food plt for deer

Welcome to the fascinating world of deer food plots. A deer food plot, in its simplest form, is a strategically planned area, often tucked away in the wilderness, where crops are grown specifically to provide nutrition to the local deer population. It’s a wildlife manager’s secret weapon, a hunter’s silent partner, and a conservationist’s contribution to the ecosystem.

The importance of these food plots cannot be overstated. They serve as a vital nutritional supplement for deer, particularly in areas where their natural forage may not provide all the nutrients they need for optimal health and growth. But a food plot is more than just a deer diner; it’s a tool for managing deer populations, improving herd health, and even aiding in hunting strategies.

Now, let’s dive into the concept of a year-round food plot. The beauty of a year-round food plot is that it caters to the changing dietary needs of deer throughout the seasons. From the protein-rich greens needed for antler growth in the spring and summer, to the carbohydrate-dense foods that help them build fat reserves in the fall and winter, a year-round food plot ensures that deer have access to the right nutrition at the right time.

The benefits of maintaining a year-round food plot are exponential. Not only does it provide a consistent source of nutrition for deer, but it also encourages deer to remain in the area throughout the year, rather than migrating in search of food. This can be particularly beneficial for hunting, as it helps to establish predictable patterns of deer movement.

In the grand scheme of things, a year-round food plot contributes to a healthier, more balanced ecosystem. It’s a testament to the fact that with careful planning and a little bit of effort, we can coexist with nature in a way that benefits us all. So, let’s embark on this journey together, and explore how to create a thriving, year-round food plot for deer.

Understanding Deer Nutritional Needs

As we look deeper into the world of deer food plots, it’s crucial to understand the nutritional needs of deer and how they fluctuate throughout the year. Just like us, deer require a balanced diet to thrive, but what constitutes ‘balanced’ changes with the seasons.

In the spring and summer, deer are in a phase of growth and development. Bucks are growing antlers, and does are nursing fawns. During this time, their diet needs to be rich in protein to support these processes. Plants like clover and alfalfa, which are high in protein, are particularly beneficial during these months.

As we transition into fall, the nutritional needs of deer shift. This is the time when they are preparing for the harsh winter months, and their diet needs to help them build up fat reserves. Foods high in carbohydrates, such as corn and acorns, become crucial during this period.

Winter is the survival phase for deer. Their metabolism slows down, and they rely heavily on the fat reserves they built up in the fall. During this time, they need foods that are high in fiber and can be easily digested to help them conserve energy. Late-maturing plants like brassicas are an excellent choice for winter food plots.

Understanding these seasonal shifts in nutritional needs is key to planning a successful year-round food plot. But it’s not just about providing the right nutrients at the right time; variety is also essential in a deer’s diet.

A varied diet is beneficial for several reasons. Firstly, it ensures that deer get a wide range of nutrients. Just like humans, deer need more than just protein, carbohydrates, and fiber. They also need vitamins and minerals, which they can get from a variety of plants. Secondly, variety can help attract and retain deer. Just as we enjoy different foods, so do deer. Offering a variety of plants can help keep deer interested and encourage them to keep visiting your food plot.

In essence, understanding and catering to the nutritional needs of deer is a fundamental aspect of creating a successful food plot. By providing a variety of plants that offer the right nutrients at the right time, you can support the health and growth of the local deer population and create a food plot that deer will return to all year round.

Planning Your Deer Food Plot

Planning is the cornerstone of any successful endeavor, and creating a deer food plot is no exception. A well-thought-out plan lays the groundwork for a thriving food plot that caters to the nutritional needs of deer throughout the year. It helps you make the most of your resources, avoid common pitfalls, and ultimately, create a food plot that is both beneficial for deer and meets your specific goals, whether they be related to wildlife observation, hunting, or conservation.

So, how do you go about planning a deer food plot? Let’s break it down into manageable steps.

Step 1: Define Your Goals

Before you start planning your food plot, it’s important to define what you hope to achieve. Are you looking to attract deer for hunting, improve the health of the local deer population, or both? Your goals will influence many aspects of your food plot, from its size and location to the types of plants you choose to grow.

Step 2: Choose the Location

The location of your food plot plays a crucial role in its success. Deer are creatures of habit and prefer areas that provide cover and are close to their bedding areas. Look for locations that are easily accessible for planting and maintenance, but are also secluded enough to make deer feel safe. Also, consider the soil type and sunlight exposure of the location, as these factors will influence what types of plants you can grow.

Step 3: Determine the Size and Number of Plots

The size and number of your food plots will depend on several factors, including the size of the land you have available, the number of deer in the area, and your specific goals. As a general rule, smaller, more numerous plots tend to be more effective for hunting, while larger plots are better for providing nutrition. Remember, it’s better to properly manage a few smaller plots than to neglect a large one.

Step 4: Plan for Variety

As we discussed earlier, variety is key in a deer’s diet. Plan to include a mix of plant types in your food plot to provide a range of nutrients. This not only benefits the deer but also helps to attract and retain them in your plot.

Step 5: Consider the Seasons

Finally, remember to plan for the changing seasons. The nutritional needs of deer change throughout the year, so your food plot should reflect this. Include plants that provide high-protein forage in the spring and summer, carbohydrate-rich foods in the fall, and easily digestible, high-fiber plants in the winter.

Choosing the Right Plants for Your Food Plot

Selecting the right plants for your deer food plot is a critical step in ensuring its success. The plants you choose should not only be palatable to deer but also suited to the soil and climate conditions of your plot. Let’s take a look at some top plants for deer food plots and their benefits.

Cereal Rye

Cereal Rye is a fantastic choice for a winter food plot. It’s hardy, grows quickly, and can provide forage even in colder temperatures. Plus, its fibrous root system can help improve soil structure.

Clover

Clover is a perennial favorite in deer food plots. It’s high in protein, making it excellent for spring and summer when deer need protein for growth and development. Clover is also relatively easy to grow and can tolerate a variety of soil conditions.

Brassicas

Brassicas, which include plants like turnips and radishes, are another excellent choice for deer food plots. They’re high in protein and can provide nutritious forage from late summer through winter. Plus, deer love the taste of brassicas, making them a great option for attracting deer to your plot.

Corn

Corn is a high-carbohydrate food source that’s perfect for fall when deer are building up their fat reserves for winter. It’s also a favorite among deer, making it a great choice for hunting plots.

Soybeans

Soybeans are another high-protein plant that’s excellent for summer food plots. They’re also a favorite food source for deer, making them a great choice for both nutrition and attraction.

When choosing plants for your food plot, there are a few factors you should consider. Firstly, consider the soil type of your plot. Some plants, like clover, can tolerate a variety of soil conditions, while others, like soybeans, prefer well-drained soils.

Secondly, consider the climate. Some plants are more tolerant of cold or drought than others. Choose plants that are well-suited to the climate conditions of your plot to ensure they can thrive.

Finally, consider deer preference. While nutritional content is important, if deer don’t like the taste of a plant, they won’t eat it. Choose plants that are known to be favorites among deer to ensure your plot is attractive to them.

By carefully selecting the right plants for your deer food plot, you can create a plot that provides nutritious forage for deer throughout the year and helps attract and retain deer in your area.

Preparing the Site for Planting

Before you can start planting your deer food plot, it’s crucial to properly prepare the site. This involves two key steps: soil testing and site preparation.

Soil Testing

Soil testing is an essential first step in preparing your site for planting. It provides valuable information about the nutrient content and pH level of your soil, which can influence what types of plants you can grow and how well they will thrive.

To conduct a soil test, you’ll need to collect soil samples from several locations within your plot. These samples should be taken from the top 6-8 inches of soil. Once you’ve collected your samples, mix them together in a clean bucket to create a composite sample. This composite sample can then be sent to a soil testing lab, which will provide you with a detailed analysis of your soil’s nutrient content and pH level.

The results of your soil test will guide your site preparation. For example, if your soil is low in a certain nutrient, you may need to add a specific type of fertilizer. If your soil’s pH is too high or too low, you may need to add lime or sulfur to adjust it.

Site Preparation

Once you’ve conducted your soil test and know what amendments your soil needs, you can begin preparing your site for planting. This involves several steps:

  1. Remove Existing Vegetation: Before you can plant your food plot, you’ll need to remove any existing vegetation. This can be done manually for small plots, or with the help of machinery for larger plots. Removing existing vegetation helps ensure that your food plot plants won’t have to compete for resources.
  2. Amend the Soil: Based on the results of your soil test, add any necessary amendments to your soil. This could include adding fertilizer to increase nutrient levels or adding lime or sulfur to adjust the pH. Be sure to follow the recommendations provided by your soil test for best results.
  3. Prepare the Seedbed: Once your soil has been amended, you’ll need to prepare the seedbed. This involves tilling the soil to a depth of about 2-3 inches and then smoothing it out to create a flat surface for planting. A well-prepared seedbed will help ensure good seed-to-soil contact, which is crucial for seed germination.

By taking the time to properly prepare your site for planting, you can create a strong foundation for your deer food plot. This will help ensure that your plants can thrive and provide nutritious forage for deer throughout the year.

Planting and Maintaining Your Food Plot

With your site prepared, it’s time to move on to the exciting part – planting your deer food plot. But the work doesn’t stop once the seeds are in the ground. Proper maintenance is key to ensuring your food plot thrives throughout the year.

Planting Your Food Plot

Here’s a step-by-step guide on how to plant your food plot:

  1. Choose the Right Time: The best time to plant your food plot will depend on the types of plants you’ve chosen. Some plants are best planted in the spring, while others should be planted in the fall. Be sure to follow the recommended planting times for your chosen plants.
  2. Prepare Your Seeds: Some seeds may need to be inoculated or coated before planting. This can help improve germination and plant growth. Follow the instructions provided with your seeds.
  3. Plant Your Seeds: Spread your seeds evenly over your prepared seedbed. You can do this by hand for small plots, or with a seed spreader for larger plots. Be sure to follow the recommended seeding rates for your chosen plants.
  4. Cover Your Seeds: Once your seeds are spread, lightly cover them with soil. This can be done by lightly raking the area or by dragging a piece of chain link fence over the plot. Covering the seeds helps protect them from birds and improves seed-to-soil contact.

Maintaining Your Food Plot

Once your food plot is planted, proper maintenance is key. Here are some maintenance practices you may need to consider:

  • Watering: Some plants may need regular watering, especially during dry periods. Be sure to provide enough water to keep the soil moist, but not waterlogged.
  • Fertilizing: Based on your soil test results, you may need to apply additional fertilizer throughout the growing season. Be sure to follow the recommendations provided by your soil test.
  • Weed Control: Weeds can compete with your food plot plants for resources. Regular weeding can help ensure your plants have the resources they need to thrive. This can be done manually, or with the help of herbicides. If using herbicides, be sure to choose ones that are safe for your food plot plants.
  • Monitoring: Regularly monitor your food plot to check for signs of disease or pest problems. Early detection can make treatment more effective.

By following these steps for planting and maintaining your food plot, you can help ensure it provides nutritious forage for deer throughout the year.

Monitoring and Adjusting Your Food Plot

Once your food plot is established, the journey is far from over. Monitoring your food plot and making necessary adjustments is a critical part of ensuring its success.

The Importance of Monitoring and Adjusting

Monitoring your food plot allows you to assess its performance and make necessary adjustments. This could involve changing the types of plants you’re growing, adjusting your maintenance practices, or even changing the location or size of your food plot.

Monitoring is also crucial for understanding deer behavior. By observing how deer interact with your food plot, you can gain valuable insights that can help you make your food plot more attractive and beneficial to them.

How to Monitor Your Food Plot

Monitoring your food plot involves regularly checking on both the plants and the deer. Here are some tips on how to do this:

  1. Check the Plants: Regularly inspect your food plot to assess the health of the plants. Look for signs of disease or pest problems, and check to see if the plants are growing well. If you notice any problems, you may need to adjust your maintenance practices.
  2. Observe the Deer: If possible, regularly observe the deer that visit your food plot. Note when they visit, which plants they seem to prefer, and how they behave. Trail cameras can be a valuable tool for this.
  3. Assess the Soil: Regular soil testing can help you monitor the nutrient levels in your soil and make necessary adjustments. This can be particularly useful if you notice that your plants aren’t growing as well as expected.

Making Necessary Adjustments

Based on your monitoring, you may need to make adjustments to your food plot. This could involve:

  • Changing the Plants: If certain plants aren’t performing well, or if the deer don’t seem to like them, you may need to try different plants.
  • Adjusting Maintenance Practices: If you’re noticing problems with your plants, you may need to adjust your watering, fertilizing, or weed control practices.
  • Changing the Food Plot: If your food plot isn’t attracting deer as expected, you may need to consider changing its location, size, or layout.

Remember, creating a successful deer food plot is a dynamic process that requires ongoing monitoring and adjustment. By staying observant and being willing to adapt, you can create a food plot that provides valuable nutrition for deer and meets your specific goals.

Wrapping Up

Creating a successful deer food plot is a rewarding endeavor that requires careful planning, selection of the right plants, diligent preparation of the planting site, and ongoing maintenance and monitoring.

We’ve journeyed through understanding the nutritional needs of deer and how they change throughout the year, highlighting the importance of variety in a deer’s diet. We’ve underscored the significance of planning your deer food plot, considering factors like location, size, and the number of plots.

We’ve learned about the top plants for deer food plots, including Cereal Rye, Clover, Brassicas, Corn, and Soybeans, and how to choose the right plants based on factors like soil type, climate, and deer preference. We’ve also walked through the steps of preparing the site for planting, emphasizing the importance of soil testing and site preparation.

Finally, we’ve discussed the crucial steps of planting your chosen crops and maintaining your food plot, as well as the importance of monitoring the food plot and adjusting the plan based on deer behavior and plant performance.

Now, it’s your turn to take these insights and start planning and implementing your deer food plot. Remember, the journey of creating a food plot is as rewarding as the destination. So, get out there, start planning, and before you know it, you’ll have a thriving food plot that provides year-round nutrition for deer and contributes to a healthier, more balanced ecosystem.

Frequently Asked Questions

Q1: What is the best size for a deer food plot?

Answer: The size of your deer food plot can vary depending on your goals and the size of the land you have available. As a general rule, food plots can range from as small as 1/4 acre to as large as several acres. Smaller, more numerous plots tend to be more effective for hunting, while larger plots are better for providing nutrition.

Q2: When is the best time to plant a deer food plot?

Answer: The best time to plant your food plot will depend on the types of plants you’ve chosen. Some plants are best planted in the spring, while others should be planted in the fall. Be sure to follow the recommended planting times for your chosen plants.

Q3: How often should I water my food plot?

Answer: The watering needs of your food plot will depend on the types of plants you’re growing and your local climate. Some plants may need regular watering, especially during dry periods. Be sure to provide enough water to keep the soil moist, but not waterlogged.

Q4: Can I create a deer food plot if I don’t have a lot of land?

Answer: Yes, even small plots of land can be used to create a deer food plot. In fact, smaller food plots can often be more effective for attracting deer, especially for hunting. The key is to choose plants that are well-suited to the size of your plot and to manage the plot properly.

Q5: What should I do if the deer aren’t using my food plot?

Answer: If deer aren’t using your food plot, it could be due to a variety of factors. The plot may be too exposed, making deer feel unsafe, or the plants you’ve chosen may not be attractive to the deer in your area. Consider adjusting the location, layout, or plant selection of your food plot. Monitoring deer behavior can provide valuable insights into why they might not be using your plot.

Posted on

Mastering Thermals: Predicting Winds for Successful Bowhunting

Have you ever found yourself in the perfect hunting spot, only to have a deer blow and slip away due to a sudden shift in the wind? Understanding thermals – the invisible currents of air that can carry drift straight to where you are expecting a deer to come from – is a game-changer in the world of bowhunting. It’s the secret weapon that separates the occasional lucky shot from the consistently successful hunter. In this article, we’re going to unravel the mystery of thermals, turning this fickle force of nature into your trusted ally on your next hunting adventure. So, buckle up and get ready to transform your bowhunting skills from good to exceptional!

Understanding Thermals

If you’re new to the world of hunting, or even if you’re a seasoned pro, the concept of thermals might be a bit foreign. But don’t worry, we’re here to break it down for you in a way that’s easy to understand and apply to your hunting strategy.

Definition and Explanation of Thermals

Thermals, in the simplest terms, are columns of rising or falling air. They’re created by the heating and cooling of the Earth’s surface. When the ground heats up, it warms the air above it. This warm air is lighter than the surrounding cooler air, so it rises, creating an updraft, or a thermal. Conversely, when the ground cools, it chills the air above it. This cooler air is denser and heavier than the surrounding warmer air, so it sinks, creating a downdraft, or a negative thermal. 

The Impact of Changing Temperatures on Thermals

Changing temperatures throughout the day significantly impact thermals. In the morning, as thermals begin to rise they usually can last for several hours, typically until the afternoon when the sun is at its peak. At this point, there’s often a lull in thermal activity as the temperatures level out. As the day cools into the evening, downdrafts begin to form, typically lasting until the next morning when the cycle starts again.

The Difference Between Updrafts and Downdrafts

The primary difference between updrafts and downdrafts is the direction in which the air is moving. Updrafts occur when warm air rises, while downdrafts occur when cool air falls. This is important for hunters to understand because these air movements can carry your scent towards or away from whatever it is you are hunting.

How Terrain and Topography Affect Thermals

Terrain and topography regardless of public or private land can have a significant impact on thermals. In hilly or mountainous areas, thermals can be more potent and predictable due to the elevation changes. For example, warm air rising up a hillside can create a strong updraft, while cool air sinking into a valley can create a strong downdraft. Even in flatter areas, features like bodies of water, vegetation, and man-made structures can influence thermal activity.

Understanding thermals is a crucial part of successful hunting. By knowing how and why the air moves as it does, you can better predict where your scent will go, helping you stay undetected. So, the next time you’re out in the field, take a moment to consider the thermals and use them to your advantage. Get to know how they act in an area you plan to hunt.

Thermals and Deer Behavior

Understanding how deer interact with and utilize thermals can significantly improve your hunting success. Deer, especially mature bucks, are incredibly savvy creatures that have adapted to use their environment, including thermals, to their advantage. 

How Deer Use Thermals to Their Advantage

Deer, particularly whitetails, have an extraordinary sense of smell, which is their primary defense mechanism. They use this sense to detect danger, including the scent of hunters. Thermals play a significant role in how deer detect these scents.

During periods of rising thermals (updrafts), deer often position themselves on higher terrain. This allows them to detect the scent of predators or hunters that is being carried upward by the warm air. Conversely, during periods of falling thermals (downdrafts), deer often move to lower terrain where the cooler air is sinking, bringing with it the scent of any threats from above. Knowing this can help you identify area’s you plan to hunt and how to get in and out of them remaining undetected.

The Impact of Thermals on Deer Movement and Behavior

Thermals can greatly influence deer movement and behavior. For example, deer often adjust their bedding locations based on thermal activity. They may choose to bed on south-facing slopes during the colder months because these areas receive more sunlight and thus have stronger rising thermals. This helps them detect any danger from below.

Similarly, deer often adjust their travel routes based on thermal activity. They may choose to move along ridges or downwind sides of hills during periods of rising thermals, allowing them to detect scents from both the area below them and the area upwind.

How Deer Use Thermals During Different Times of the Day

Deer behavior changes throughout the day in response to the shifting thermal currents. In the morning, as thermals rise, deer are likely to be found on higher ground so use this knowledge to your advantage in your morning hunts.

In the late afternoon and evening, as the ground cools and thermals begin to fall, deer typically move to lower ground. Here, the sinking cool air carries the scent of predators from higher ground down to them. This is why you’ll often see deer entering fields and open areas from lower points in the late afternoon and evening. So be aware of that and possibly have a stand in that location for evening hunts. Understanding how deer use thermals to their advantage can help you predict their movements and behavior, making you a more successful hunter. 

Using Thermals to Your Advantage

As a hunter, understanding thermals is like having a secret weapon. It can give you an edge in predicting deer movement, choosing the best hunting spots, and ultimately, increasing your chances of a successful harvest. Let’s explore how you can use thermals to your advantage, especially if you’re new to hunting.

How to Use Thermals to Predict Deer Movement

One of the key ways to use thermals in hunting is to predict deer movement. As we’ve discussed, deer adjust their behavior based on thermal activity. They position themselves on higher or lower terrain depending on whether the thermals are rising or falling. This behavior can help you anticipate where deer are likely to be at different times of the day.

Remember, these are general patterns and can vary based on local conditions and individual deer behavior. But understanding these patterns can give you a starting point in predicting deer movement.

Strategies for Hunting in Different Thermal Conditions

Different thermal conditions require different hunting strategies. Here are some strategies for hunting in rising and falling thermals:

Hunting in Rising Thermals (Morning to Early Afternoon): During this period, consider setting up your stand or blind on higher ground. This will help keep your scent above the deer. Be mindful of the wind direction as well. You want to position yourself so that the wind and rising thermals carry your scent away from where you anticipate the deer to be.

Hunting in Falling Thermals (Late Afternoon to Evening): As thermals begin to fall, consider moving to lower ground. This can help keep your scent below the deer. Again, be mindful of the wind direction. You want it to carry your scent away from the deer’s anticipated location.

Remember, thermals can be influenced by local conditions such as bodies of water, vegetation, and terrain. Spend time in your hunting area to understand how these factors affect thermal activity.

The Importance of Understanding Wind and Thermals in Choosing Hunting Spots

Choosing the right hunting spot is crucial for a successful hunt. Understanding wind and thermals can greatly assist in this decision. When scouting for hunting spots, consider how the wind and thermals move through the area. Look for areas where deer are likely to move based on thermal activity. 

Also, consider how your scent will travel based on the wind and thermal activity. You want to position yourself so that your scent is carried away from the deer’s anticipated location. This might mean setting up your stand or blind downwind of a trail, feeding area, or bedding area.

An easy trick hunters use for seeing thermals and the direction they are going is milkweed. Milkweed is a popular tool among deer hunters for detecting thermals and wind direction due to its lightweight and buoyant properties. When a hunter releases a tuft of milkweed fluff into the air, it gets carried along by the slightest breeze or thermal current, providing a visual representation of the air movement.

Here’s why it’s particularly useful:

  1. Sensitivity: Milkweed fluff is extremely light and sensitive to even the slightest air currents. This makes it an excellent indicator of subtle wind shifts and thermal currents that might not be noticeable otherwise.
  2. Buoyancy: Milkweed fluff tends to float and drift slowly, rather than quickly falling to the ground. This allows hunters to observe the direction and speed of the wind or thermal over a longer period and distance.
  3. Visibility: The bright white color of milkweed fluff makes it easy to see against most backgrounds, allowing hunters to track its movement easily.

By observing the direction and speed at which the milkweed fluff moves, hunters can gain a better understanding of how their scent is likely to travel and adjust their position or strategy accordingly. This can be especially useful when hunting in hilly or mountainous terrain, where thermals can have a significant impact on scent distribution.

Advanced Strategies for Using Thermals

For those of you who have a solid understanding of thermals and have already used this knowledge in your hunting strategies, it’s time to take it to the next level. 

How to Use “Just-Off” Winds and Thermals

One advanced strategy involves using “just-off” winds and thermals. This refers to positioning yourself in a way that your scent drifts just outside of the deer’s expected travel path or bedding area. It’s a risky move, as you’re essentially playing on the edge of the deer’s scent detection zone, but when executed correctly, it can pay off significantly.

The key to this strategy is understanding the specific wind and thermal patterns in your hunting area and the behavior of the deer you’re pursuing. You’ll need to position yourself so that the wind and thermals carry your scent in a direction that’s close to, but not directly into, the area where you expect the deer to be. This can allow you to remain undetected while still being close enough for a shot.

The Role of Terrain Features in Thermal Strategies

Terrain features play a significant role in how thermals behave, and understanding this can greatly enhance your hunting strategy. For example, saddles in ridgelines, ravines separating hills, and other pinch points in the terrain can create unique thermal patterns.

Deer often use these terrain features to their advantage, moving through these areas where they can catch the scent of predators from multiple directions. As a hunter, you can use this knowledge to anticipate deer movement and position yourself accordingly.

In addition, terrain features can create thermal tunnels or funnels where rising or falling thermals are concentrated. Identifying these areas can give you an edge, as they often serve as preferred travel routes for deer, especially during periods of thermal transition.

The Importance of Having Multiple Stand Sites

Having multiple stand sites is another advanced strategy that can increase your success. Personally I use a tree saddle which gives me the option to set up in any tree not needing pre set stands. However, if that’s not an option for you, hanging different stand will be advantageous for you under different wind and thermal conditions, and having a variety of options allows you to adapt to the conditions of any given day.

When choosing stand sites, consider how the wind and thermals move through the area. You’ll want sites that allow you to hunt effectively in both rising and falling thermals, and in different wind directions. Also, consider the deer’s likely travel routes and how your scent will be carried from each stand site.

Having multiple stand sites also allows you to avoid over-hunting a single area, which can make deer wary and less likely to frequent the area. By rotating between stand sites, you can keep the pressure low and the deer less aware of your presence.

Remember, these advanced strategies require a deep understanding of thermals and deer behavior, as well as careful observation and adaptation to your specific hunting area. But with practice and patience, these strategies can greatly enhance your hunting success.

Predicting and Monitoring Thermals

As you become more experienced in hunting, you’ll realize that success often hinges on your ability to predict and monitor thermals. This involves understanding the factors that influence thermals, using technology to aid in monitoring, and spending time in the field to get a feel for the land you’re hunting. 

How to Predict Changes in Thermals

Predicting changes in thermals primarily involves understanding the factors that influence them. The most significant of these is the sun. Therefore, you can generally predict that thermals will rise in the morning and fall in the evening.

However, other factors can also influence thermals. For example, cloud cover can reduce the warming effect of the sun, which can lessen the strength of rising thermals. Similarly, a sudden drop in temperature can cause thermals to fall more quickly.

In addition, the local terrain can influence how thermals behave. For example, south-facing slopes may warm more quickly and create stronger rising thermals in the morning compared to north-facing slopes. Understanding these nuances can help you predict how thermals will behave in your specific hunting area.

The Role of Weather Apps in Monitoring Wind Currents and Thermals

In today’s digital age, technology can be a valuable tool in your hunting arsenal. Weather apps, in particular, can be incredibly useful for monitoring wind currents and thermals.

Apps like HuntStand, for example, offer features that allow you to monitor, record, and track wind currents. This can help you understand how the wind is likely to carry your scent in your hunting area. Some apps also offer topographic maps, which can help you understand how the terrain might influence thermals.

While these apps can’t directly monitor thermals, they can provide valuable information that can help you predict thermal behavior. For example, by monitoring the temperature throughout the day, you can anticipate when thermals are likely to rise or fall.

The Importance of Scouting and Understanding the Land You Plan to Hunt

While understanding the theory behind thermals and using technology to monitor conditions are important, there’s no substitute for spending time in the field. Scouting the land you plan to hunt is crucial for understanding how thermals behave in that specific area.

When scouting, pay attention to how the wind and thermals move through the area at different times of the day. Notice how the terrain influences this movement. Look for signs of deer movement and try to understand how the deer are using the wind and thermals to their advantage.

Over time, you’ll start to develop a feel for the land and how the thermals behave. This understanding, combined with your knowledge of thermals and the use of technology, can greatly enhance your ability to predict and monitor thermals, ultimately leading to more successful hunts.

Conclusion

As we draw this article to a close, it’s clear that the art of bowhunting is as much a science as it is a sport. The invisible dance of thermals, swirling and shifting with the rhythm of the day, plays a pivotal role in the delicate balance between hunter and hunted. Understanding and harnessing the power of these elusive air currents can transform your hunting experience, elevating you from a casual enthusiast to a master of the hunt.

We’ve journeyed through the fundamentals of thermals, exploring their creation and behavior, and delving into the profound impact they have on deer movement. We’ve uncovered strategies to use thermals to our advantage, from predicting deer behavior to selecting the ideal hunting spots. For our seasoned hunters, we’ve delved into advanced strategies, pushing the boundaries of our understanding and application of thermals.

But the pursuit of knowledge is a never-ending journey. The world of thermals is dynamic and ever-changing, much like the wilderness we love to explore. As hunters, we are perpetual students of nature, always learning, always adapting. I encourage you to continue this journey of learning, to experiment with thermals, to observe their effects on your hunts, and to share your experiences with the hunting community.

Remember, every hunt is an opportunity to learn, to grow, and to connect with the natural world. So, as you step into the wilderness, bow in hand, feel the wind on your face, watch the leaves flutter in the thermals, and know that you carry with you a deeper understanding of this incredible force of nature.

Here’s to your next hunt. May it be guided by knowledge, filled with adventure, and crowned with success. If you are interested in saddle hunting after reading this be sure to check out more of our articles on how to get started and any gear you may need.  Happy hunting!

Resources

In the digital age, technology has become a valuable ally for hunters. From weather tracking to topographic mapping, there’s an app or tool out there that can enhance your understanding and use of thermals in bowhunting. Let’s explore some recommended resources that can assist you on your hunting journey.

Recommended Apps and Tools for Understanding and Tracking Thermals

HuntStand: This app offers a range of features including weather tracking, wind direction, and topographic mapping. While it doesn’t directly track thermals, it provides valuable information that can help you predict thermal behavior.

onX Hunt: This app provides detailed topographic maps, which can help you understand how the terrain in your hunting area might influence thermals. It also offers a feature that shows wind direction and speed.

Weather Underground: This app provides detailed weather information, including temperature changes throughout the day, which can help you anticipate when thermals are likely to rise or fall.

GoHunt: While not an app, this online platform offers detailed information and tools for hunters, including topographic maps and weather information.

The advancement of these apps and tools has made it easier than ever to access real-time information about weather and terrain conditions, which are crucial for understanding and predicting thermals. By using these resources, you can make more informed decisions and increase your chances of a successful hunt.

Additional Reading and Resources for Mastering Thermals in Bowhunting

In addition to apps and tools, there are numerous books, articles, and online resources that can enhance your understanding of thermals. Here are a few recommendations:

Mapping Trophy Bucks by Brad Herndon: This book offers valuable insights into using topographic maps to predict deer movement, which is closely tied to thermal activity.

Precision Bowhunting: A Year-Round Approach to Taking Mature Whitetails by John and Chris Eberhart: This book provides a comprehensive guide to bowhunting, including a section on using wind and thermals.

QDMA (Quality Deer Management Association): This organization’s website offers a wealth of articles and resources on all aspects of deer hunting, including understanding and using thermals.

Bowhunter-ed and Hunter-ed: These online platforms offer state-specific hunter education courses, some of which include information on understanding and using wind and thermals in hunting.

Remember, mastering thermals in bowhunting is a journey of continuous learning. By leveraging the power of technology and investing time in further education, you can enhance your skills and become a more successful hunter.

Posted on

OBX Unleashed: A Guide to Beach Driving and 4×4 Adventures in the Outer Banks

cape hatteras lighthouse obx beach driving

Are you looking to add some excitement and adventure to your Outer Banks vacation? You’re in luck because one of the most thrilling experiences you can have is driving on the beach in OBX. The Outer Banks is home to miles and miles of some of the most pristine beaches that are perfect for exploring by 4×4 vehicles. In this article, we’ll introduce you to everything you need to know about beach driving in Outer Banks – from permits and regulations, to tips and tricks on how best to prepare for an unforgettable adventure. So sit back, start your engines and let’s take a drive on the wild side down some of the most beautiful beaches in America!

Thrill of Beach Driving in the Outer Banks

Driving on the beach in OBX is a unique and unforgettable experience that you won’t want to miss on your visit to the Outer Banks. Picture yourself cruising along miles of stunning, sandy beaches with the ocean breeze blowing through your hair.

But it’s not just about the thrill of driving – there’s also plenty of natural beauty to enjoy while you’re at it. As you traverse the beaches and sand dunes, you’ll be treated to breathtaking views of unspoiled coastline, high dunes shaped by years of wind and waves, and clear blue waters as far as the eye can see.

Whether you’re heading out for a day trip or planning a sunset drive with friends or family, nothing beats the excitement and adventure that comes with beach driving in the OBX. So pack some snacks, grab your camera, hop into your 4×4 vehicle, and get ready for an experience unlike any other!

Driving the Outer Banks (ORV) 

One of the most exciting aspects of beach driving OBX is the flexibility it offers. You can easily move from one sandy stretch to another and experience a different atmosphere – from secluded, quiet beaches to those that attract a crowd for kiteboarding or surfing.

Corolla is one such spot that would offer this sort of diversity. As you traverse along its beautiful coastline, you’ll come across vast areas where wild horses roam freely in their natural habitat which makes for amazing sightseeing while cruising along the sandy shores.

Beach driving OBX isn’t all sand dunes and ocean views; once on land, your off-road vehicle can put its suspension system and four-wheel drive capabilities to good use up-close with some unique terrain offered by mother nature. After a good wind storm or hurricane the roads and trails can become washed over creating an adventure in itself.

Understanding OBX Beach Driving Permits

Before you head out for some beach driving in the Outer Banks, it’s important to understand the requirements and process for obtaining a beach driving permit.

Why do you need an Outer Banks beach driving permit?

Beach driving permits are mandatory in all areas of the Cape Hatteras National Seashore and some areas of Currituck County. This is to ensure visitor safety as well as protect sensitive habitats that may be damaged by vehicles.

What is the process for getting an OBX beach driving permit?

The application process for a beach driving permit can vary depending on which area you plan to visit. You can usually apply online or in person at designated locations like park offices or visitors’ centers. I always make it a point to stop at Hatteras Light and pick up my permit in person. A video is required to be watched prior to obtaining your first permit.

You will also need to provide proof of vehicle ownership and insurance, along with valid identification such as your driver’s license.

How much does an OBX beach driving permit cost?

Permit fees vary depending on the type of vehicle and length of stay, but typically range from $50-$150. Weekly beach permits can be purchased as well as a yearly beach permit..

It’s important to note that failing to obtain a proper Outer Banks off-road permit could result in costly fines or penalties, so make sure you check local regulations before hitting the sand!

Importance of getting a Cape Hatteras beach driving permit

Cape Hatteras offers scenic beauty combined with an outdoor adventure experience which makes it extremely popular among travelers visiting this east coast destination; however beach access here is strictly regulated via permitting! So ensuring you get one would give access not only into some beautiful landscapes but also allow following designated routes while keeping participants aware and safe around unmarked obstacles often present in coastal surroundings.

Guide to 4×4 Beaches in Outer Banks

One of the biggest advantages of driving on the beach in OBX is that there are many miles of coastline to explore, each offering its own unique terrain and features. Here’s a guide to some of the most popular ramps and beaches:

Corolla Beach

Corolla beach, also known as Carova Beach beyond Corolla has more than a dozen entry points which makes it one of the easiest beaches for access via off-road vehicles.

Off Highway Vehicle (OHV) rentals are available here or partner up with any OBX rental businesses making this an accessible spot for both visitors without their own vehicle or those seeking convenient alternatives.

Apart from providing stunning views and scenic beauty; mustangs roaming around freely have been known to be particularly attracted towards this stretch increasing your chances of spotting them first-hand while cruising through. Seeing the wild horses roam the beaches of OBX is a must do.

Other Popular Ramps & Locations in Outer Banks 

  • Kill Devil Hills
  • Nags Head
  • Cape Hatteras National Seashore, Ocracoke Island
  • Pea Island National Wildlife Refuge

Be sure you’ve got your hands on an updated outer banks 4×4 beach access map before taking off from the campsite  just so you’re aware what area is permitted and where seasonal closures usually occur! These closures are usually due to the nesting sea turtles or piping plovers. 

What to expect when driving on the beach?

While driving remotely across sandy beaches by itself offers such an adventure like no other route would, along with beautiful scenery – observing safety precautions along with obeying signs marking restricted areas should never be overlooked!

Be vigilant about maintaining lower speeds while operating vehicles efficiently across soft sand patches so they don’t get stuck solid; carry adequate tools like tire pressure gauges or air compressors since different pressures can greatly impact traction on different road surfaces!

So if you are looking for thrilling adventures that combine natural scenery together look no further than experiencing outdoor activities over sand dune beaches in OBX; even if you don’t have your own personal vehicle, there are plenty of rental options giving you access to over 200 miles of the most amazing beaches on the east coast. 

Tips for Beach Driving in the Outer Banks

When it comes to beach driving in Outer Banks, there are several tips that can help make your experience both safe and enjoyable. Here are some practical tips and safety considerations to keep in mind:

1. Check the Tides – Before heading out to any beach in Outer Banks, it is important to check the tides. You don’t want to get stuck or risk damaging your vehicle by driving during high tide or driving on wet sand. Ideal times for beach driving are during low tide or within a couple of hours of low tide.

2. Reduce Tire Pressure – Reducing your tire pressure when driving on the beach allows your vehicle to better grip the sand, giving you better mobility and avoiding getting stuck. The ideal pressure usually ranges between 15-20 PSI. If you become stuck letting more air out can sometimes give you enough traction to get unstuck. 

3. Stay on Designated Trails – When driving on the beaches in Outer Banks, be sure to stick to designated trails marked by signs or orange poles. This ensures that you’re not driving in prohibited areas where certain species of wildlife may be nesting or resting. Additionally, staying on designated trails ensures you’re not running the risk of getting stuck in soft sand.

4. Bring Recovery Gear – Beach driving can be unpredictable, so it’s important to be prepared with recovery gear. Bring a shovel, tire gauge, and traction mats in case you get stuck in the sand. Also, make sure to bring towing straps or chains that are rated for your vehicle’s weight – this can come in handy if you get stranded or need assistance.

5. Respect Local Regulations – Beach driving is only allowed on designated beaches in Outer Banks where permits are required. Before hitting the beach with your 4×4 vehicle, familiarize yourself with local regulations regarding speed limits and parking rules. Remember that these guidelines are set up not only for safety reasons but also to preserve the environment.

6. Watch out for Wildlife– Keep an eye out for horses at all times when driving along Corolla drive-on-beaches as they often graze near the dunes and may wander onto trails frequently used by vehicles.

7.Watch Your Speed – It’s advisable not to attempt speeding on OBX coastlines because of unseen obstacles like driftwood or buried rocks that could damage the undercarriage of your car while compromising its stability.

With these tips and considerations, you’ll have a safe and enjoyable experience while enjoying everything Outer Banks has to offer! Always remember that preserving nature should be paramount during off-road adventures by respecting wildlife habitats even more so than obtaining epic photos of beach views within prohibited zones!

Beach driving in the Outer Banks is an incredibly thrilling way to explore some of the most beautiful coastlines on the East Coast. Driving along miles and miles of sandy beaches and dunes with breathtaking ocean views offer a unique experience that you won’t forget. However, it comes with its own set of challenges as well.

It’s important to remember that before heading out, you should familiarize yourself with local regulations and obtain necessary permits and follow safety guidelines to have an enjoyable trip. Make sure to bring recovery gear in case your vehicle gets stuck, reduce your tire pressure for better traction on sand and stay on designated trails while keeping a watchful eye out for wildlife.

If you’ve never tried beach driving OBX before, it’s time to get behind the wheel; grab some friends or family members who are looking for adventure too! With these practical tips at your disposal, make sure everything is geared up correctly leading towards unforgettable memories filled with scenic beauty offered by mile-long stretches across coastal sands where each bend reveals something new!