Posted on 1 Comment

The Lone Wolf Pocket Arm: A Revolutionary Tool for Saddle Hunting and Self Filming

As a passionate saddle hunter and outdoor content creator, I’m continually searching for gear that can enhance my hunting experience and simplify self-filming. The Lone Wolf Pocket Arm is one such product that has genuinely revolutionized the way I hunt and document my adventures. In this comprehensive review, I’ll share my experience with the Lone Wolf Pocket Arm, discuss how it outshines its competitors, and explain how it has made my time in the woods more enjoyable and efficient.

Unparalleled Build Quality and Lightweight Design

The Lone Wolf Pocket Arm boasts an exceptional build quality, which is evident from the moment you handle it. Crafted from high-quality aluminum, the Pocket Arm is not only lightweight at 1.6 lbs but also incredibly durable. I’ve tried many other competitor products and often encountered flimsy construction that led to instability and constant readjustments. However, the Pocket Arm’s robust build eliminates those concerns, allowing me to focus on my hunt with confidence.

The Pocket Arm is designed to fit trees ranging from 4-18″ in diameter, offering versatility in the field. Additionally, the strap is made of 1″ polyester webbing with a micro weight cam buckle, ensuring a secure and reliable attachment to the tree. This combination of high quality parts gives the Pocket Arm the ability to hold cameras weighing up to 10 lbs. Staying lightweight and mobile is key when it comes to saddle hunting. The Pocket Arm allows both with quick and easy set up.

Ultra-Compact and Noise-Free

One of the most impressive features of the Lone Wolf Pocket Arm is its compact design, which allows it to fold flat to a size of 12″x 6″x 1″. This compactness enables me to carry it in my Mystery Ranch pack as I navigate the terrain easily. I’ve experimented with various other camera arms on the market, and none can match the portability and ease of use that the Pocket Arm provides. The innovative folding design also minimizes noise and movement during setup, ensuring that I remain stealthy and undetected in the woods.

Exceptional Versatility and Wide Range of Motion

The Lone Wolf Pocket Arm’s versatility truly distinguishes it from its competitors. The arm offers a 29″ reach from the tree to the camera mount, granting me the ability to capture footage from multiple angles. With its 360-degree rotation and extensive range of motion, I can swiftly and effortlessly adjust the arm to film the perfect shot. This versatility has proven invaluable when self-filming my hunts, allowing me to switch between filming myself and the surrounding action with ease.

Wide Compatibility with Camera Setups

The Pocket Arm’s compatibility with various camera setups is another significant advantage. It comes with a universal 3/8″ stud for mounting a wide array of camera models, including DSLRs, action cameras, and smartphones. This compatibility simplifies the process of switching between devices, enabling me to capture content on multiple platforms without any hassle.

Enhanced Saddle Hunting Experience

The Lone Wolf Pocket Arm has undoubtedly elevated my saddle hunting experience, thanks to its stability and user-friendly design. The arm’s strong grip and secure attachment to the tree ensure that my camera remains steady, even in challenging conditions. Moreover, the built-in utility hook and level indicator button further enhance the functionality of the Pocket Arm.

The quick and straightforward setup process means I can devote more time to focusing on my hunt and less time wrestling with gear. The only caveat is that the fluid head is not included, so you’ll need to purchase it separately. Nevertheless, the Lone Wolf Pocket Arm is well worth the investment.

Final Thoughts

In summary, the Lone Wolf Pocket Arm has become an indispensable piece of equipment for my saddle hunting and self-filming escapades. Its innovative design, exceptional versatility, and unmatched performance make it the premier choice for hunters and content creators alike. As I continue to explore the world of saddle hunting and experiment with various accessories, the Lone Wolf Pocket Arm remains a constant companion, helping me capture stunning visuals and unforgettable moments in the great outdoors.

If you’re a saddle hunter or outdoor content creator looking to simplify your self-filming process, I highly recommend giving the Lone Wolf Pocket Arm a try. With its impressive range of features and unparalleled performance, it’s sure to elevate your hunting experience and make documenting your adventures a breeze.

Posted on 1 Comment

Striped Bass Baits and Techniques

As I have refined my techniques and experimented with different baits, it has become apparent that stripers are opportunistic feeders with a diverse diet. Their willingness to go after a wide range of prey, from small baitfish to crustaceans and mollusks, is a testament to their prowess as hunters. This adaptability, combined with their preference for specific water temperatures, has given me a deeper appreciation for the delicate balance of nature and the importance of protecting our waterways.

Each fishing trip in pursuit of stripers brings a new adventure, and with it, more opportunities to learn and hone my skills. I’ve met fellow anglers who share my passion for stripers, and together we’ve swapped stories, tips, and laughs over the challenges and triumphs of chasing these amazing fish. As I continue to explore the world of striped bass fishing, I am grateful for the experiences, friendships, and lessons it has brought me, and I look forward to many more years of excitement, discovery, and of course, reeling in those prized stripers.

Striped Bass, also known as Stripers, Rockfish, or Linesiders, are one of the most sought-after game fish along the East Coast. Anglers of all skill levels enjoy the challenge and excitement of pursuing these hard-fighting fish. Striped bass, also known as stripers, are predatory fish that are native to the East Coast of North America. They have stout bodies with seven to eight continuous horizontal stripes on each side, from their gills to their tail. Striped bass can grow up to 5 feet in length and over 80 pounds, and they are anadromous, meaning they live in the ocean but return to freshwater to spawn. Their preferred water temperature range is from 55° F to 68° F, and they have no eyelids, which may explain their preference for dawn and dusk feeding.

Striped bass have firm and flavorful flesh with a large flake, which can be eaten raw or pickled. They are known by various names, including stripers, linesiders, rock, pimpfish, and rockfish. The World Record weight for a striped bass is 81 pounds and 14 ounces.

The average lifespan of a striped bass is 10-12 years, with some living up to 30 years. They are primarily carnivorous and eat a variety of foods, including fish, insects, crustaceans, invertebrates, mollusks, zooplankton, lobsters, crabs, soft clams, small mussels, sea worms, and squid. They are opportunistic feeders and can adapt to what is available.In this article, we’ll cover the top baits and techniques for catching Striped Bass, and provide tips on how to use them effectively. Let’s dive in!

Live Bait: The Real Deal 

Using live bait is one of the most effective ways to catch Striped Bass, as it closely mimics their natural prey. Here are the top live baits for Stripers:

  • Menhaden (Bunker) and Alewife: Menhaden, commonly known as Bunker, are a favorite food source for Striped Bass. In freshwater, Alewife serve a similar purpose. Live-lining Bunker or Alewife near schools of baitfish can yield excellent results. Hook them through the nose or just behind the dorsal fin, and let them swim naturally to attract Stripers.
  • Eels: Eels are another top choice for live bait, especially in areas where they are a natural part of the ecosystem. Hook eels through the lower jaw and out through an eye socket or just behind the head. Drift, troll, or cast eels on their own or combined with lures for maximum effect.
  • Mackerel: Live Mackerel are a popular choice for Striped Bass in the northeastern region. Hook them through the nose or just behind the dorsal fin, and present them in a lively manner.

Cut Bait: Tried and True

Cut bait is a versatile and effective option for targeting Striped Bass. Here are some popular cut bait choices:

  • Bunker (Menhaden) and Alewife: When live Bunker or Alewife are not available, fresh cut bait can be an excellent alternative. Remove the tail and divide the rest into three sections: the head, body cavity, and tail-end. Each section offers unique advantages when targeting Stripers.
  • Mackerel: Fresh or frozen Mackerel are a go-to cut bait option for Striped Bass. Their oily flesh releases a strong scent that attracts Stripers, and their tough meat holds up well on the hook.
  • Clams: Clams are an enticing choice for Striped Bass, as they cannot resist the scent of freshly-shelled clams. Rig them on a hook with the shell removed for easy presentation.

Lures: Artificial Attraction 

Lures can be an effective and exciting way to target Striped Bass. Here are some popular lure types:

  • Topwater Lures: Topwater lures, such as spooks, poppers, and plugs, create surface commotion that attracts hungry Stripers. Cast and retrieve these lures with a “walk-the-dog” or popping action.
  • Soft Plastics: Soft plastic eels, worms, or swimbaits can mimic the natural prey of Striped Bass. Rig them on a jig head or weighted hook and use a steady retrieve or bouncing action to entice bites.
  • Jigs and Bucktails: Bucktail jigs and hard-bodied jigs are highly effective for Striped Bass. Tip them with real bait or soft plastics for added attraction. Cast and retrieve with a bouncing motion or vertical jig near the bottom.
  • Trolling Rigs: Tube lures and umbrella rigs are popular trolling options for targeting Striped Bass. Attach soft plastic shads or swimbaits to mimic a school of baitfish, and troll at various depths to locate fish.

Techniques: Perfecting Your Approach 

To maximize your chances of catching Striped Bass, it’s essential to employ the right techniques based on the conditions and the behavior of the fish. Here are some tried-and-true techniques for landing Stripers:

  1. Drifting: Drifting is a versatile technique that allows you to cover a wide area and present your bait or lure at different depths. Drift with the wind or current while using live or cut bait, or cast lures and retrieve them as you drift.
  2. Trolling: Trolling allows you to cover large stretches of water at varying speeds and depths, increasing your chances of finding actively feeding Striped Bass. Use trolling rigs like tube lures or umbrella rigs, and adjust your speed and depth to match the conditions and preferences of the fish.
  3. Casting: Casting is a popular and effective method for targeting Stripers close to shore or around structure. Cast topwater lures, soft plastics, or jigs to areas where Striped Bass are known to congregate, and retrieve them using the appropriate action to entice bites.
  4. Vertical Jigging: Vertical jigging is an excellent technique when fishing for Striped Bass in deeper water or around underwater structure. Use bucktail jigs or metal jigs, and let them sink to the desired depth before bouncing them off the bottom with a rhythmic motion.
  5. Live-Lining: Live-lining involves using live bait such as Bunker, Alewife, or Eels to attract Striped Bass. Cast or drift your live bait, and allow it to swim naturally to draw the attention of hungry Stripers.
  6. Chumming: Chumming can be an effective way to draw Striped Bass to your location. Use ground-up baitfish, clam chum, or even canned cat food to create a scent trail. Deploy your chum from a mesh bag or chum bucket, and present your bait or lure within the chum slick.

Striped Bass Seasonality and Habitat 

Understanding the seasonal movements and preferred habitats of Striped Bass is essential for successful fishing. By knowing where to find them and when they are most active, you can increase your chances of hooking into a trophy Striper.

Spring

Spring is the prime time for Striped Bass fishing, as they migrate from their wintering grounds in the ocean to freshwater rivers and estuaries to spawn. Look for them in areas with strong current, near bridges, and in shallow water near marshes and grass beds. This is the perfect time to use live bait like Bunker, Herring, and Eels, as well as topwater lures and soft plastics.

Summer

During the summer months, Striped Bass typically move back to the ocean or deeper waters in search of cooler temperatures. Focus on structure, such as underwater ledges, rocky outcrops, and drop-offs, where they seek refuge and ambush prey. Use live bait like Mackerel or Eels, as well as deep-diving plugs, jigs, and trolling rigs to target Stripers in deeper water.

Fall

As water temperatures begin to cool in the fall, Striped Bass become more active and feed aggressively in preparation for winter. Look for them in areas with abundant baitfish, such as rips, points, and sandbars. Fall is an excellent time to use live bait like Bunker, Alewife, and Clams, as well as a wide range of artificial lures, including topwater lures, soft plastics, and jigs.

Winter

Striped Bass are generally less active during the winter months and can be found in deeper waters or near their wintering grounds in the ocean. Fishing for Stripers during this time can be challenging but rewarding. Try using live bait like Eels or deep-diving lures and trolling rigs to target them in deeper water.

Tips and Tricks for Striped Bass Fishing Success 

To help you maximize your Striped Bass fishing success, here are some additional tips and tricks:

  1. Fish during low light conditions: Striped Bass are most active during dawn, dusk, and at night. Low light conditions provide them with an advantage for ambushing prey.
  2. Pay attention to birds: Diving birds often indicate the presence of baitfish, which attract Striped Bass. Keep an eye on bird activity to locate feeding Stripers.
  3. Use your electronics: Modern fish finders and GPS units can help you locate structure, baitfish schools, and Striped Bass. Use these tools to your advantage.
  4. Match the hatch: Try to match the size, color, and action of the baitfish or other prey items that Striped Bass are feeding on. This will make your offering more appealing to them.
  5. Be patient: Striped Bass can be finicky, and it may take time to figure out what they want. Don’t be afraid to switch baits, lures, or techniques until you find what works.

Striped Bass are a prized game fish that offers a thrilling and challenging experience for anglers of all skill levels. By using the right baits, techniques, and understanding their seasonal patterns and preferred habitats, you can greatly increase your chances of landing a trophy Striper. So grab your gear, head out to the water, and enjoy the excitement of Striped Bass fishing. Tight lines and happy fishing!

F.A.Q.

Q: What is the best time of year to fish for Striped Bass?

  1. A: The best time of year to fish for Striped Bass varies depending on the region. In general, spring and fall migrations are the peak times, with spring being especially productive as the fish move into freshwater to spawn. In the summer, anglers can find success fishing for Stripers in deeper waters or during the early morning and late evening hours.

Q: Where can I find Striped Bass in their natural habitat?

  1. A: Striped Bass are native to the Atlantic coastline of North America, from the St. Lawrence River to the Gulf of Mexico. They can be found in both saltwater and freshwater environments, as they are anadromous fish that spawn in fresh or brackish waters. Look for them in estuaries, bays, rivers, and along the shoreline, often near underwater structures or schools of baitfish.

Q: What are the most common mistakes anglers make when fishing for Striped Bass?

  1. A: Some common mistakes anglers make when fishing for Striped Bass include using inappropriate bait or lures, not adapting to changing conditions or fish behavior, and not being patient enough. To increase your chances of success, be prepared to switch baits, lures, or techniques based on the situation, and be patient as you hone your skills.

Q: Do I need a special fishing license to target Striped Bass?

  1. A: Fishing regulations and licensing requirements for Striped Bass vary by state and region. It’s essential to check your local regulations before targeting Stripers, as there may be specific rules regarding size and bag limits, catch-and-release areas, and seasonal closures. You may need a standard fishing license, a saltwater or freshwater endorsement, or a specific Striped Bass permit, depending on the area.

Q: What type of fishing gear should I use for Striped Bass fishing?

  1. A: For Striped Bass fishing, a medium to medium-heavy action rod with a fast or moderate action is recommended. Pair it with a spinning or baitcasting reel loaded with 20-50 lb braided line or 12-30 lb monofilament, depending on the size of the fish you’re targeting. Choose a suitable leader material, such as fluorocarbon, to increase your chances of landing a Striper. Be sure to have a variety of baits, lures, and terminal tackle on hand to adapt to different conditions and preferences of the fish.
Posted on

Best Awnings for Overlanding 2023

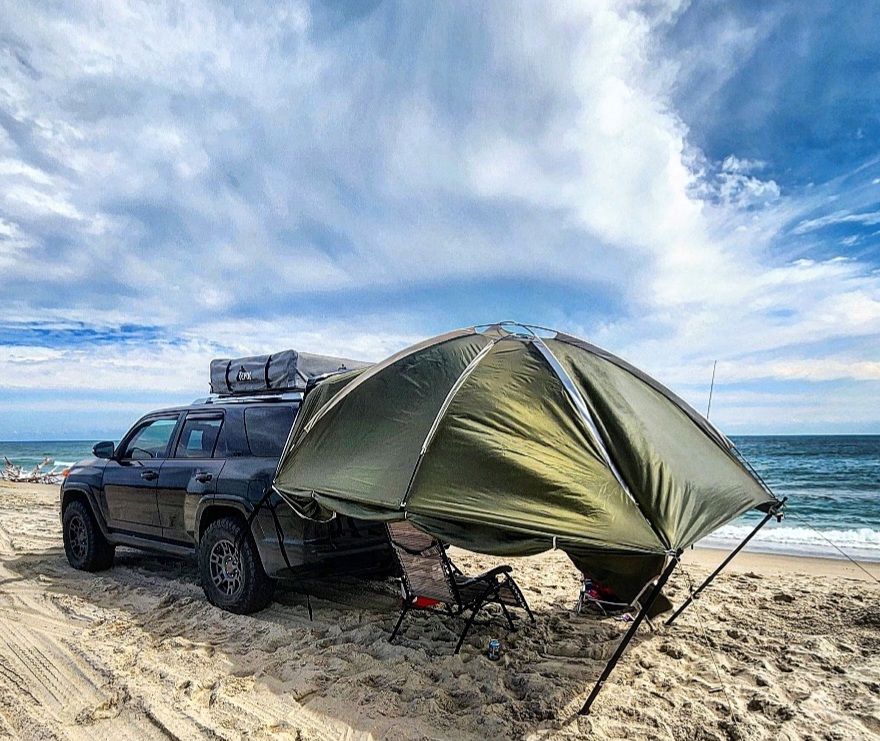
Car and truck awnings have become indispensable accessories for adventure enthusiasts, providing pop-up shade and shelter during unpredictable weather conditions. In this article, we present a comprehensive guide to the best car and truck awnings of 2023, perfect for overlanding and car camping.

Factors to Remember When Choosing an Awning for Overlanding

When choosing an awning for overlanding, there are several factors to consider:

  1. Material: Purchase an awning made with high-quality fabric that is waterproof and UV protected. Cheap fabric can thin and fade over time.
  2. Type of awning: There are two major awning types: the 180-degree awning and the 270-degree awning. The choice between a 180 and 270-degree awning will depend on the most important attributes for you and your end-use.
  3. Size and height: Consider the size and height of the awning to ensure it fits your vehicle and provides adequate coverage.
  4. Weight and storage: Consider the weight and storage of the awning to ensure it is easy to transport and store.
  5. Ease of installation and setup: Consider the ease of installation and setup of the awning to ensure it is easy to use.
  6. Weather resistance: Consider the weather resistance of the awning to ensure it can withstand all sorts of weather conditions.
  7. Compatibility: Make sure your cross bars or rack system is ready to carry the weight of the awning.
  8. Brand name and reputation: Consider the brand name and reputation of the awning to ensure it is of high quality.
  9. Design complexity: Consider the design complexity of the awning to ensure it is easy to use and set up.
  10. Warranty: Consider the warranty of the awning to ensure it is covered in case of any defects or issues.

Differences Between 180-Degree and 270-Degree Awnings

The main difference between a 180-degree awning and a 270-degree awning is the size and coverage area. A 180-degree awning protrudes directly off the side of the vehicle and provides a rectangular awning, while a 270-degree awning expands 270-degrees from the opening point, providing a larger coverage area. 180-degree awnings are usually cheaper, lighter, and easier to set up and pack away than 270-degree awnings. However, 270-degree awnings provide increased coverage and ease of setup, but they are larger when collapsed, more expensive, and heavier.

The choice between a 180-degree and a 270-degree awning depends on personal preference and the most important attributes for the user and their end-use. A 180-degree awning is simple to set up, lightweight, and cost-effective, making it a good option for those who prioritize ease of use and affordability. A 270-degree awning provides a larger coverage area, making it a good option for those who prioritize increased coverage and convenience, but it is more expensive and heavier.

What is a Car Awning?

A car awning is a type of car accessory that provides shade and protection from the elements for a vehicle. There are different designs for vehicle awnings, including standalone designs with plastic or metal pillars that can be moved from one location to another, and fixed designs that are mounted to a wall or a vehicle’s roof. Fixed vehicle awnings tend to absorb more wind and weather, making them more durable and long-lasting. Portable vehicle awnings are also available, which can be disassembled and stored when not in use. Car awnings can be mounted to a variety of roof basket racks or flat platform racks, and come in different sizes to fit different vehicles. Some car awnings have additional features, such as integrated LED lighting and side walls that create shade shelters. Car awnings can be useful for camping, overlanding, or simply enjoying the outdoors while protecting your vehicle from the sun and rain.

Are Car Awnings Waterproof?

Yes, car awnings can be waterproof. Car awnings are designed to provide protection against the rain, especially when it’s time to cook, and a bit more privacy. The awnings are made from heavy-duty, mold-resistant materials that are water-repellent and UV-resistant. The materials used in car awnings vary, but they are often made from waterproof 280g ripstop canvas or heavy-duty PVC-coated 650g nylon. It is important to note that not all car awnings are waterproof, so it is essential to check the product specifications before purchasing. Additionally, some car awnings come with tie-downs, guy lines, and additional support poles to withstand wind and rain.

Pros and Cons of a Car Awning

Car awnings can be a great investment for outdoor enthusiasts, providing shade and shelter from the sun, wind, and rain. Here are some pros and cons of car awnings:

Pros:

  • Provide shade and shelter from the sun, wind, and rain
  • Create more living space and privacy
  • Easy to set up and take down
  • Can be mounted to a variety of roof basket racks or flat surfaces
  • Can be used for camping, road trips, tailgating, and other outdoor activities

Cons:

  • May increase your car’s fuel consumption
  • May create more noise when driving, especially soft-shell tents
  • May need to drive slower, recommended top speed of 65mph or 100kmh
  • More expensive than other car tents
  • May not be as effective in extreme weather conditions

Maintenance and Care for Your Awning

To extend the lifespan of your car or truck awning, proper maintenance and care are essential. Here are some tips to help keep your awning in top condition:

  1. Clean the awning regularly: Use a soft brush and mild soap to gently clean dirt and debris from the awning fabric. Rinse with clean water and allow the awning to air dry completely before storing.
  2. Inspect the awning for damage: Regularly check for any signs of wear and tear, such as rips, tears, or broken hardware. Address any issues promptly to prevent further damage.
  3. Lubricate moving parts: Apply a silicone-based lubricant to any moving parts, such as hinges and poles, to ensure smooth operation and prevent rust.
  4. Store the awning properly: When not in use, store the awning in a dry, cool place, away from direct sunlight. Ensure that the awning is completely dry before storing to prevent mold and mildew growth.
  5. Use guy lines and stakes: In windy conditions, use guy lines and stakes to secure the awning and prevent damage caused by wind.
  6. Avoid overloading: Do not exceed the weight capacity of your awning or mounting system, as this can lead to structural damage or even collapse.

With proper care and maintenance, a high-quality car or truck awning can provide years of reliable shade and shelter for your overlanding adventures. By following these tips, you can ensure that your awning remains in excellent condition and continues to enhance your outdoor experiences.

Overall, car awnings can be a great addition to your outdoor gear, providing shade and shelter and creating more living space. However, it’s important to consider your vehicle type and use case before purchasing an awning to ensure that it’s the right fit for you.

Our Top Picks for the Best Awnings for Overlanding 2023

  1. Front Runner Easy-Out Awning

The Easy-Out Awning / 2M is a water-repellent, UV-resistant awning that measures 2m wide and extends 2.1m from the mounting extrusion. It is designed for quick and easy two-person set up, in under 60 seconds. The awning mounts quickly and easily to the side of the Front Runner Roof Rack for instant sun or rain protection. The vertical support poles are lightweight yet durable and have spikes on the end for secure ground placement. The poles extend to 2.4m maximum height for use with taller vehicles. The awning comes with a heavy-duty PVC-coated nylon cover that protects it while stowed and in transit. The awning also includes reflective gut ropes with tent stakes for stability in windy conditions. The awning can be turned into a shelter in minutes by adding the Easy-Out Awning Room or Easy-Out Awning Mosquito Net. The product dimensions of the awning when closed are 2110mm (80”) L x 120mm (4.7”) W x 120mm (4.7”) H, and when open are 2110mm (82.7”) L x 2000mm (78.7”) W x 2400mm (94.5”) H (Max Height)

  1. Rhino-Rack Compact Batwing

The Rhino-Rack Compact Batwing is an awning designed for outdoor enthusiasts who want to enjoy the great outdoors while staying protected from the sun and rain. The Batwing Compact is made from a heavy-duty, water-resistant material that has been tested and rated to UPF 50+, offering maximum sun protection. It is perfect for solo adventurers and couples with small to medium vehicles or short wheelbase 4WDs. The Batwing Compact provides 270 degrees of shade and 6.4m² / 68.9ft² of coverage, making it ideal for enjoying the great outdoors1. The awning is easy to set up and pack away within minutes. Accessories are available to increase coverage even more, such as the Rhino-Rack Batwing Compact Tapered Zip Extension. The Batwing Compact is available in both left and right side mounts. The length of the compact model when packed away on the roof rack is 79″ (6′ 7″) compared to the massive 98″ (8′ 2″) of the full-size Batwing. The Rhino-Rack Compact Batwing is a great option for those who want a high-quality, durable, and easy-to-use awning for their outdoor adventures.

  1. OVS Nomadic Awning 270

The OVS Nomadic Awning 270 is a game-changer for outdoor enthusiasts seeking a reliable shelter solution. Designed for the driver’s side, this awning effortlessly spans a generous 270 degrees, providing expansive shade and protection against unpredictable weather conditions. Crafted with durability in mind, its robust construction ensures it stands up to the challenges of varied terrains, from desert sun to mountain rain. The setup is refreshingly straightforward, making it a breeze even for solo adventurers. Integrated with telescopic poles, the awning remains stable even in windy conditions. A perfect blend of functionality and convenience, the OVS Nomadic Awning 270 is a top pick for those looking to elevate their outdoor experiences. Opened: 240″ x 157″ x 88.5″ Closed: 88” x 7” x 6”

  1. ARB Touring Awning with LED Light

The ARB Touring Awning with LED Light is a retractable awning that provides shade and protection from the sun and rain. The awning is made of tough PU coated 300gsm poly/cotton canvas that is fully waterproof and has a UVP 50+ rating to block harmful UV rays. The awning is available in a size of 2500mm x 2500mm (8.2ft x 8.2ft). The aluminum encased awning offers a sleek and contemporary alternative to traditional awning covers while adding improved functionality. The awning comes with an LED light strip that provides up to 1,200 Lumens and is sealed in a waterproof housing. The light strip is adjustable via a waterproof dimmer switch and can switch between cool white or amber modes. The ARB Touring Awning with LED Light is easy to set up and take down and comes with pegs and guy ropes for windy conditions. The awning is compatible with all ARB 2500mm x 2500mm awning accessories. The ARB Touring Awning with LED Light is a top-quality product that is perfect for camping and off-roading adventures

  1. Thule Outland Awning

The Thule Outland Awning is a manual box awning that can be used in conjunction with a rooftop tent, cargo box, or other rooftop accessories. It is easy to install and comes with an adapter kit that is ready to mount to Thule and other aftermarket roof racks. The awning can be easily deployed in just 60 seconds and comes with a reliable set of telescopic legs that can be locked out thanks to the Quick Lock System. The Thule Outland Awning is available in lengths of 6.2, 7.5, and 8.2 feet and projects 8 feet out when fully extended. It is easy to use and stows into a lightweight, sleek aluminum case to stay protected from the elements when not in use. The awning is made from high-strength polyester fabric to provide years of use. The Thule Outland Awning is available for purchase on Amazon and other online retailers

  1. Moon Fabrications MoonShade

MoonShade is a portable vehicle awning created by Moon Fabrications that provides reliable coverage, day or night, to your outdoor site. It is designed to be compatible with almost any sturdy structure and offers maximum sun protection by day and reflective coverage by night. MoonShade provides 9ft by 7ft coverage but packs down tight and weighs only 8 lbs, making breakdown and storage a breeze. It is a versatile awning that can be used on multiple vehicles and can be set up easily with a variety of anchoring systems. MoonShade is made of lightweight material but is very durable and structurally sound2. It can be set up alone and can withstand heavy winds. Moon Fabrications also offers an XL version of the MoonShade that measures 9 x 12 feet, giving it a total coverage of 108 square feet, a big upgrade from the 63 square feet of the original MoonShade. The MoonShade XL can pack into a roll the size of a yoga mat, making it very convenient to store and transport. The MoonShade is a great option for those who want a portable and versatile awning that can provide reliable coverage in any outdoor setting.

Investing in a high-quality car or truck awning can make a significant difference in your outdoor experiences, providing much-needed shade and shelter during your adventures. Our top picks cover a range of features, sizes, and prices, ensuring that there’s an option for everyone. Consider your vehicle type, use case, and personal preferences when choosing the best awning for your needs, and enjoy the comfort and convenience that these awnings bring to your outdoor excursions.

F.A.Q.

  1. Q: How do I choose the right awning for my vehicle?
    A: Consider factors such as material quality, type of awning (180-degree or 270-degree), size and height, weight and storage, ease of installation and setup, weather resistance, compatibility with your vehicle’s cross bars or rack system, brand reputation, design complexity, and warranty.
  2. Q: What is the difference between a 180-degree awning and a 270-degree awning?
    A: A 180-degree awning provides a rectangular shade directly off the side of the vehicle, while a 270-degree awning expands 270-degrees from the opening point, providing a larger coverage area. 180-degree awnings are usually cheaper, lighter, and easier to set up than 270-degree awnings. However, 270-degree awnings provide more coverage and ease of setup but are larger when collapsed, more expensive, and heavier.
  3. Q: Can car awnings be used on any vehicle?
    A: Car awnings can be mounted to a variety of roof basket racks or flat platform racks, and they come in different sizes to fit different vehicles. It’s important to check the compatibility of the awning with your specific vehicle and roof rack system before purchasing.
  4. Q: Are car awnings waterproof and UV resistant?
    A: High-quality car awnings are typically made from waterproof and UV-resistant materials to protect you from rain and harmful sun rays. Make sure to look for these features when choosing an awning to ensure it can withstand various weather conditions.
  5. Q: How easy is it to install and set up a car awning?
    A: Car awnings vary in their ease of installation and setup. Many car awnings can be installed and set up by one or two people in a matter of minutes. Be sure to consider the ease of installation and setup when choosing an awning, as well as any included instructions or video tutorials from the manufacturer.
Posted on

Overlanding Installing and Using Roof Top Tents

Make Your Vehicle Home with the Perfect Roof Top Tent

In today’s world of adventure and exploration, the concept of “home is where you park it” has never been more relevant. Equipped with the right gear and essentials, every traveler can turn any location into their temporary home. As technology and products continue to evolve, so does the convenience, comfort, and enjoyment that comes with it. One such innovation that has significantly improved the outdoor experience is the roof top tent.

In this article, we will discuss the advantages of using a roof top tent, the factors to consider when choosing one, and the proper way to install and maintain it.

Understanding Roof Top Tents and Their Benefits

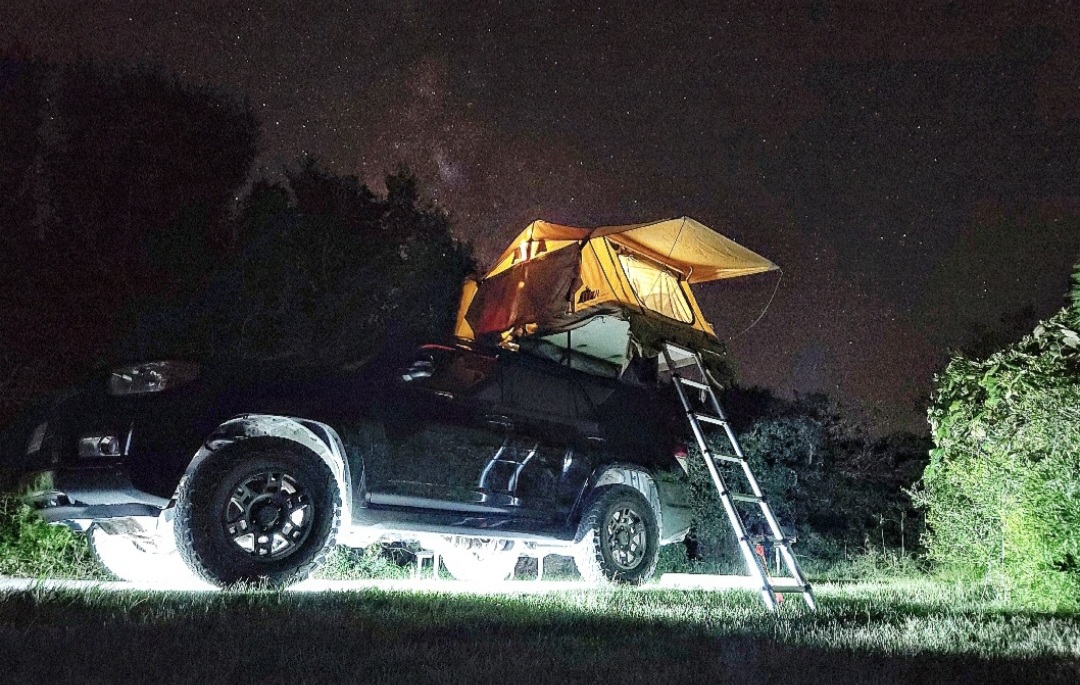
Roof top tents, also known as car top tents, have become a popular choice for regular campers due to their quick setup, durability, portability, and comfort. They are easy to install and maintain, and their vehicle-mounted design makes packing and setting up the tent effortless. Most roof top tents come with comfortable mattresses that can accommodate up to five people, ensuring a cozy and relaxing camping experience.

Advantages of Roof Top Tents Over Ground Tents

While many campers still use ground tents, roof top tents offer several advantages that make them an attractive alternative. Some of the key benefits include:

  • Faster and easier setup
  • Greater durability
  • Elevated views
  • Reduced exposure to bugs and insects
  • Easier campsite selection
  • Increased safety from potential predators or wild animals
  • Improved ventilation and warmth
  • Enhanced aesthetics
  • Greater sleeping comfort

Choosing Between Hard Shell and Soft Shell Roof Top Tents

Roof top tents come in two main categories: hard shell and soft shell. Hard shell tents have two rigid outer shells (typically made of fiberglass, aluminum, or hard plastic) joined by waterproof fabrics, while soft shell tents have bodies made of waterproof fabrics and rely on an internal folding support structure for their shape.

Hard shell tents are more durable and long-lasting, while soft shell tents are lighter and more affordable. To help you decide which type of tent best suits your needs, we have provided a comparison of the two below:

Hard Shell:

  • Faster and easier to set up
  • More durable and long-lasting
  • Warmer and more weatherproof
  • Can serve as a cargo box for extra storage
  • More comfortable
  • More aerodynamic, resulting in better gas mileage
  • Quieter (less affected by wind)

Soft Shell:

  • More affordable
  • Lighter weight
  • Allows for stargazing
  • Packs down smaller
  • Larger sleeping area
  • More customizable
  • More accessories available
  • Higher headroom

Factors to Consider When Buying a Roof Top Tent

When choosing a roof top tent, it’s essential to consider factors such as durability, shipping costs, and compatibility with your vehicle. Look for tents made of high-quality materials that can withstand various weather conditions. Additionally, be aware of potentially high shipping costs due to the weight of the tent.

The most crucial factor to consider is the compatibility of the tent with your vehicle. This involves checking the tent’s weight, installation specifications, and requirements to ensure a proper fit without any issues.

Installing Your Roof Top Tent

Before attempting to install your roof top tent, make sure you have all the necessary tools and materials, as well as a thorough understanding of the installation process. Here’s a step-by-step guide to help you mount your roof top tent:

Unboxing 

  1. Lay out your roof top tent on a flat, clean surface and unpack all the materials and tools that came with it. Inspect the tent for any damages or holes and ensure that you have all the necessary components for installation.

Assemble the mounting brackets

  1. Your tent will come with mounting brackets that need to be assembled before installation. Follow the manufacturer’s instructions to properly assemble and secure the brackets.

Prepare your vehicle

  1. Ensure your vehicle’s roof rack or crossbars are compatible with the tent’s mounting system and can handle the weight of the tent. Clean the roof and crossbars to remove any dirt or debris.

Mount the tent

  1. With the help of at least one other person, lift the tent onto the roof of your vehicle and align the mounting brackets with your vehicle’s crossbars. Secure the tent to the crossbars by tightening the bolts and nuts according to the manufacturer’s instructions.

Install the ladder

  1. Attach the ladder to the tent following the manufacturer’s instructions. Ensure that it is properly secured and stable before use.

Adjust the tent position

  1. Make sure the tent is evenly distributed across your vehicle’s roof to avoid any imbalance. Adjust its position if necessary and tighten all the bolts and nuts to secure it in place.

Set up the tent

  1. Unfold the tent, set up the poles, and attach any additional accessories like awnings, mesh screens, or rainflys according to the manufacturer’s instructions.

Perform a safety check

  1. Before hitting the road, double-check that all the bolts and nuts are tightened, and the tent is securely fastened to your vehicle. Additionally, inspect the ladder and tent accessories for stability and proper installation.

Maintaining Your Roof Top Tent

To ensure your roof top tent lasts for many adventures, proper maintenance is essential. Here are some tips to keep your tent in top condition:

Clean the tent regularly

  1. Wipe down the tent’s exterior with a damp cloth to remove dirt and debris. For the interior, use a vacuum to clean the mattress and a damp cloth to clean any hard surfaces. Allow the tent to air dry before packing it away.

Store the tent properly

  1. Always store your roof top tent in a cool, dry, and well-ventilated place to avoid mold and mildew growth.

Check for damages

  1. Regularly inspect your tent for any damages, such as tears, holes, or loose bolts. Address any issues promptly to avoid further damage.

Lubricate zippers and hinges

  1. Apply a silicone lubricant to the zippers and hinges periodically to ensure smooth operation and prevent rust.

Protect from UV exposure

  1. When not in use, cover your tent with a UV-resistant cover to protect it from sun damage.

With the proper installation, use, and maintenance, your roof top tent will provide a comfortable and memorable camping experience for years to come. Embrace the freedom of the outdoors and make your vehicle your home away from home with a roof top tent.

Maximizing Your Roof Top Tent Experience

Once you have successfully installed and maintained your roof top tent, it’s time to make the most of your outdoor adventures. Here are some tips to enhance your camping experience with a roof top tent:

Choose the right campsite

  1. Pick a campsite with a flat and stable surface to ensure your vehicle remains balanced and stable throughout your stay. Look for locations that offer beautiful views, as one of the perks of a roof top tent is the elevated perspective it provides.

Organize your space

  1. To make your camping experience more enjoyable, keep your roof top tent and vehicle organized. Utilize storage solutions, such as hanging pockets and gear nets, to store your belongings and keep them easily accessible.

Bring additional comforts

  1. Enhance your sleeping experience by bringing extra pillows, blankets, or even a sleeping bag to keep you cozy during chilly nights. Don’t forget a camping chair and a portable table for added comfort during meals and relaxation time.

Plan your meals

  1. Prepare easy-to-cook and nutritious meals that can be cooked on a portable camping stove or a campfire. Pack enough food and water for the duration of your trip, and consider bringing a cooler to keep your perishables fresh.

Pack essential gear

  1. Make sure to bring essential camping gear, such as a flashlight, portable power bank, multi-tool, first aid kit, and appropriate clothing for the weather conditions.

Be mindful of the environment

  1. Practice Leave No Trace principles by disposing of your waste properly, minimizing campfire impacts, and respecting wildlife and the environment.

Socialize with fellow campers

  1. If you’re camping in a popular location, take the opportunity to connect with fellow campers and share stories, tips, and experiences.

Embrace the experience

  1. Lastly, take the time to truly enjoy the experience that roof top tent camping offers. Savor the views, breathe in the fresh air, and immerse yourself in the beauty of nature.

By following these tips and ensuring proper installation and maintenance of your roof top tent, you can create unforgettable memories and experiences on your outdoor adventures. Whether you’re exploring remote wilderness areas or spending a weekend at a local campground, a roof top tent can provide the ultimate home away from home for the modern-day adventurer.

Roof Top Tent Accessories and Add-Ons

To further enhance your roof top tent camping experience, consider investing in some useful accessories and add-ons. These items can provide additional convenience, comfort, and functionality to your setup. Here are some popular options to consider:

Awning

  1. A vehicle-mounted awning provides shelter from the sun and rain, extending your living space and offering a shaded area to relax, cook, and socialize.

Annex

  1. An annex is an optional add-on that attaches to your roof top tent, providing an enclosed space beneath the tent for extra storage, privacy, or sleeping quarters. This is especially useful for larger groups or families who need more space.

Roof rack storage

  1. Roof rack storage solutions like cargo baskets, gear bags, and bike racks can help you organize and secure your belongings while traveling.

Solar panels

  1. Portable solar panels can be used to charge devices, power lights, and provide energy for other camping appliances. They are a sustainable and eco-friendly power source, perfect for extended trips off the grid.

Interior lighting

  1. LED strip lights or portable lanterns can be used to illuminate the interior of your roof top tent for added convenience and ambiance during nighttime.

Mosquito netting

  1. Although many roof top tents come with built-in mosquito netting, investing in additional or higher-quality netting can provide extra protection from insects and other pests.

Tent fan

  1. A portable fan can help to circulate air inside your roof top tent, providing comfort on hot nights and reducing condensation.

Insulated tent cover

  1. An insulated tent cover can be placed over your roof top tent to improve thermal insulation, keeping you warmer in cold conditions and cooler in hot weather.

By investing in these accessories and add-ons, you can customize your roof top tent to suit your specific needs and preferences, ultimately maximizing your enjoyment and comfort during your outdoor adventures. The convenience and versatility of a roof top tent make it a perfect option for modern campers seeking to explore and experience the beauty of nature in a unique and comfortable way. As you venture into the great outdoors, a roof top tent allows you to immerse yourself in nature while still enjoying the comforts of home, ensuring that your camping adventures are nothing short of extraordinary.

F.A.Q.

  1. Q: What is the weight limit for a roof top tent?
    A: The weight limit for a roof top tent depends on the specific tent model and your vehicle’s roof rack capacity. Generally, roof top tents can accommodate between 400 and 800 pounds, including the weight of the tent itself and its occupants. It is crucial to check both the tent’s weight limit and your vehicle’s roof rack capacity to ensure a safe and secure installation.
  2. Q: Can I install a roof top tent on any vehicle?
    A: Not all vehicles are compatible with roof top tents. Factors such as the vehicle’s roof structure, the weight of the tent, and the roof rack’s weight capacity must be considered. It is essential to verify that your vehicle can support the added weight of a roof top tent and that the tent is compatible with your vehicle’s specific make and model.
  3. Q: How do I maintain and clean my roof top tent?
    A: To maintain and clean your roof top tent, regularly inspect it for any signs of wear or damage. Make sure to address any issues immediately to prolong the tent’s lifespan. After each camping trip, clean the tent using a mild soap and water solution, and allow it to air dry completely before storing it. Always store the tent in a cool, dry place to prevent mold and mildew growth.
  4. Q: Is a roof top tent safe to use in extreme weather conditions?
    A: While roof top tents are designed to withstand various weather conditions, extreme weather can pose risks. High winds, heavy rain, or snow can put additional stress on the tent and your vehicle’s roof rack. It is best to check the tent’s weather resistance specifications and avoid camping in extreme conditions if your tent is not equipped to handle them.
  5. Q: Can I leave my roof top tent attached to my vehicle at all times?
    A: Yes, you can leave your roof top tent attached to your vehicle as long as it is securely mounted and does not exceed your vehicle’s weight capacity. However, it is essential to consider factors such as the tent’s effect on fuel efficiency, aerodynamics, and the added height it brings to your vehicle, especially when driving in areas with low clearance.
Posted on

The Ultimate Guide to Rooftop Tents in 2023

cape hatteras lighthouse obx beach driving

Discover the top rooftop tents of 2023 that will elevate your camping experience, with options for all budgets and vehicle types.

Camping enthusiasts and overland adventurers are always looking for the most comfortable and convenient ways to enjoy the great outdoors. Rooftop tents (RTTs) have become increasingly popular in recent years for their unique benefits and elevated camping experience. In this article,  we will introduce you to the best rooftop tents of 2023, covering options for all budgets and vehicle types.

Benefits of Rooftop Tents

Rooftop tents offer several advantages over traditional ground tents:

  • Safety and Security: RTTs provide an elevated sleeping space, keeping you away from potential hazards on the ground, such as insects and wildlife.
  • Superior Comfort: Most RTTs come with built-in mattresses, offering a more comfortable sleeping experience than traditional camping pads.
  • Efficient Setup: Rooftop tents can be set up quickly and easily, saving you time and energy at the campsite.
  • Versatility: Many RTTs can be mounted on a variety of vehicles, from small cars to trucks and SUVs, making them an adaptable option for different adventures.

Top Rooftop Tents of 2023

Best Rooftop Tent for Small Cars: iKamper Skycamp 3.0 Mini

The iKamper Skycamp 3.0 Mini is a two-person rooftop tent that is lightweight and small, making it one of the lightest and smallest rooftop tents on the market. It is a 4-season rated tent that is constructed with breathable, high-density poly-cotton canvas, waterproof zippers and rainfly, convertible windows, and insulating mattresses to reduce condensation. The dimensions of the tent when closed are 55.1 x 57.5 x 13.0 inches, and when open, they are 101.6 x 101.2 x 48.0 inches. The tent weighs 125 lbs. The Skycamp 3.0 Mini has a dark gray and black exterior design and fabric with PFC-FREE processed, black pigmented, and UV-coated 75D RIPSTOP rainfly. It is ideal for almost all vehicles and is shipped to the nearest freight terminal or commercial receiving location in the continental US states only. The tent is available for purchase at REI Co-op.

Pros:

Fits all vehicles, ultra-fast setup

Cons:

Mattress may be too firm for some campers

Best Budget Rooftop Tent: Smittybilt Gen 2 Overlander Tent XL

For those on a budget, the Smittybilt Gen 2 Overlander Tent XL offers a spacious and affordable option. It can sleep up to four people and, despite its lower price point, comes with features like heavy-duty waterproof fabric and LED strip lighting.

The Smittybilt Gen 2 Overlander Tent XL is a rooftop tent designed for serious traveling adventurers. Here are some features of the tent. The tent sets up in minutes and provides secure, spacious above-ground sleeping quarters.

  • The tent is completely self-contained, and all bedding and accessories are stored inside the tent during the trip, freeing up critical storage space and providing quick and easy tear down and packing.
  • The tent is designed to be durable and comfortable.
  • The tent weighs about 118-139 lbs and can be mounted to most rack systems.
  • The tent comes with a telescopic anodized aluminum ladder, a cover made from heavy-duty 1040gsm, 2000d PVC with Velcro for waterproofing/UV resistant straps, and no-see-um mosquito screens.
  • The tent has a two-year warranty

Pros: 

  • Great price

Cons: 

  • Some reported quality control issues, provided hardware may be too short for some racks

Best for Headroom: Roofnest Sparrow EYE

The Roofnest Sparrow EYE boasts a taller peak than many other rooftop tents, offering ample headroom for added comfort. Its pop-up hardshell design and gear storage on top make it a popular choice for adventurers seeking both space and convenience.

Pros:

  • The Sparrow EYE is the quickest and easiest tent to set up among Roofnest’s models.
  • The main window is large and provides a great view.
  • The interior space is comfortable, with an 83″ length and 49″ width.
  • The mattress is comfortable and can be removed for washing.

Cons:

  • The slanted ceiling may cause a lack of headroom, especially with two people.
  • The gas struts used to assist in conversion take up some space inside the tent, so you will lose some space in the corners.
  • The MPG’s of the vehicle will drop slightly.
  • The Sparrow EYE has significantly fewer views than the original Sparrow

Included with the tent are a ladder, a mounting kit, and an anti-condensation mat. The ladder hooks to the tent’s integrated mounting brackets, making it easy to set up and remove. The anti-condensation mat keeps moisture from building up under the mattress, ensuring a comfortable and dry sleep.

You can also customize the Sparrow EYE with a range of available accessories, such as an awning, an annex, and a roof storage bag. The tent’s roof even includes built-in mounts for solar panels, allowing you to power your gadgets while on the go.

Overall, the Roofnest Sparrow EYE offers an excellent balance of comfort, headroom, and ease of use, making it a top choice for those seeking a rooftop tent with superior headroom.

Best 3-Person Rooftop Tent

Yakima SkyRise HD

Specs

  • Dimensions open: 96″ x 56″ x 48″
  • Dimensions closed: 12″ x 56″ x 48″
  • Sleeping footprint: 96″ x 56″
  • Peak internal height: 48″
  • Weight: 115 lbs.
  • Static weight capacity: 600 lbs.
  • Minimum bar spread: 30″

Pros

  • Durable and weather-resistant
  • Easy to install and remove
  • Spacious enough for three people

Cons

  • Slightly heavier than some competitors

The Yakima SkyRise HD is a well-designed, three-person rooftop tent that provides comfort, durability, and ease of use. With a 600-pound static weight capacity, the SkyRise HD can comfortably accommodate three people and their gear.

Made from heavy-duty, weather-resistant, 600D ripstop polyester fabric, the SkyRise HD is designed to withstand the elements and keep you dry and comfortable in any weather. The tent’s aluminum poles and stainless steel hardware provide sturdy support, while the 2.5-inch high-density foam mattress ensures a restful night’s sleep.

The SkyRise HD’s easy-to-install design allows you to quickly set up and break down the tent, making it an excellent option for weekend getaways or extended trips. The tent’s universal mounting system is compatible with a wide range of roof rack systems, allowing for a hassle-free installation process.

Inside the tent, you’ll find large mesh windows and skylights, providing ample ventilation and natural light. The windows are also equipped with zippered fabric panels, allowing for privacy and protection from the elements when needed.

For those looking for additional storage or living space, Yakima offers a range of compatible accessories, such as the SkyRise Annex and the SlimShady awning.

Overall, the Yakima SkyRise HD is an excellent choice for adventurers seeking a spacious and durable rooftop tent that can accommodate up to three people.

Most Compatible with Additional Mounts

Thule Tepui Foothill

Specs

  • Dimensions open: 84″ x 47″ x 50″
  • Dimensions closed: 6″ x 47″ x 85″
  • Sleeping footprint: 84″ x 47″
  • Peak internal height: 50″
  • Weight: 108 lbs.
  • Static weight capacity: 400 lbs.
  • Minimum bar spread: 27″

Pros

  • Slim profile when closed
  • Compatible with many roof rack systems
  • Can mount additional gear alongside the tent

Cons

  • Smaller sleeping footprint compared to other rooftop tents

The Thule Tepui Foothill is a rooftop tent designed for compatibility and versatility. Its slim profile when closed allows you to mount additional gear alongside the tent on your roof rack, making it an excellent option for those who need to carry extra equipment like bikes or kayaks.

With its universal mounting system, the Tepui Foothill is compatible with a wide range of roof rack systems, ensuring a smooth and secure installation process. The tent has a static weight capacity of 400 pounds, providing ample support for two people and their gear.

Constructed from a durable 420D polyester Oxford fabric, the Tepui Foothill is built to withstand the elements and keep you dry and comfortable. The tent’s aluminum frame and stainless steel hardware provide a sturdy structure, while the 2.5-inch high-density foam mattress ensures a comfortable night’s sleep.

The Tepui Foothill features large mesh windows and a skylight, providing excellent ventilation and natural light. When needed, zippered fabric panels can be closed for privacy and protection from the elements.

While the Tepui Foothill has a slightly smaller sleeping footprint compared to other rooftop tents, its compatibility with additional mounts and gear make it an excellent choice for adventure enthusiasts who require extra storage space on their roof racks.

Best Value Rooftop Tent

Smittybilt Overlander

Specs

  • Dimensions open: 95″ x 56″ x 51″
  • Dimensions closed: 12″ x 56″ x 48″
  • Sleeping footprint: 95″ x 56″
  • Peak internal height: 51″
  • Weight: 116 lbs.
  • Static weight capacity: 661 lbs.
  • Minimum bar spread: 30″

Pros

  • Affordable price point
  • Durable construction
  • LED interior lighting included

Cons

  • Heavier than some competitors

The Smittybilt Overlander is a budget-friendly rooftop tent option that offers durability and comfort without breaking the bank. With a static weight capacity of 661 pounds, the Overlander can accommodate up to three people and their gear.

Constructed from heavy-duty 600D ripstop polyester, the Overlander is designed to withstand harsh weather conditions while keeping you dry and comfortable. The tent’s aluminum frame and stainless steel hardware provide a sturdy structure, and the 2-inch high-density foam mattress ensures a restful night’s sleep.

One standout feature of the Smittybilt Overlander is the included LED strip lighting, providing ample interior illumination for nighttime use. The tent also features large mesh windows and skylights, offering excellent ventilation and natural light.

While the Overlander is slightly heavier than some competitors, its affordable price point and durable construction make it an excellent value option for those seeking a rooftop tent without breaking the bank.

These are our top picks for the best rooftop tents in various categories. Keep in mind that choosing the right rooftop tent for your needs will depend on factors such as your vehicle’s compatibility, the number of people you plan to accommodate, and your budget. Regardless of your requirements, any of these rooftop tents will provide you with a comfortable and convenient outdoor sleeping solution.

Most Innovative Rooftop Tent

OPUS OP-Lite

Specs

  • Dimensions open: 83″ x 57″ x 48″
  • Dimensions closed: 43″ x 57″ x 9″
  • Sleeping footprint: 79″ x 55″
  • Peak internal height: 48″
  • Weight: 145 lbs.
  • Static weight capacity: 600 lbs.
  • Minimum bar spread: 28″

Pros

  • Innovative air beam design
  • Durable and lightweight construction
  • Quick and easy setup

Cons

  • Pricey
  • Limited headroom compared to other options

If you’re looking for a rooftop tent that stands out from the crowd, the OPUS OP-Lite Air ($3,999) is a cutting-edge option. With its innovative air beam design, this tent provides a unique camping experience that’s easy to set up and break down.

The OP-Lite Air features an inflatable air beam system that replaces traditional tent poles. The air beams provide a stable structure while significantly reducing weight and setup time. With the included electric air pump, you can inflate the tent in just 90 seconds.

The tent’s construction features a double-layered, lightweight aluminum honeycomb floor that’s both strong and insulated. The fabric is made from a high-quality, breathable, and waterproof polycotton material that provides excellent protection from the elements. Additionally, the tent comes with a waterproof rainfly for added weather protection.

Inside, you’ll find a 2.5-inch high-density foam mattress that offers a comfortable sleeping surface for two adults. Large windows and doors on all sides provide excellent ventilation and panoramic views of your surroundings.

While the innovative design and ease of setup are major selling points, the OP-Lite Air does have some drawbacks. The air beam structure limits headroom compared to other rooftop tents, and the price is on the higher side. However, if you’re willing to invest in a unique and user-friendly rooftop tent, the OPUS OP-Lite Air is a fantastic option.


Final Thoughts on Rooftop Tents

As you can see,, choosing the perfect rooftop tent for your next adventure can be an exciting yet daunting task, given the variety of options available on the market. Our article has presented the best rooftop tents of 2023, spanning from budget-friendly options to those with extra headroom or compatibility features. By taking into account your specific needs, vehicle compatibility, and budget, you can make an informed decision to elevate your camping experience.

Remember to consider factors such as ease of setup, durability, and warranty when selecting a rooftop tent. With the right rooftop tent, you’ll be ready to embark on memorable experiences with the comfort and convenience that only these elevated shelters can provide. Happy camping!

Posted on

Enhance Your Public-Land Deer Hunting Experience: Best Hunting Apps of 2023

Utilizing modern technology to revolutionize your hunting strategy and success

As avid hunters, we are always on the lookout for new ways to improve our skills, especially when it comes to public-land deer hunting. In recent years, technological advancements have given rise to a plethora of hunting apps that offer invaluable assistance, making traditional printed maps almost obsolete. In this article, we explore how hunting apps can elevate your public-land deer hunting experience, providing useful insights and information to help you become a more effective hunter.

Discovering Public Lands and Navigating Boundaries

Modern hunting apps come equipped with layers that highlight public land properties, making it easier for hunters to identify new hunting grounds or better understand familiar territories. With the ability to track your movements and pinpoint property boundaries, these apps ensure that you remain within legal hunting zones at all times.

Analyze Properties and Identify Key Terrain Features

Unlike printed maps, hunting apps allow you to zoom in and out to analyze properties on multiple levels. This capability is crucial for identifying key terrain features such as crops, CRP, coniferous stands, islands of cover, oxbows, timber harvests, and more. With this detailed information, you can make informed decisions about where to set up your hunting spots.

Understand Topography and Deer Behavior

Deer are significantly influenced by topography, and understanding how their behavior is affected by various land features is essential for a successful hunt. Use hunting apps to study essential topographic features, including benches, bottoms, ditches, drainages, draws, flats, hills, hollows, ridges, leeward ridges, marsh interiors, points, pinch points, swamp interiors, waterways, and more.

Assess Habitat Maturity and Locate Essential Resources

Whitetails prefer early successional habitats, which offer the bedding cover, security, and browse they need to thrive. Hunting apps can help you assess habitat maturity and identify these prime areas by analyzing differences in overhead canopy color. Additionally, these apps can assist in locating vital resources such as bedding areas, food sources, and watering spots.

Streamline Scouting and Identify Potential Honey Holes

Hunting apps can significantly improve the scouting process by helping you identify areas to avoid, such as homogenous terrain or large tracts of mature timber. By focusing your efforts on more promising locations, you can save time and increase your chances of success. Moreover, these apps can help you pinpoint potential honey holes, allowing you to mark and navigate between them more efficiently.

Access Real-Time Landscape Change Updates and Offline Map Versions

With certain apps like HuntStand, you can receive monthly updates on aerial imagery, providing valuable information on property changes such as crop rotations, timber harvests, and land alterations. Additionally, most hunting apps offer the option to save offline map versions, ensuring that you can access crucial information even in areas with limited or no cellular service.

Record Scouting Finds and Keep Track of your Treestand Locations

Hunting apps make it easy to document your discoveries, such as beds, rubs, scrapes, food sources, watering areas, and more. You can also mark the locations of deployed gear, such as treestands, blinds, and trail cameras, ensuring that you never lose track of your equipment.

Enhance Navigation and Monitor Hunting Companions

One of the most significant benefits of hunting apps is their ability to assist with navigation, helping you find your way to and from your hunting spots with ease. Many apps offer GPS tracking, ensuring that you can easily retrace your steps, even in the most challenging terrain. Additionally, some hunting apps have features that allow you to monitor the locations of your hunting companions, promoting safety and communication in the field.

Stay Informed About Weather, Wind, and Moon Phases

Weather conditions, wind direction, and moon phases can have a significant impact on deer behavior. Many hunting apps provide real-time weather updates, enabling you to plan your hunting strategy accordingly. By knowing the wind direction and speed, you can set up your hunting spots in a way that maximizes your chances of remaining undetected by deer. Similarly, understanding the moon phases can help you determine the best times to hunt, as deer movement often increases during specific phases.

Customize Your Mapping and Data Visualization Experience

One of the most appealing aspects of hunting apps is their ability to offer a customizable experience tailored to your preferences. You can choose which layers and data to display, ensuring that the information you find most useful is always at your fingertips. This level of personalization allows you to create a truly efficient and effective hunting experience.

The integration of advanced hunting apps into your public-land deer hunting strategy can significantly enhance your experience and success. From identifying public lands and key terrain features to analyzing habitat maturity and locating essential resources, these apps offer invaluable insights and assistance. By streamlining the scouting process, offering real-time updates, and providing essential navigation tools, hunting apps have revolutionized the way we approach public-land deer hunting. Embrace the power of technology and elevate your hunting game to new heights. In no particular order here are some of the best hunting apps of 2023.

1. onX Hunt

Key Features:

  • GPS tracker and waypoints
  • Accurate land ownership maps and property boarders
  • Works offline
  • Exclusive services for Elite Members

onX Hunt is a popular hunting app designed to help hunters increase their odds of success by providing accurate land ownership maps, property lines, and GPS tracking. It offers maps for all 50 states and works offline, making it ideal for use in remote areas. With the Elite membership, users gain access to exclusive services and benefits from leading hunting brands.

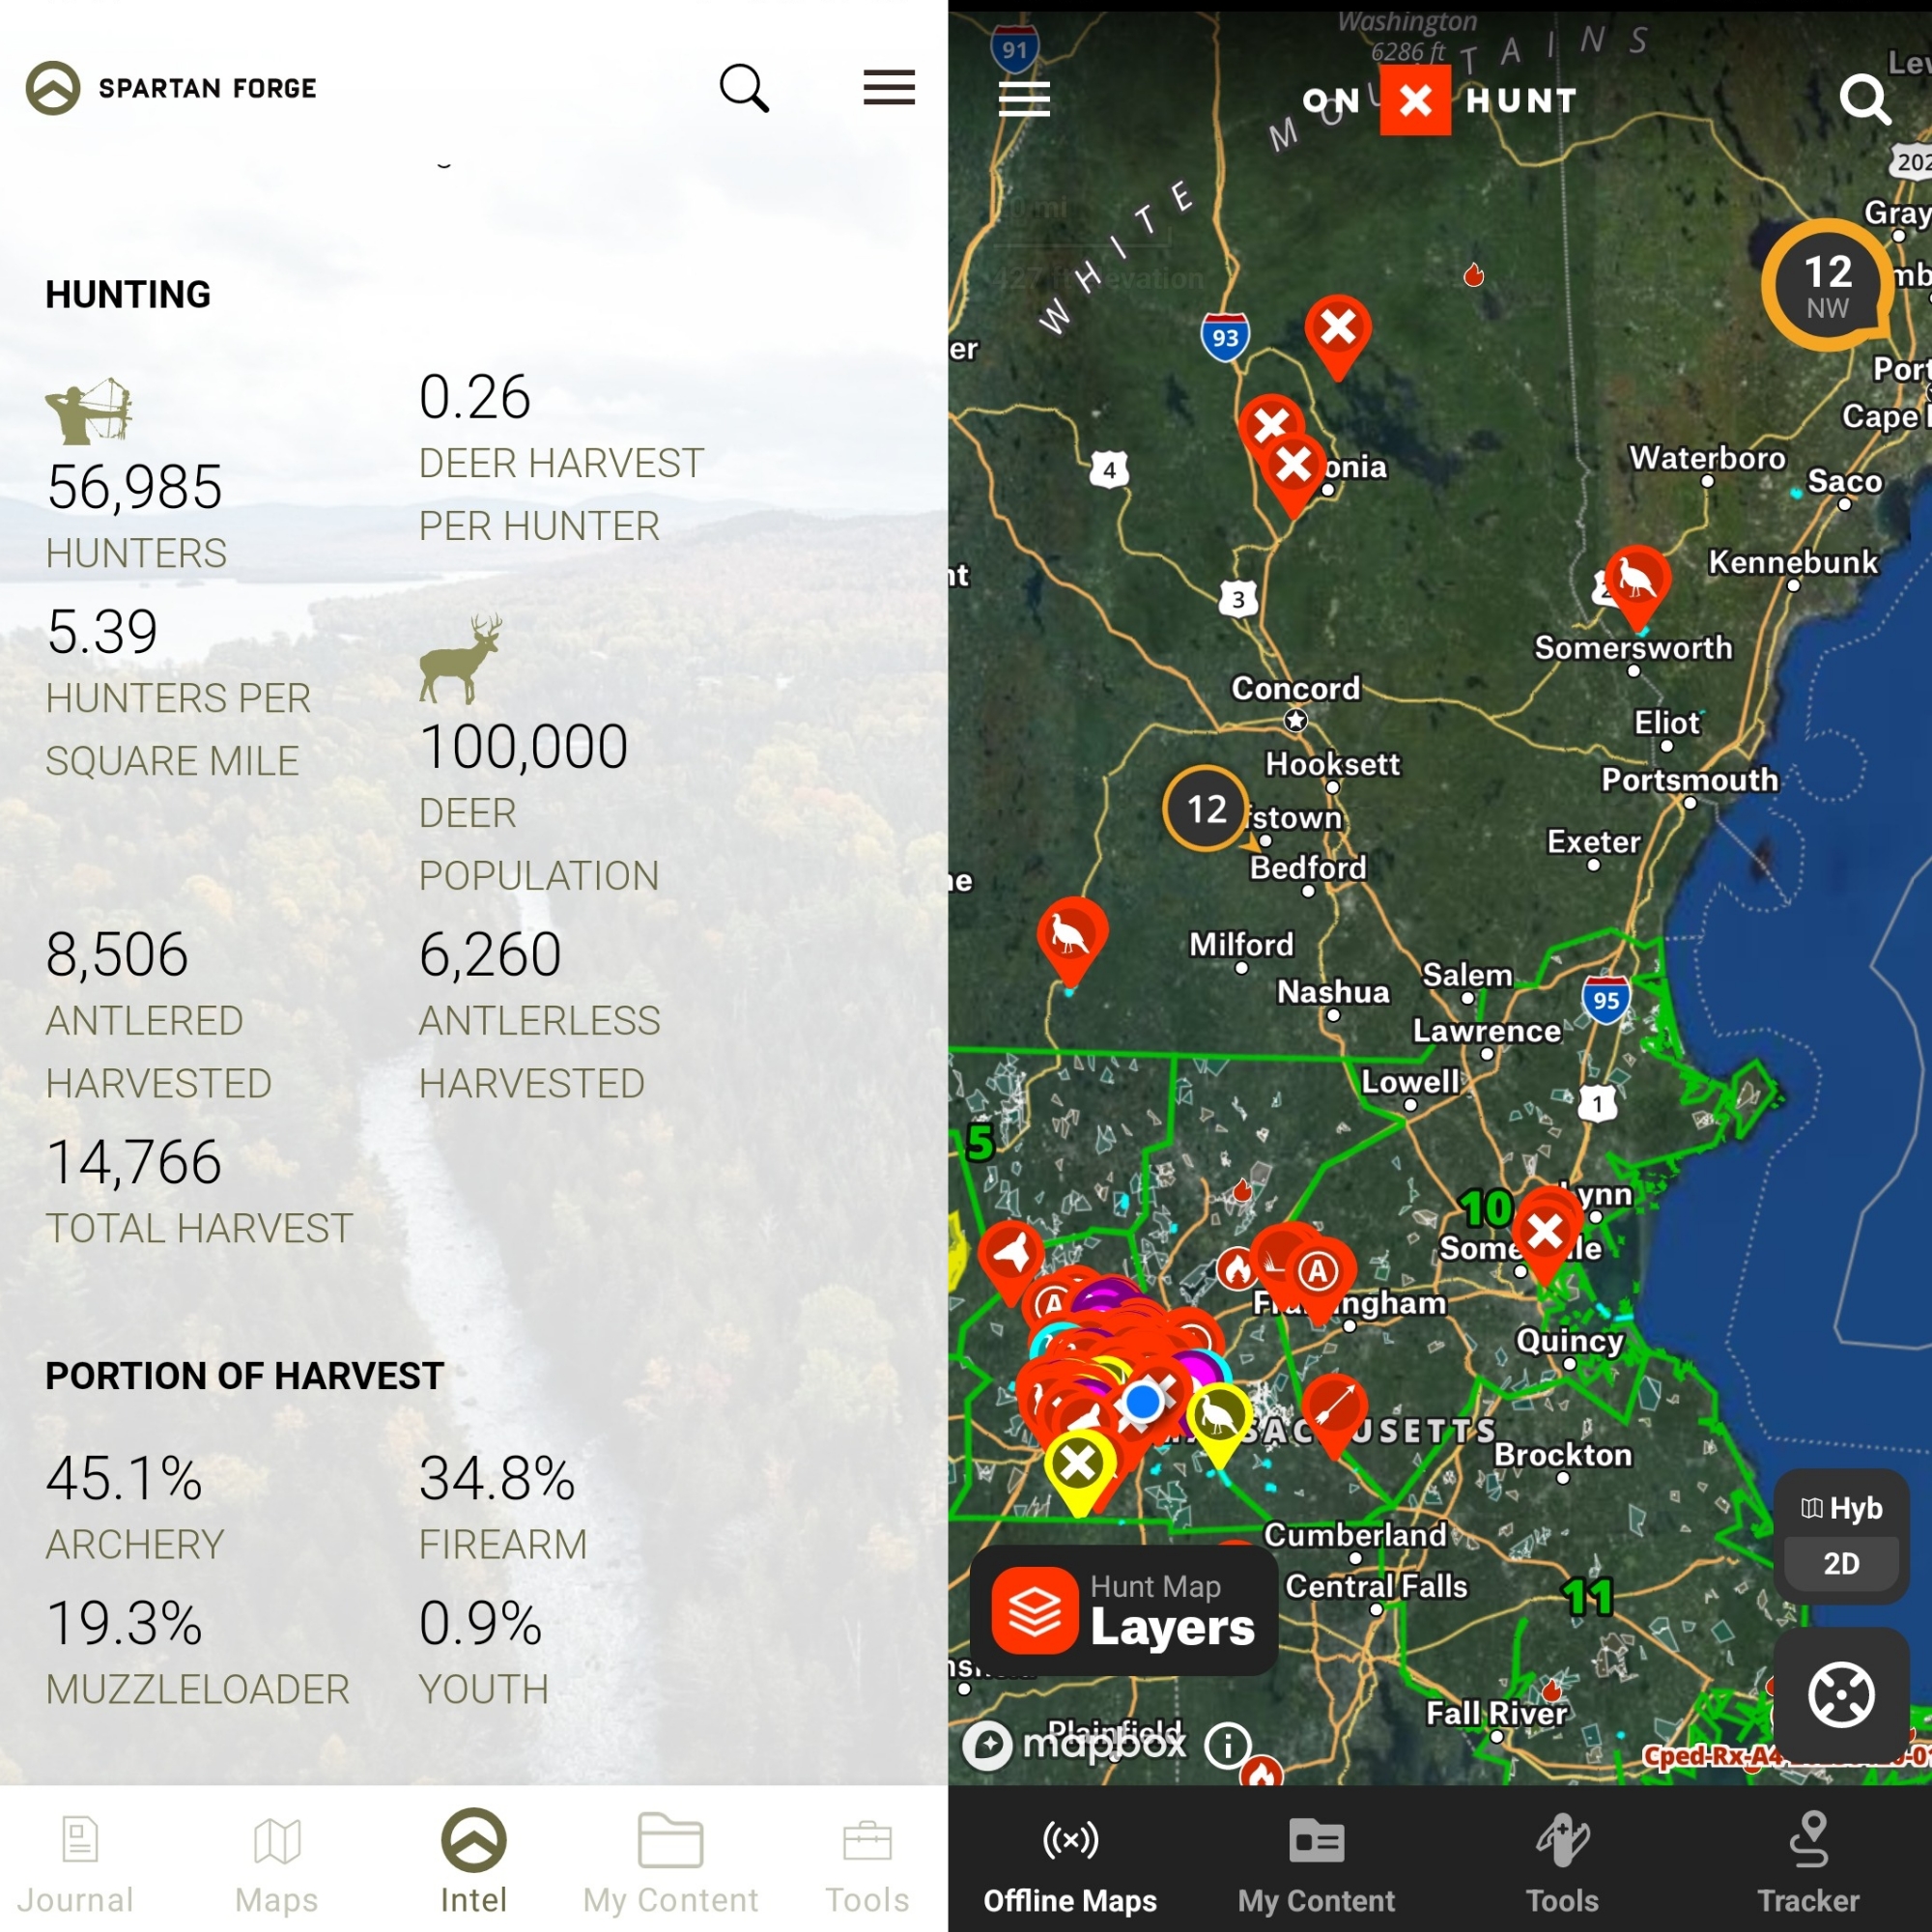
2. Spartan Forge

Key Features:

  • Artificial intelligence for deer movement prediction
  • UAV imagery for enhanced mapping features
  • Offline maps and historical weather data
  • Blue Force Tracker tool for real-time data sharing

Spartan Forge uses artificial intelligence to predict deer movement and provide bolstered mapping options due to the use of unmanned aerial vehicle (UAV) imagery. The app is available on iOS and Android devices and offers multiple map types with the highest level of detail. Spartan Forge combines GPS studies, deer biologist fetus studies, car accident reports, and other data to determine the best time for peak breeding, along with moon, wind, and weather information.

3. HuntWise

Key Features:

  • Weather forecasting tool
  • Mapping tool with over 450 hunting maps and satellite imagery
  • HuntCast feature for game prediction
  • Real-time hunt area and pin sharing

HuntWise is a comprehensive hunting app available on web, iOS, and Android devices that provides hunters with the ultimate hunting advantage. The app has several key features, including weather forecasting, mapping tools, and HuntCast, a game prediction feature based on moon phases, temperature, and weather. HuntWise also allows hunters to share their hunt areas, pins, notes, and images with others in real-time.

4. HuntStand

Key Features:

  • Navigation, mapping, and land management tools
  • Weather, solunar, and social features
  • Sync hunting area maps across devices
  • HuntStand Pro upgrade with advanced features

HuntStand is a powerful hunting and land management app that offers a wide range of features. The app provides navigation, mapping, land management, reporting, weather, solunar, social, and collaboration tools. HuntStand Pro, an upgrade option, includes advanced features like measurement tools and treestand management for an even more valuable experience.

5. Google Earth

Key Features:

  • Satellite imagery and topography
  • Historical imagery for scouting
  • Measure areas and save high-resolution images
  • Free to use on computer and mobile devices

Google Earth is a powerful tool for hunters, providing satellite imagery, topography, and other geographic data to represent the Earth as a three-dimensional globe. Hunters can use Google Earth to scout for potential deer cover and study maps to gain insights on the best hunting locations.

As you can see some of the best hunting apps of 2023 for saddle hunting offer a wide array of features and benefits to help hunters improve their experience in the field. From GPS tracking and accurate land ownership maps to artificial intelligence for deer movement prediction and advanced weather forecasting tools, these apps aim to provide the ultimate advantage for modern hunters. Before heading out on your next hunting adventure, consider downloading and familiarizing yourself with one or more of these top-rated apps to maximize your chances of success. Happy hunting!

Posted on 1 Comment

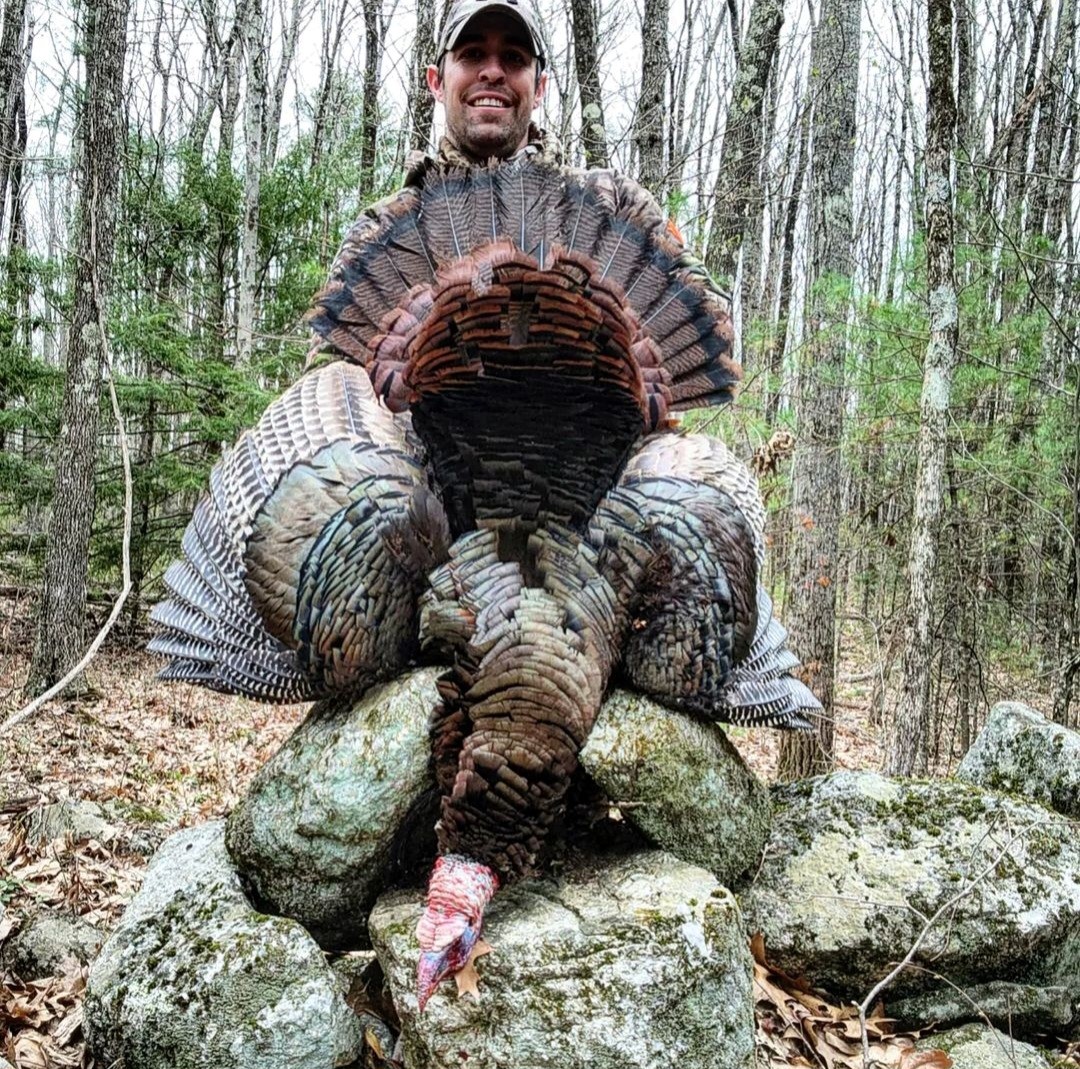
Late Season Turkey Hunting Tactics and Strategies: Master the Art of Last-Minute Gobblers

As the spring turkey hunting season draws to a close, hunters who still have a few remaining days left may find themselves scrambling for late-season tactics to bag that elusive last-minute gobbler. Fear not, for with the right approach and understanding of late-season turkey behavior, you can still achieve success in the waning days of the season. In this article, we will discuss late-season turkey hunting tactics, calling techniques, and decoy strategies to help you secure your prize.

Understanding Late-Season Turkey Behavior

To effectively hunt turkeys in the late spring season, it’s crucial to understand how their behavior changes over time. Generally, turkey behavior can be divided into three phases: early, mid, and late season. As the season progresses, turkeys become more cautious due to increased hunting pressure. Adapting your tactics is essential for bagging a late-season gobbler.

Early Season Phase

In the first week or two of the season, hens break away from family groups, and gobblers become increasingly vocal and active as they prepare for breeding. This is often the easiest time to harvest birds, as they are less pressured and can be easily lured to a decoy setup. For more tips on early season hunting, check out our Early Season Turkey Hunting Tips: Expert Strategies for Success.

Mid-Season Phase

During the middle weeks of the season, gobblers become less vocal as breeding reaches its peak. Adaptable turkey calling and run-and-gun setups can produce results in this phase. Learn more about turkey calling techniques in our Turkey Calls 101 guide and Turkey Mouth Calls for Beginners.

Late Season Phase

In the final phase, hens move on to nesting while gobblers transition to feeding. Gobblers become more vocal in a final effort to secure a willing hen but approach cautiously. This is when late-season turkey hunting tactics come into play.

Adapting to Late-Season Environmental Changes

As the late season approaches, hunters must also adapt to the changing environment. Vegetation becomes denser, limiting both the hunter’s and the turkey’s vision and hearing. This creates additional challenges for late-season turkey hunting, requiring hunters to be more vigilant and strategic in their approach.

Mastering Late-Season Turkey Calling Techniques

When it comes to late-season turkey calling, less is often more. Keep your calling soft and subtle, as overcalling can spook wary gobblers. Try these three late-season turkey call strategies:

  1. Soft and limited calling – Use 2-3 soft yelps followed by a few purrs, then pause for at least 30 minutes. If a gobbler responds, call again, but don’t overdo it. Often, the best practice is to sit tight and wait for him to approach.
  2. Stop calling altogether – If you’re not confident in your calling, rely on your camouflage and wait in an area where birds will be traveling back and forth, such as feeding areas.
  3. Switch to a gobbler call – Gobblers rejoin bachelor groups after breeding, so gobbler yelps can lure in a lonely bird looking for companions. Be ready for a silent approach, as they may not respond vocally.

Decoy Strategies for Late-Season Turkey Hunting

In the late season, decoy setups can be simplified to two main strategies:

  1. Single hen decoy setup – A single feeding hen can stimulate passing gobblers without spooking them. Keep the decoy around 20 yards from your position to allow for a shot if the gobbler hangs up.
  2. Aggressive full-strut gobbler decoy setup – This strategy challenges a bird’s dominance and can quickly draw in boss gobblers defending their territory. Use this strategy when hunting in the afternoon to catch gobblers moving between feeding areas.

Sometimes, no decoy at all may be the best strategy for pressured birds. If a gobbler seems interested but hangs up well out of range, it may be wise to try hunting him again without any decoy.

Late-Season Turkey Hunting Tips for Success

  • Focus on food sources – In the late season, gobblers prioritize feeding over mating. Set up near food plots, agricultural fields, and mature forests where forage is abundant. Ambush gobblers by getting as close as possible to these areas.
  • Stay patient – Late-season gobblers are cautious and may take longer to approach your setup. Patience is key to ensuring success during this time.
  • Be adaptable – The late season requires a different approach than earlier in the season. Monitor the changing environment and turkey behavior, and adjust your tactics accordingly.

Late-season turkey hunting presents unique challenges, but with a thorough understanding of turkey behavior, environmental changes, and the right strategies, you can still bag a last-minute gobbler. Be patient, adaptable, and focused on your target, and you’ll be well on your way to a successful late-season hunt. Remember, late-season turkey hunting is not merely a last-ditch effort but rather an opportunity to outsmart the most elusive gobblers. By following our expert tips, you’ll increase your chances of securing your prize even in the final days of the spring turkey hunting season. Make sure to check our early-season turkey hunting tips and learn more about turkey chokes, turkey mouth calls for beginners, and turkey decoys to enhance your hunting experience.

Posted on

QuietKat E-Bikes: A Hunter’s Best Friend – An In-Depth Interview

Hunting QuietKat Ebike

As a hunter, you understand the importance of stealth, mobility, and durability when it comes to your equipment. Traditional gas-powered vehicles, such as ATVs and UTVs, can be loud and cumbersome, often alerting game animals to your presence. Enter the QuietKat e-bike, a purpose-built hunting e-bike designed to provide hunters with a stealthy, powerful, and efficient mode of transportation. We had the opportunity to speak with QuietKat to learn more about their passion for hunting and how their innovative e-bikes are revolutionizing the hunting experience.

The Birth of QuietKat: A Company Made by Hunters, for Hunters

In the interview, QuietKat explained how their love for hunting and the outdoors led them to create QuietKat. Based out of Eagle, CO, and with less than 50 employees, the company prides itself on its small-business atmosphere and hands-on customer support. As hunters themselves, they understand the unique challenges and requirements that hunters face and are committed to developing e-bikes specifically tailored to the hunting community.

Designing the Ultimate Hunting E-Bike

When asked about the design process, QuietKat emphasized the importance of durability, towing capacity, tire surface area, and battery capacity while keeping the bike’s weight in mind. QuietKat’s e-bikes are built using high-quality materials and components from well-established brands, ensuring optimal performance and reliability in the field.

The company also highlighted the versatility of their e-bikes, with the Apex being the most popular model among hunters. The Apex offers a 1000W motor, hydraulic brakes, a hardtail rack, and a 24-48 mile range on a full battery. This e-bike can be fitted with a basket, two pannier bags, gun holders, handlebar bags, a trailer, and coolers, making it the ultimate hunting companion.

The Advantages of QuietKat E-Bikes

During the interview, we discussed the numerous advantages of using a QuietKat e-bike for hunting, including:

Silent Operation

Thanks to their battery-powered electric motor, QuietKat e-bikes operate silently, allowing hunters to approach their hunting grounds without spooking nearby game animals.Thanks to their battery-powered electric motor, QuietKat e-bikes operate silently, offering a significant advantage to hunters who need to move stealthily through the wilderness. This silent operation allows hunters to approach their hunting grounds without spooking nearby game animals, which is crucial for a successful hunting experience.

The reduced noise levels emitted by the e-bikes also help maintain the tranquility and natural ambiance of the great outdoors, minimizing disturbances to wildlife and their habitats. As a result, hunters can enjoy an immersive experience in nature without causing unnecessary disruptions to their surroundings.

Moreover, the silent operation of QuietKat e-bikes makes them perfect for tracking and stalking game animals, which often rely on their acute sense of hearing to detect potential threats. With the ability to move quietly, hunters can get closer to their targets and significantly improve their chances of making a successful shot. The stealthy advantage offered by QuietKat e-bikes can be a game-changer for hunters seeking a more efficient and effective way to navigate the wilderness while remaining undetected by their quarry.

Tackling Tough Terrain

QuietKat e-bikes are designed to handle challenging landscapes with ease, thanks to their fat tires and powerful mid-drive motors. These features allow hunters to traverse difficult conditions, such as steep hills, waterlogged grass, or mountainous terrain.

Lightweight and Portable

Weighing between 50 and 75 pounds, QuietKat e-bikes are considerably lighter and more portable than gas-powered off-road vehicles. This reduced weight and portability make them easy to transport and maneuver in the field.

Carrying Capacity

With carrying capacities between 300 and 350 pounds, QuietKat e-bikes enable hunters to transport more gear than they could on foot. The company also offers a wide range of accessories to ensure that hunters have everything they need for a successful hunt.

Minimized Scent 

A hunting e-bike also minimizes the amount of human scent left in the environment, as it reduces the need for walking. This is especially important when pursuing game animals with a keen sense of smell, like the white-tailed deer. By using an e-bike, you’re less likely to alert nearby animals to your presence, increasing your chances of a successful hunt. A hunting e-bike, such as the QuietKat, greatly minimizes the amount of human scent left in the environment, primarily because it reduces the need for walking. This factor is particularly crucial when pursuing game animals with a keen sense of smell, like the white-tailed deer, elk, or even wild hogs. By using an e-bike, you’re less likely to alert nearby animals to your presence, thus increasing your chances of a successful hunt.

The reduced physical exertion associated with riding an e-bike also plays a vital role in minimizing human scent. When walking or hiking, hunters tend to sweat more, which can leave a stronger odor trail for animals to detect. By utilizing an e-bike, hunters can cover greater distances without breaking a sweat, keeping their scent profile to a minimum.

Furthermore, e-bikes enable hunters to maintain a greater distance from their hunting spots when entering and exiting the area. This approach helps prevent the lingering scent from contaminating the area and alerting game animals.

In essence, using a QuietKat e-bike as part of your hunting strategy can substantially improve your stealth in the field by minimizing the scent you leave behind. This advantage, combined with the e-bike’s silent operation and ability to navigate challenging terrain, makes it an invaluable tool for hunters looking to enhance their overall hunting experience and success rate.

Eco-Friendly

By choosing a QuietKat e-bike, hunters are also supporting a more sustainable and eco-friendly hunting experience. These bikes produce zero emissions and have minimal impact on the environment. By choosing a QuietKat e-bike, hunters are not only investing in a high-quality and effective tool for their outdoor pursuits but also contributing to a more sustainable and eco-friendly hunting experience. These bikes produce zero emissions, which is a stark contrast to the exhaust fumes generated by traditional gas-powered vehicles such as ATVs or UTVs. By reducing their carbon footprint, hunters can enjoy their favorite pastime while minimizing their impact on the environment.

In addition to producing zero emissions, QuietKat e-bikes are designed to have a minimal impact on the natural surroundings. The quiet operation of these electric hunting bikes allows hunters to traverse the wilderness without causing excessive noise pollution, which can disturb wildlife and disrupt their habitats. Furthermore, the e-bikes’ fat tires provide better traction and a smoother ride, reducing the likelihood of damaging delicate flora and eroding soil.

By opting for an eco-friendly hunting e-bike like QuietKat, hunters are demonstrating their commitment to preserving the natural beauty and health of the landscapes they explore. By embracing this innovative and environmentally conscious technology, they can enjoy a guilt-free hunting experience and ensure that future generations can continue to appreciate the great outdoors.

Suitable for Hunters with Mobility Issues

Hunting e-bikes offer a valuable solution for hunters with mobility issues, enabling them to cover more ground and participate in the sport they love. These bikes provide powered assistance, making it easier to navigate challenging terrain and reach hunting spots that may have been previously inaccessible. Hunting e-bikes, like the QuietKat models, offer an invaluable solution for hunters with mobility issues or physical limitations, enabling them to cover more ground and continue participating in the sport they love. These bikes provide powered assistance, making it easier to navigate challenging terrain and reach hunting spots that may have been previously inaccessible due to physical constraints.

Furthermore, the adjustable power settings on these e-bikes allow hunters to customize the level of assistance they receive based on their individual needs and preferences. This feature ensures that hunters can conserve their energy for the actual hunt, rather than exhausting themselves during the journey to their hunting spot.

In addition to providing powered assistance, e-bikes also come equipped with fat tires and robust suspension systems, which can greatly improve ride comfort and stability on uneven terrain. This feature is particularly beneficial for hunters with mobility issues, as it helps to alleviate the strain on joints and muscles that can be exacerbated by traditional hiking or walking.

Hunting e-bikes also present an opportunity for older hunters or those recovering from injuries to continue enjoying the outdoors and maintain an active lifestyle. By allowing them to travel more efficiently and with less physical exertion, these e-bikes can help extend their hunting careers and promote overall well being. By offering powered assistance, customizable settings, and enhanced comfort features, these bikes enable a more inclusive hunting experience, allowing individuals with physical limitations to continue pursuing their passion for the great outdoors.

The Future of QuietKat

As more companies begin to explore fat tire e-bikes tailored for hunters, Jake and Justin are confident that QuietKat  will remain at the forefront of the industry. With their extensive experience and passion for hunting, they have established a strong foundation for their brand and are continuously working to improve their products.

In addition to catering to the hunting community, QuietKat is now branching out and offering e-bikes suitable for use around town or tailored to mountain bikers. Their commitment to providing high-quality machines and exceptional customer support has allowed them to thrive in the industry.

The co-founders shared their belief in the importance of staying connected to their customers and providing a sense of community. The small team at QuietKat works closely with customers, offering personalized support, repairs, and custom recommendations. They take pride in their attention to detail and dedication to providing the best service and technology possible.

QuietKat e-bikes are revolutionizing the hunting experience by offering a stealthy, powerful, and efficient mode of transportation tailored specifically for hunters. Through our in-depth interview with the co-founders, we’ve learned about their passion for hunting and dedication to designing the ultimate hunting e-bike.

Investing in a QuietKat e-bike can significantly enhance your hunting experience, providing numerous advantages such as silent operation, the ability to handle tough terrain, increased carrying capacity, and minimized scent transfer. As the company continues to innovate and expand its offerings, we can expect to see even more hunters embracing this game-changing technology for a more enjoyable and successful time in the field.

In summary, QuietKat e-bikes are a game-changing innovation designed specifically for hunters, offering numerous advantages such as silent operation, the ability to handle tough terrain, increased carrying capacity, and minimized scent transfer. Born from a passion for hunting, the company focuses on providing high-quality, durable, and versatile e-bikes tailored for hunters, while also expanding into other e-bike applications. With a small-business atmosphere and hands-on customer support, QuietKat prides itself on staying connected to its customers and offering personalized service. As the company continues to innovate and grow, it will undoubtedly remain at the forefront of the hunting e-bike industry, ensuring that hunters can enjoy a more efficient, effective, and eco-friendly experience in the field.
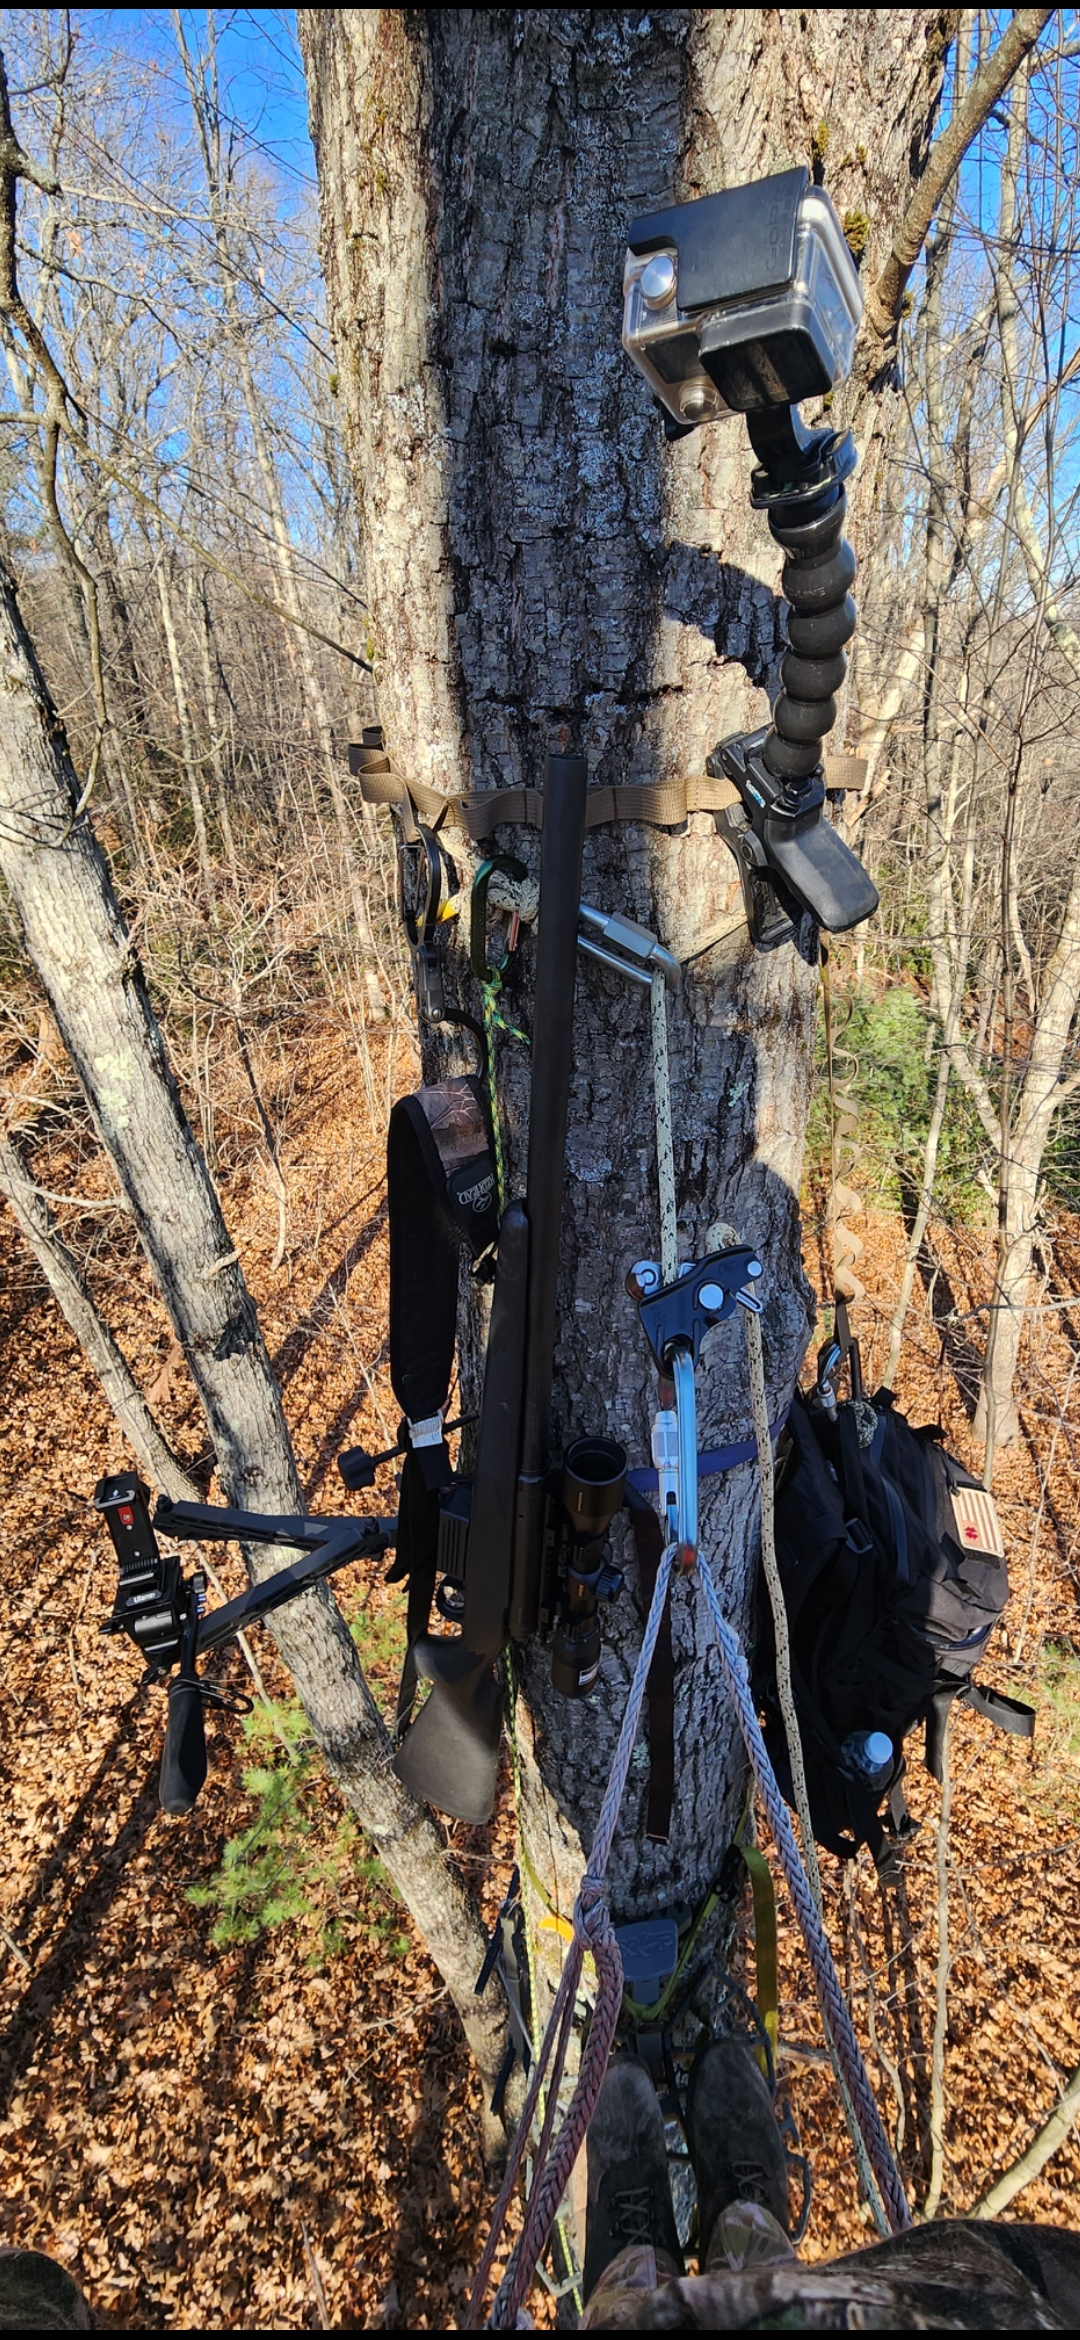
Posted on

Hottest New Hunting Gear of 2023

Hunting is more than just a hobby for many people; it’s a way of life. As the hunting season approaches, many hunters eagerly look forward to spending time in the field and experiencing the thrill of the hunt. One of the most important aspects of hunting is having the right gear. With so many options available, it can be difficult to determine which gear is worth investing in. However, with the latest and greatest gear hitting the market, hunters are sure to find the perfect equipment to make their hunting trip a success.

In recent years, hunting gear has become increasingly high-tech and sophisticated. From advanced trail cameras to innovative hunting blinds, hunters have access to a wide range of gear that can improve their chances of success. The newest gear items for the 2023 hunting season are no exception. These innovative pieces of equipment are designed to make hunting more efficient, comfortable, and enjoyable than ever before.

Whether you’re a bowhunter, rifle hunter, or an archer, there’s gear out there that can help you take your hunting game to the next level. From climbing sticks to backpacks and bow sights, the latest gear is designed to meet the needs of hunters in all types of hunting environments. With lightweight materials, sturdy construction, and advanced technology, the newest gear is both functional and stylish.

Carbon SS Climbing Sticks

If you’re planning on hunting from a treestand, the Carbon SS Climbing Sticks from Latitude Outdoors are a must-have. These climbing sticks are lightweight and easy to use, making it simple to climb up to your stand quickly and quietly. Plus, they’re made from high-quality carbon fiber, so you can trust that they’ll be sturdy and reliable all season long.

Pop-Up 40 Pack

Mystery Ranch has created the perfect backpack for hunters who want to be prepared for anything. The Pop-Up 40 Pack is a versatile and durable backpack that can hold all of your hunting gear, as well as your camping gear if you plan on spending a few days in the field. With multiple pockets and compartments, it’s easy to keep everything organized and within reach.

Redline Torch Bow Sight

For bowhunters, the Redline Torch Bow Sight from Redline Bowhunting is a game-changer. This sight is incredibly accurate and easy to use, even in low-light conditions. It also features an illuminated reticle, making it simple to line up your shot and take down your prey.

2A Single Point Bow Sling

If you’re tired of carrying your bow by hand, check out the 2A Single Point Bow Sling from The Bow Hitch. This sling is adjustable and comfortable, allowing you to carry your bow hands-free while you hike to your hunting spot. It’s also easy to detach when you’re ready to take your shot.

Waypoint Arrow Level

For archers, the Waypoint Arrow Level from Hamskea Archery is a must-have. This handy tool makes it easy to ensure that your arrows are perfectly level before you take your shot. It’s small and lightweight, so you can keep it in your pack and use it whenever you need it.

Overall, these are just a few of the hottest gear items for the 2023 hunting season. With the right gear, you’ll be well-equipped to take on the challenges of the hunt and come home with a trophy to show for it. So gear up, get out there, and happy hunting!

Posted on 2 Comments

Best Cell Cams of 2023 for Deer Hunting

Best Cell Cams 2023 for Hunting Deer

In recent years, cellular trail cameras have become an essential tool for deer hunters and wildlife enthusiasts alike. They offer real-time image transmission, high-quality photos, and videos, long battery life, and ease of setup. With the increasing number of options available in the market, it can be difficult to choose the best one for your needs. In this article, we’ve compiled a list of the best cell cams of 2023 for deer hunting, with a focus on their features and performance.

Top Cellular Trail Cameras for Deer Hunting in 2023

According to various sources, the best cellular trail cameras of 2023 include:

  1. Reconyx Hyperfire 2 Covert IR Camera
  2. Moultrie Mobile Edge Cellular Camera
  3. Tactacam Reveal X Gen 2
  4. Bushnell Cellucore 20 Low Glow Cellular Trail Camera
  5. Spypoint Flex
  6. Wildgame Innovations Terra Cell

These cameras are designed for outdoor use and can be used for hunting, wildlife observation, and security purposes. They offer features such as high picture quality, real-time image transmission, and long battery life.

Features to Consider When Choosing a Cellular Trail Camera

When choosing a cellular trail camera, there are several features to consider:

  1. Cellular Connectivity: The camera should connect to a cellular network, allowing it to wirelessly send images to your phone in nearly real-time.
  2. Picture Quality: A good trail camera should provide crisp photos and videos without clogging up memory with huge file sizes. A higher megapixel count can result in better image quality, but other factors such as lens quality, sensor size, and image processing capabilities are also important.
  3. Night Vision: Many deer activities occur after dark, so cameras equipped with black or IR flash and considerable night detection range are essential.
  4. Battery Life: Long battery life is crucial, as you don’t want to be constantly replacing batteries in the field.
  5. Ease of Setup: The camera should be easy to set up and user-friendly, allowing you to focus on hunting rather than troubleshooting.
  6. Mounts and Brackets: Additional hardware extras like mounts or brackets can help you aim the camera and ensure the perfect shot.

When choosing the best cell cam for deer hunting in 2023, it’s essential to consider your specific needs and budget, as well as the camera’s picture quality, battery life, ease of setup, and additional hardware extras. With the right cellular trail camera, you’ll be well on your way to capturing stunning images of deer in their natural habitat.

Breakdown of Top Cellular Trail Cameras for Deer Hunting in 2023

Below is a detailed analysis of the cellular trail cameras, including their key features, pros, and cons.

Camera ModelImage ResolutionDetection & Flash RangeTrigger SpeedInfrared Flash TypeCellular Network CompatibilityNotable Features
Reconyx Hyperfire 2 Covert IR Camera3.1 MP150 ft.0.25 secondsNo-Glow™Not mentionedTime-lapse mode, long battery life
Moultrie Mobile Edge Cellular Camera20 MP80 ft.0.9 secondsInvisibleVerizon, AT&TMoultrie Mobile app
Tactacam Reveal X Gen 224 MP96+ ft.0.5 secondsNot mentionedVerizon, AT&T, T-MobileExternal power port, Tactacam app
Bushnell Cellucore 20 Low Glow Cellular Trail Camera20 MP100 ft.0.7 secondsLow GlowAT&T, VerizonBushnell Trophy Cam app
Spypoint Flex12 MP100 ft.0.4 secondsInvisible LEDMultiple (major carriers)Spypoint app
Wildgame Innovations Terra Cell16 MP60 ft.0.9 secondsInfraredVerizonWildgame Innovations app

1. Reconyx Hyperfire 2 Covert IR Camera

Key Features:

  • 3.1 Megapixel image resolution
  • No-Glow™ High Output Covert IR illumination
  • 150 ft. night vision range
  • Rapid trigger speed (0.25 seconds)
  • Time-lapse surveillance mode
  • Up to 1 year of battery life on 12 AA batteries

Pros:

  • Exceptional night vision range
  • Fast trigger speed
  • Long battery life
  • Covert infrared illumination for discreet monitoring
  • Time-lapse mode for monitoring larger areas

Cons:

  • Lower image resolution compared to other cameras on the list
  • Relatively high price

2. Moultrie Mobile Edge Cellular Camera

Key Features:

  • 20 Megapixel image resolution
  • Invisible infrared flash
  • 80 ft. detection and flash range
  • 0.9-second trigger speed
  • Operates on Verizon or AT&T networks
  • Moultrie Mobile app for image management and camera control

Pros:

  • High image resolution
  • Invisible infrared flash for discreet monitoring
  • Compatible with major cellular networks
  • Mobile app for easy camera control and image management
  • Affordable price

Cons:

  • Lower detection and flash range compared to other cameras
  • Slower trigger speed

3. Tactacam Reveal X Gen 2

Key Features:

  • 24 Megapixel image resolution
  • 96+ ft. night vision range
  • 0.5-second trigger speed
  • External power port for solar panel or battery pack
  • Operates on Verizon, AT&T, and T-Mobile networks
  • Tactacam app for remote camera control and image management

Pros:

  • High image resolution
  • Wide night vision range
  • Fast trigger speed
  • Compatible with multiple cellular networks
  • External power port for extended battery life

Cons:

  • Higher price compared to some other options
  • No mention of infrared flash type (visible or invisible)

4. Bushnell Cellucore 20 Low Glow Cellular Trail Camera

Key Features:

  • 20 Megapixel image resolution
  • Low Glow infrared flash
  • 100 ft. detection and flash range
  • 0.7-second trigger speed
  • Operates on AT&T and Verizon networks
  • Bushnell Trophy Cam app for remote camera control and image management

Pros:

  • High image resolution
  • Good detection and flash range
  • Compatible with major cellular networks
  • Mobile app for easy camera control and image management

Cons:

  • Low Glow infrared flash may be more visible to animals than No-Glow or Invisible flash options
  • Slower trigger speed compared to some other cameras

5. Spypoint Flex

Key Features:

  • 12 Megapixel image resolution
  • Invisible LED infrared flash
  • 100 ft. detection and flash range
  • 0.4-second trigger speed
  • Operates on multiple cellular networks (compatible with major carriers)
  • Spypoint app for remote camera control and image management

Pros:

  • Invisible infrared flash for discreet monitoring
  • Fast trigger speed
  • Good detection and flash range
  • Compatible with major cellular networks
  • Mobile app for easy camera control and image management

Cons:

  • Lower image resolution compared to other cameras on the list
  • No mention of battery life

6. Wildgame Innovations Terra Cell

Key Features:

  • 16 Megapixel image resolution
  • Infrared flash
  • 60 ft. detection and flash range
  • 0.9-second trigger speed
  • Operates on Verizon network
  • Wildgame Innovations app for remote camera control and image management

Pros:

  • Affordable price
  • Mobile app for easy camera control and image management
  • Compatible with the Verizon network

Cons:

  • Lower image resolution compared to some other cameras on the list
  • Shorter detection and flash range
  • Slower trigger speed
  • Limited to the Verizon network

As you can see each cellular trail camera on this list has its unique set of features, pros, and cons. When choosing the best cell cam for deer hunting in 2023, consider factors such as image resolution, detection and flash range, trigger speed, infrared flash type, battery life, cellular network compatibility, and price. By carefully evaluating your specific needs and budget, you can select the perfect cellular trail camera to capture stunning images of deer in their natural habitat. Happy Hunting!